Powered by FluentBoard, DigitalOcean is a reliable cloud storage solution ideal for hosting media, managing backups, and building applications with its scalable and secure infrastructure.
Integrating DPMS with DigitalOcean Spaces allows seamless cloud storage connection, enabling efficient data management and file storage for projects.
This guide provides step-by-step instructions on connecting DPMS (Powered by FluentBoard) with DigitalOcean.
DigitalOcean Settings #
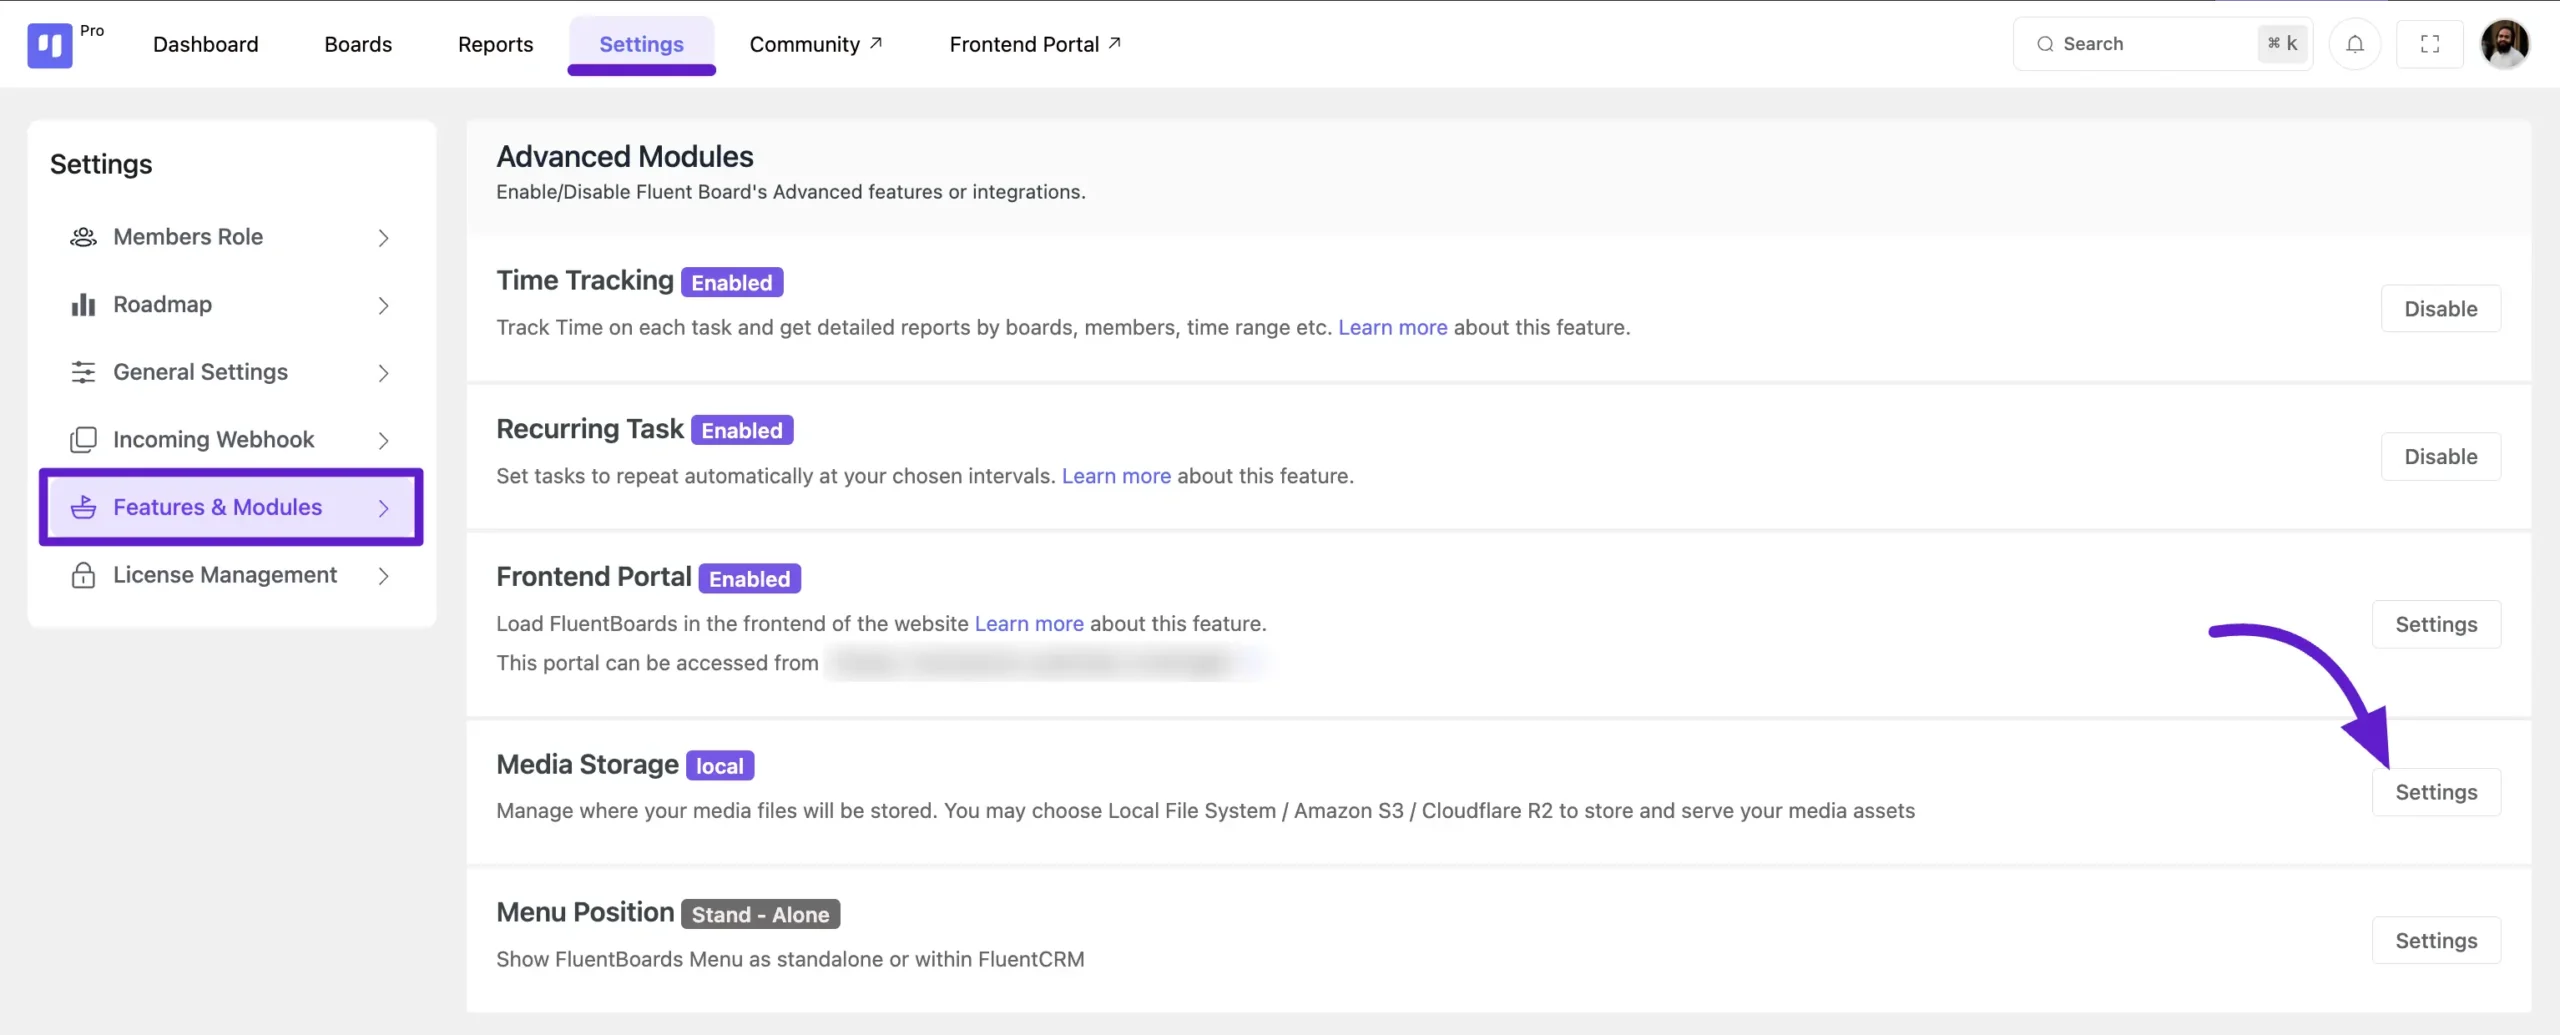
To connect DPMS (Powered by FluentBoard) with DigitalOcean, navigate to the Settings section of DPMS. Then, select the Features and Addons tab from the left sidebar. Locate the Media Storage option and click the Settings button next to it.
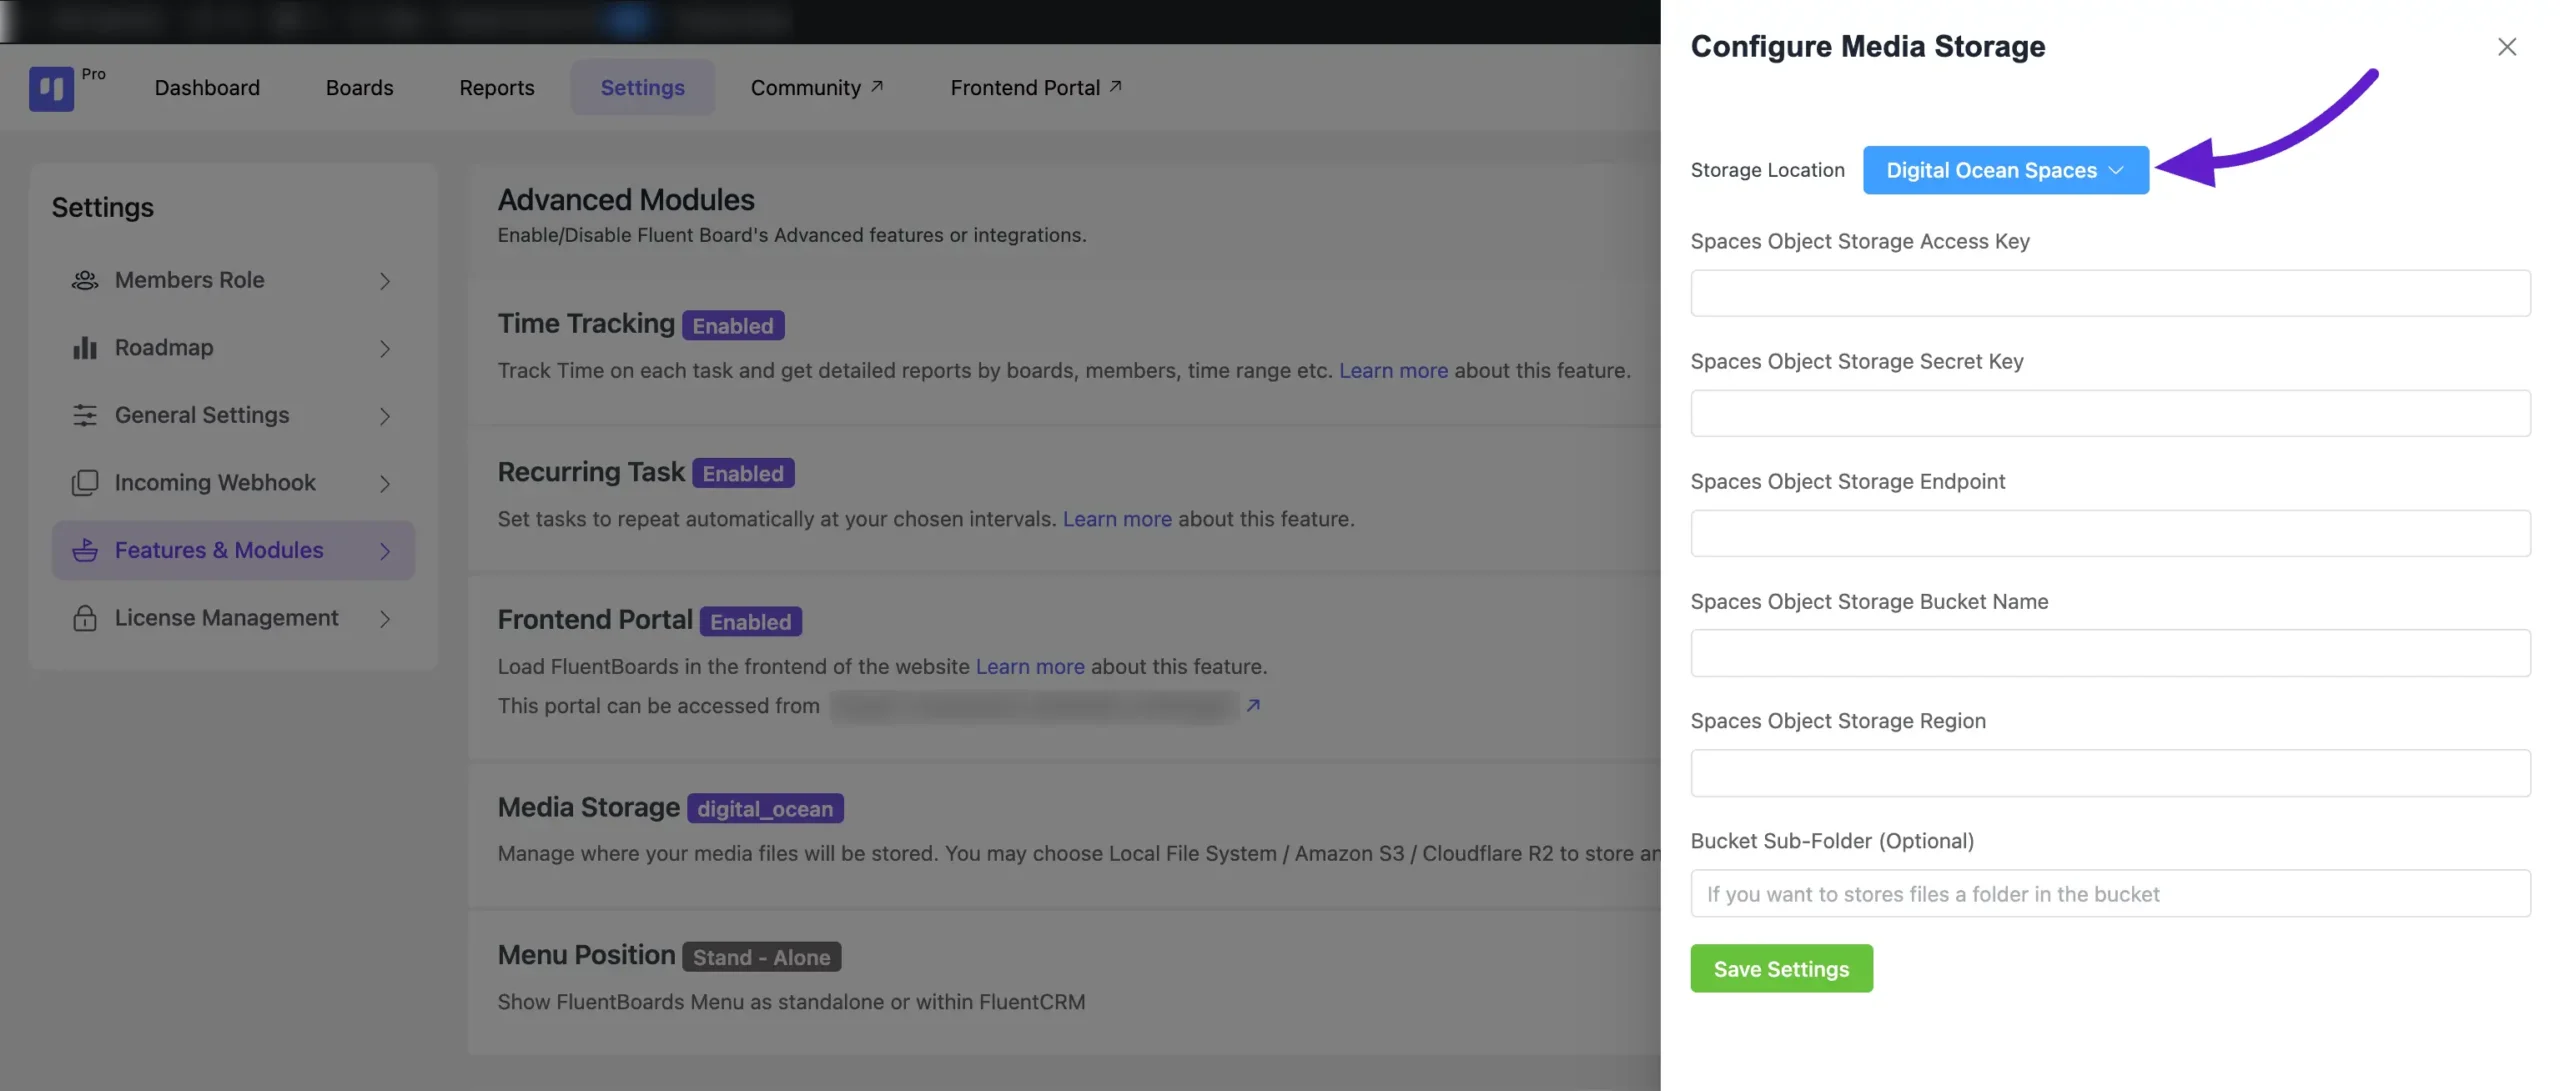
A pop-up will appear. From here, select Storage Location: DigitalOcean Space from the dropdown menu. You’ll now need some credentials to connect with DigitalOcean.
Let’s get started with collecting the required credentials.
Get Credentials from DigitalOceans #
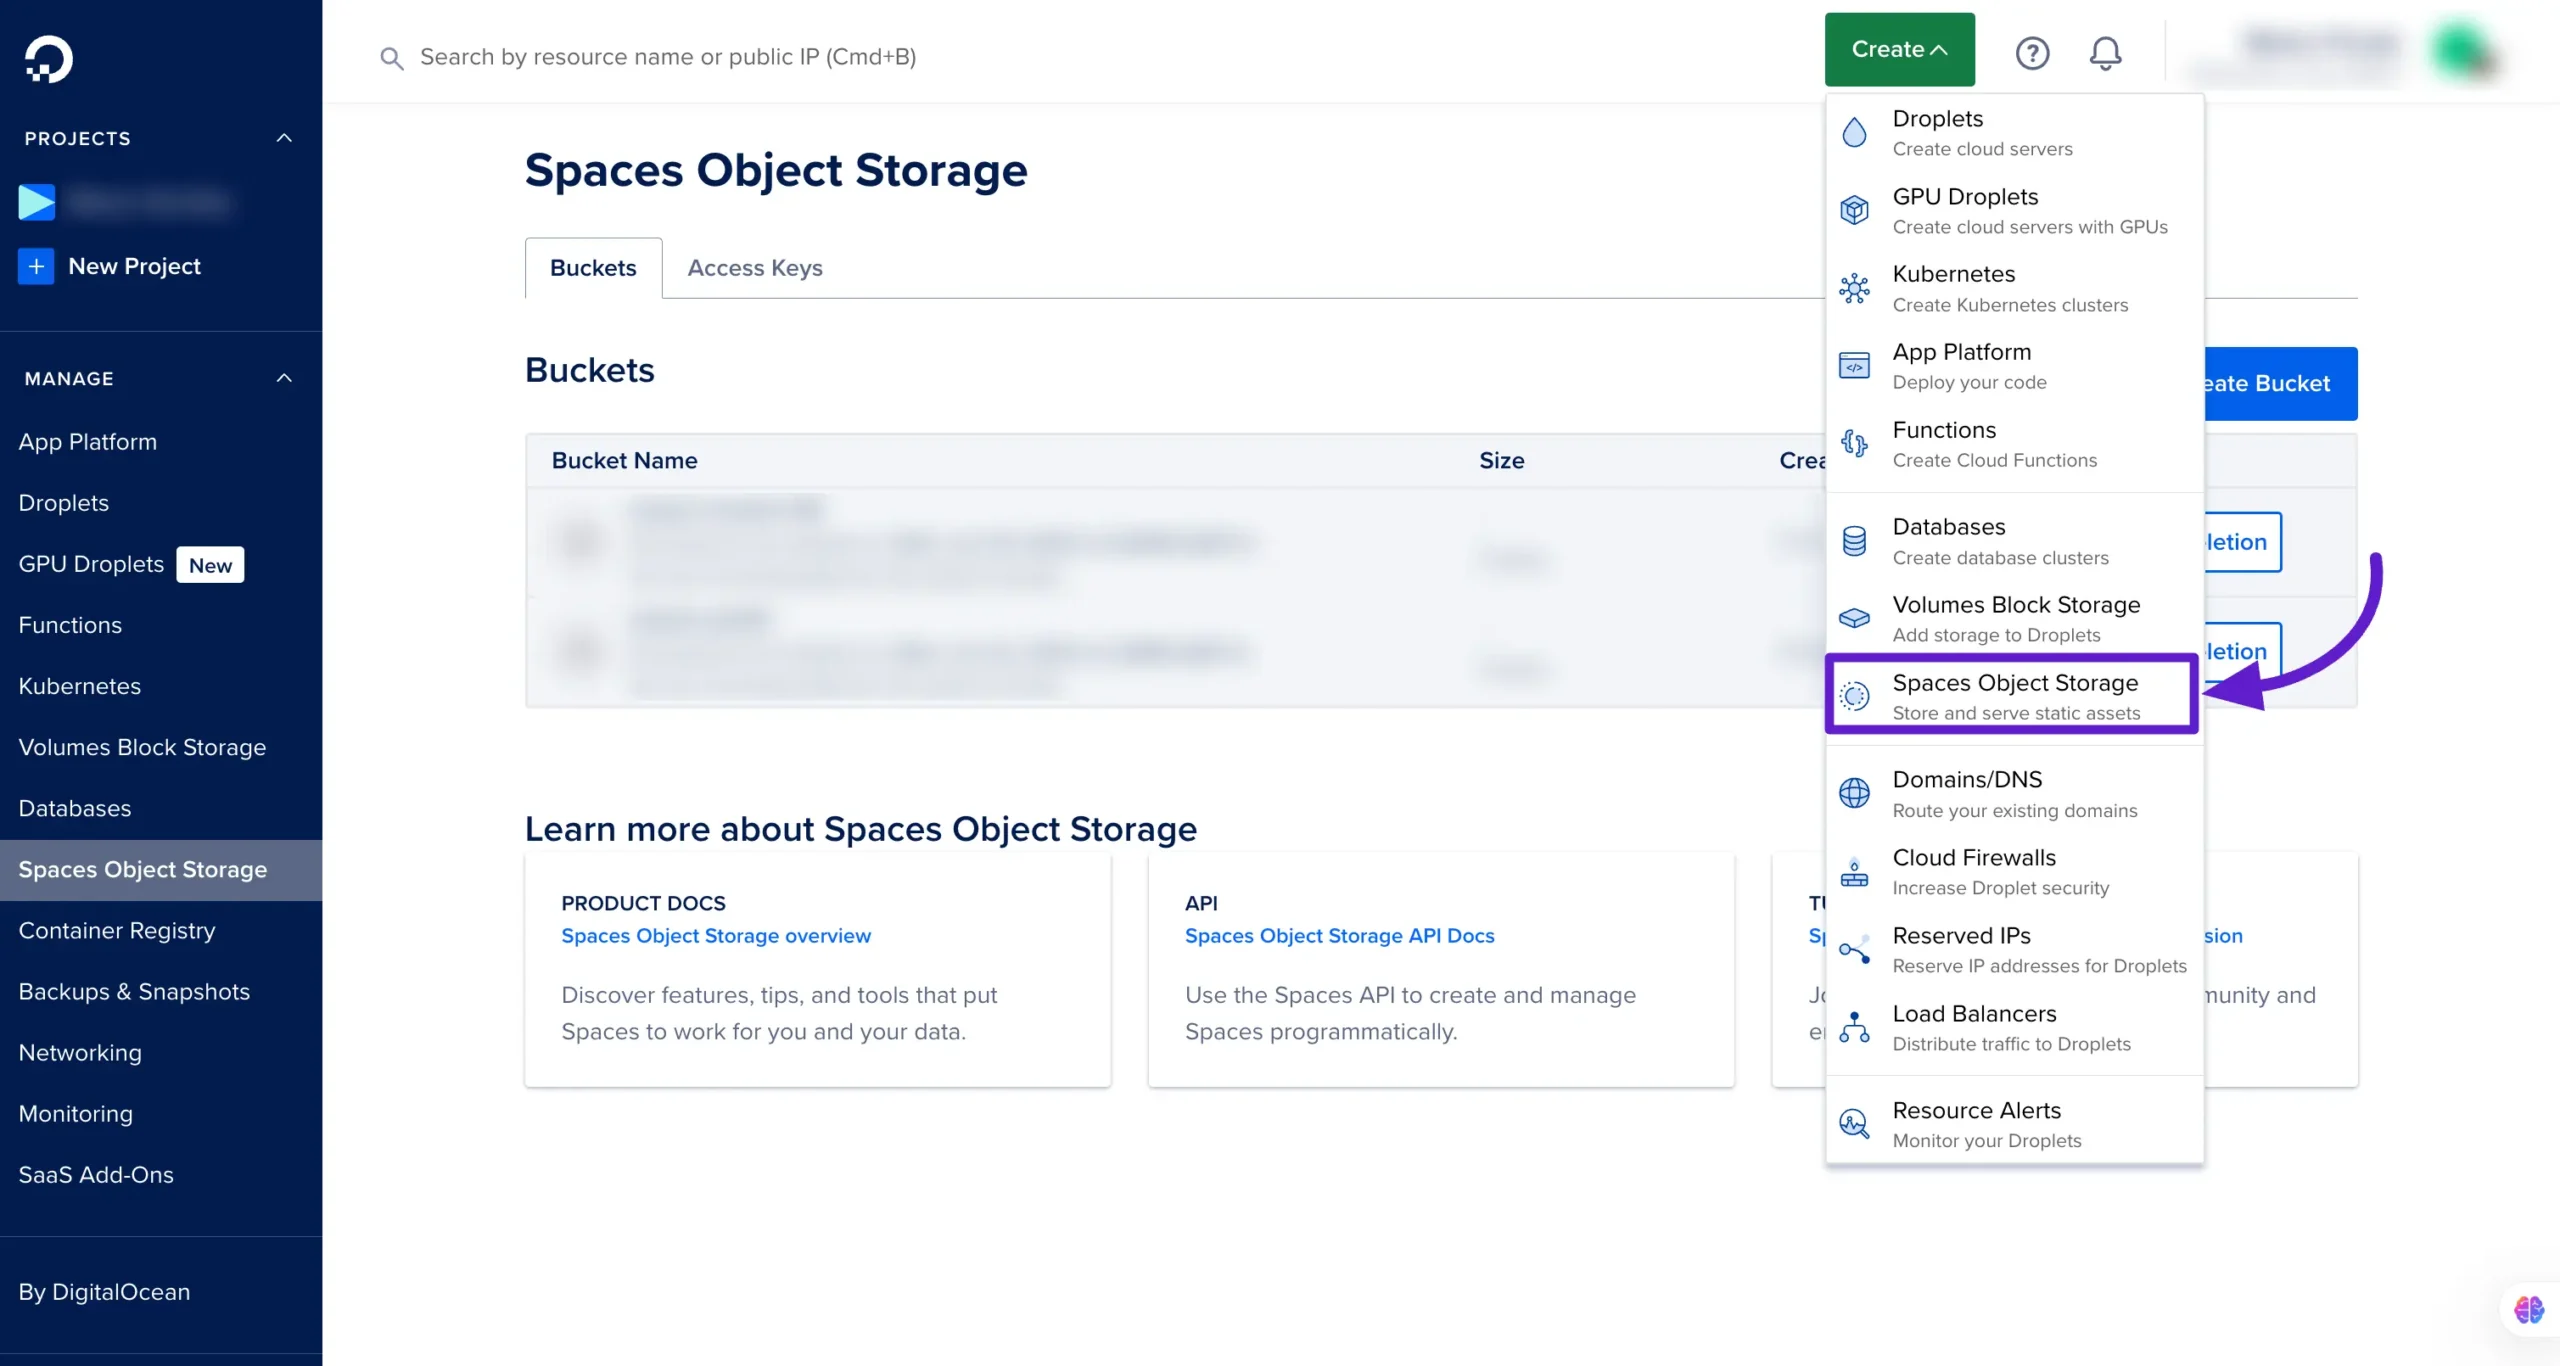
First, log in to the Digital Oceans account and then click on the Create drop-down button. Then select Space Object Storage from here to create a space bucket for storing your data.
Now you will be redirected to the Space Bucket creating page where you have to give the information for your Bucket.
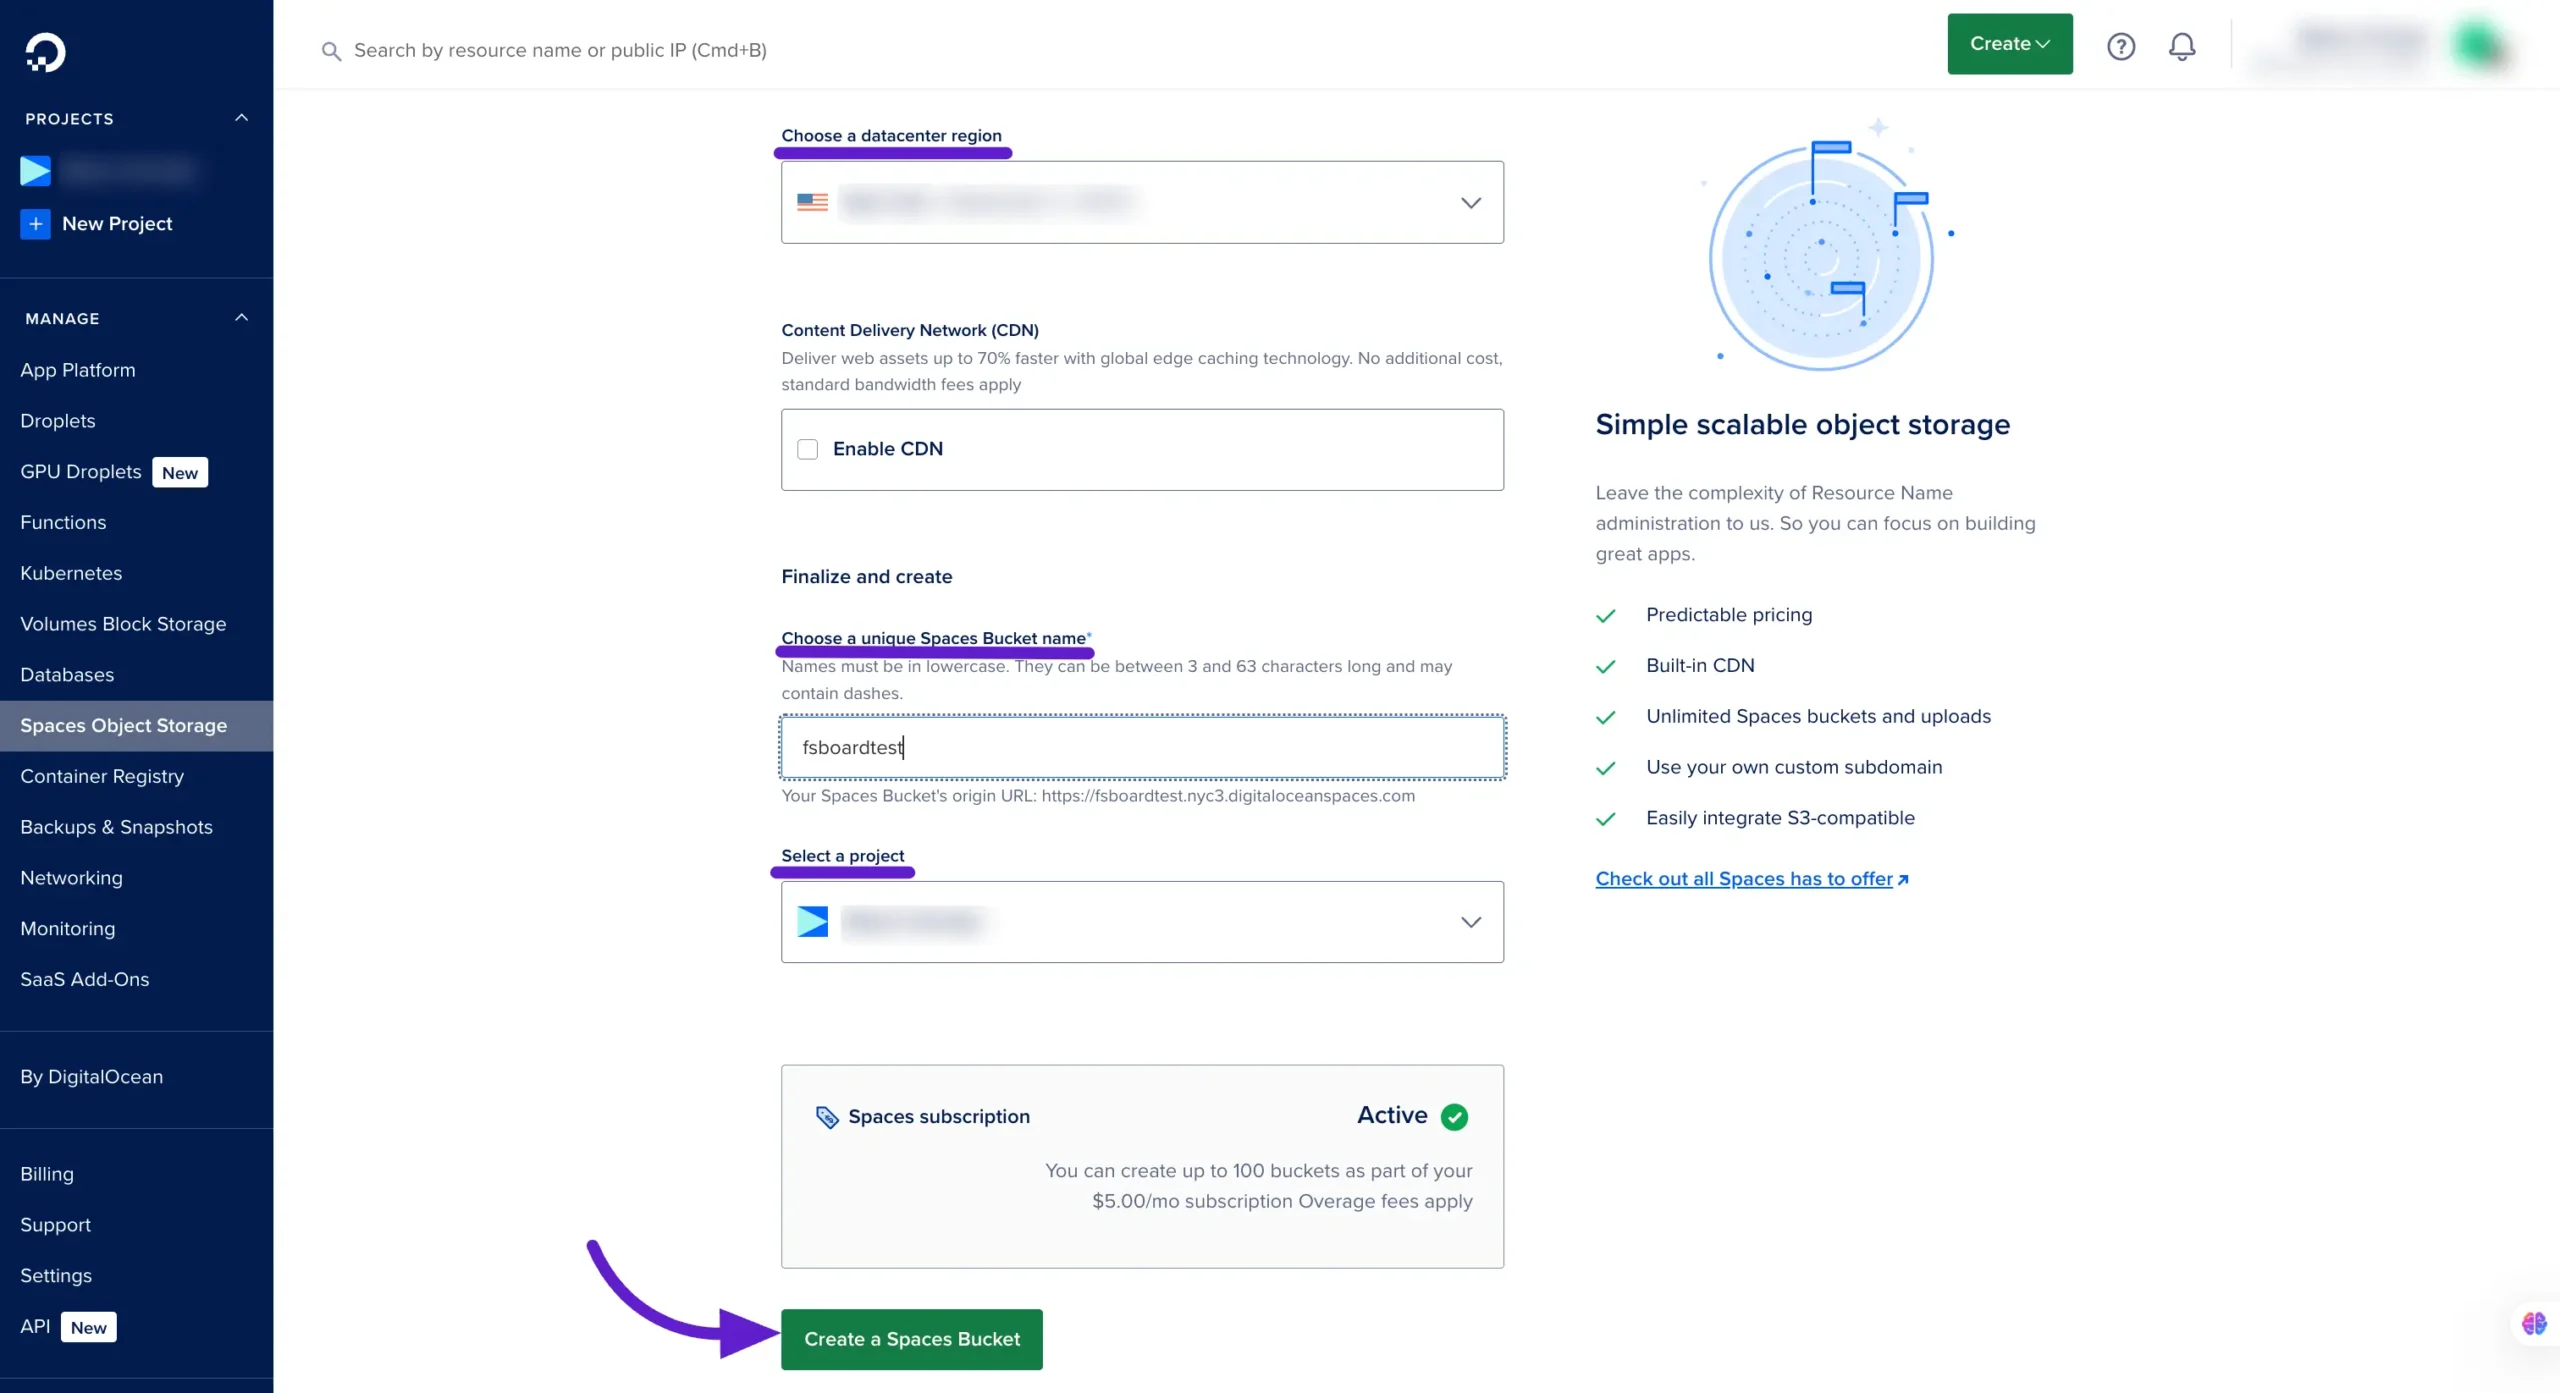
From here first Choose a Data Center Region from the dropdown menu and select your suitable data region from the available regions.
Then you have to give a unique Space Bucket Name to identify your bucket. Now select the Project from here.
Lastly, click on the Create a Space Bucket button to create a Bucket.
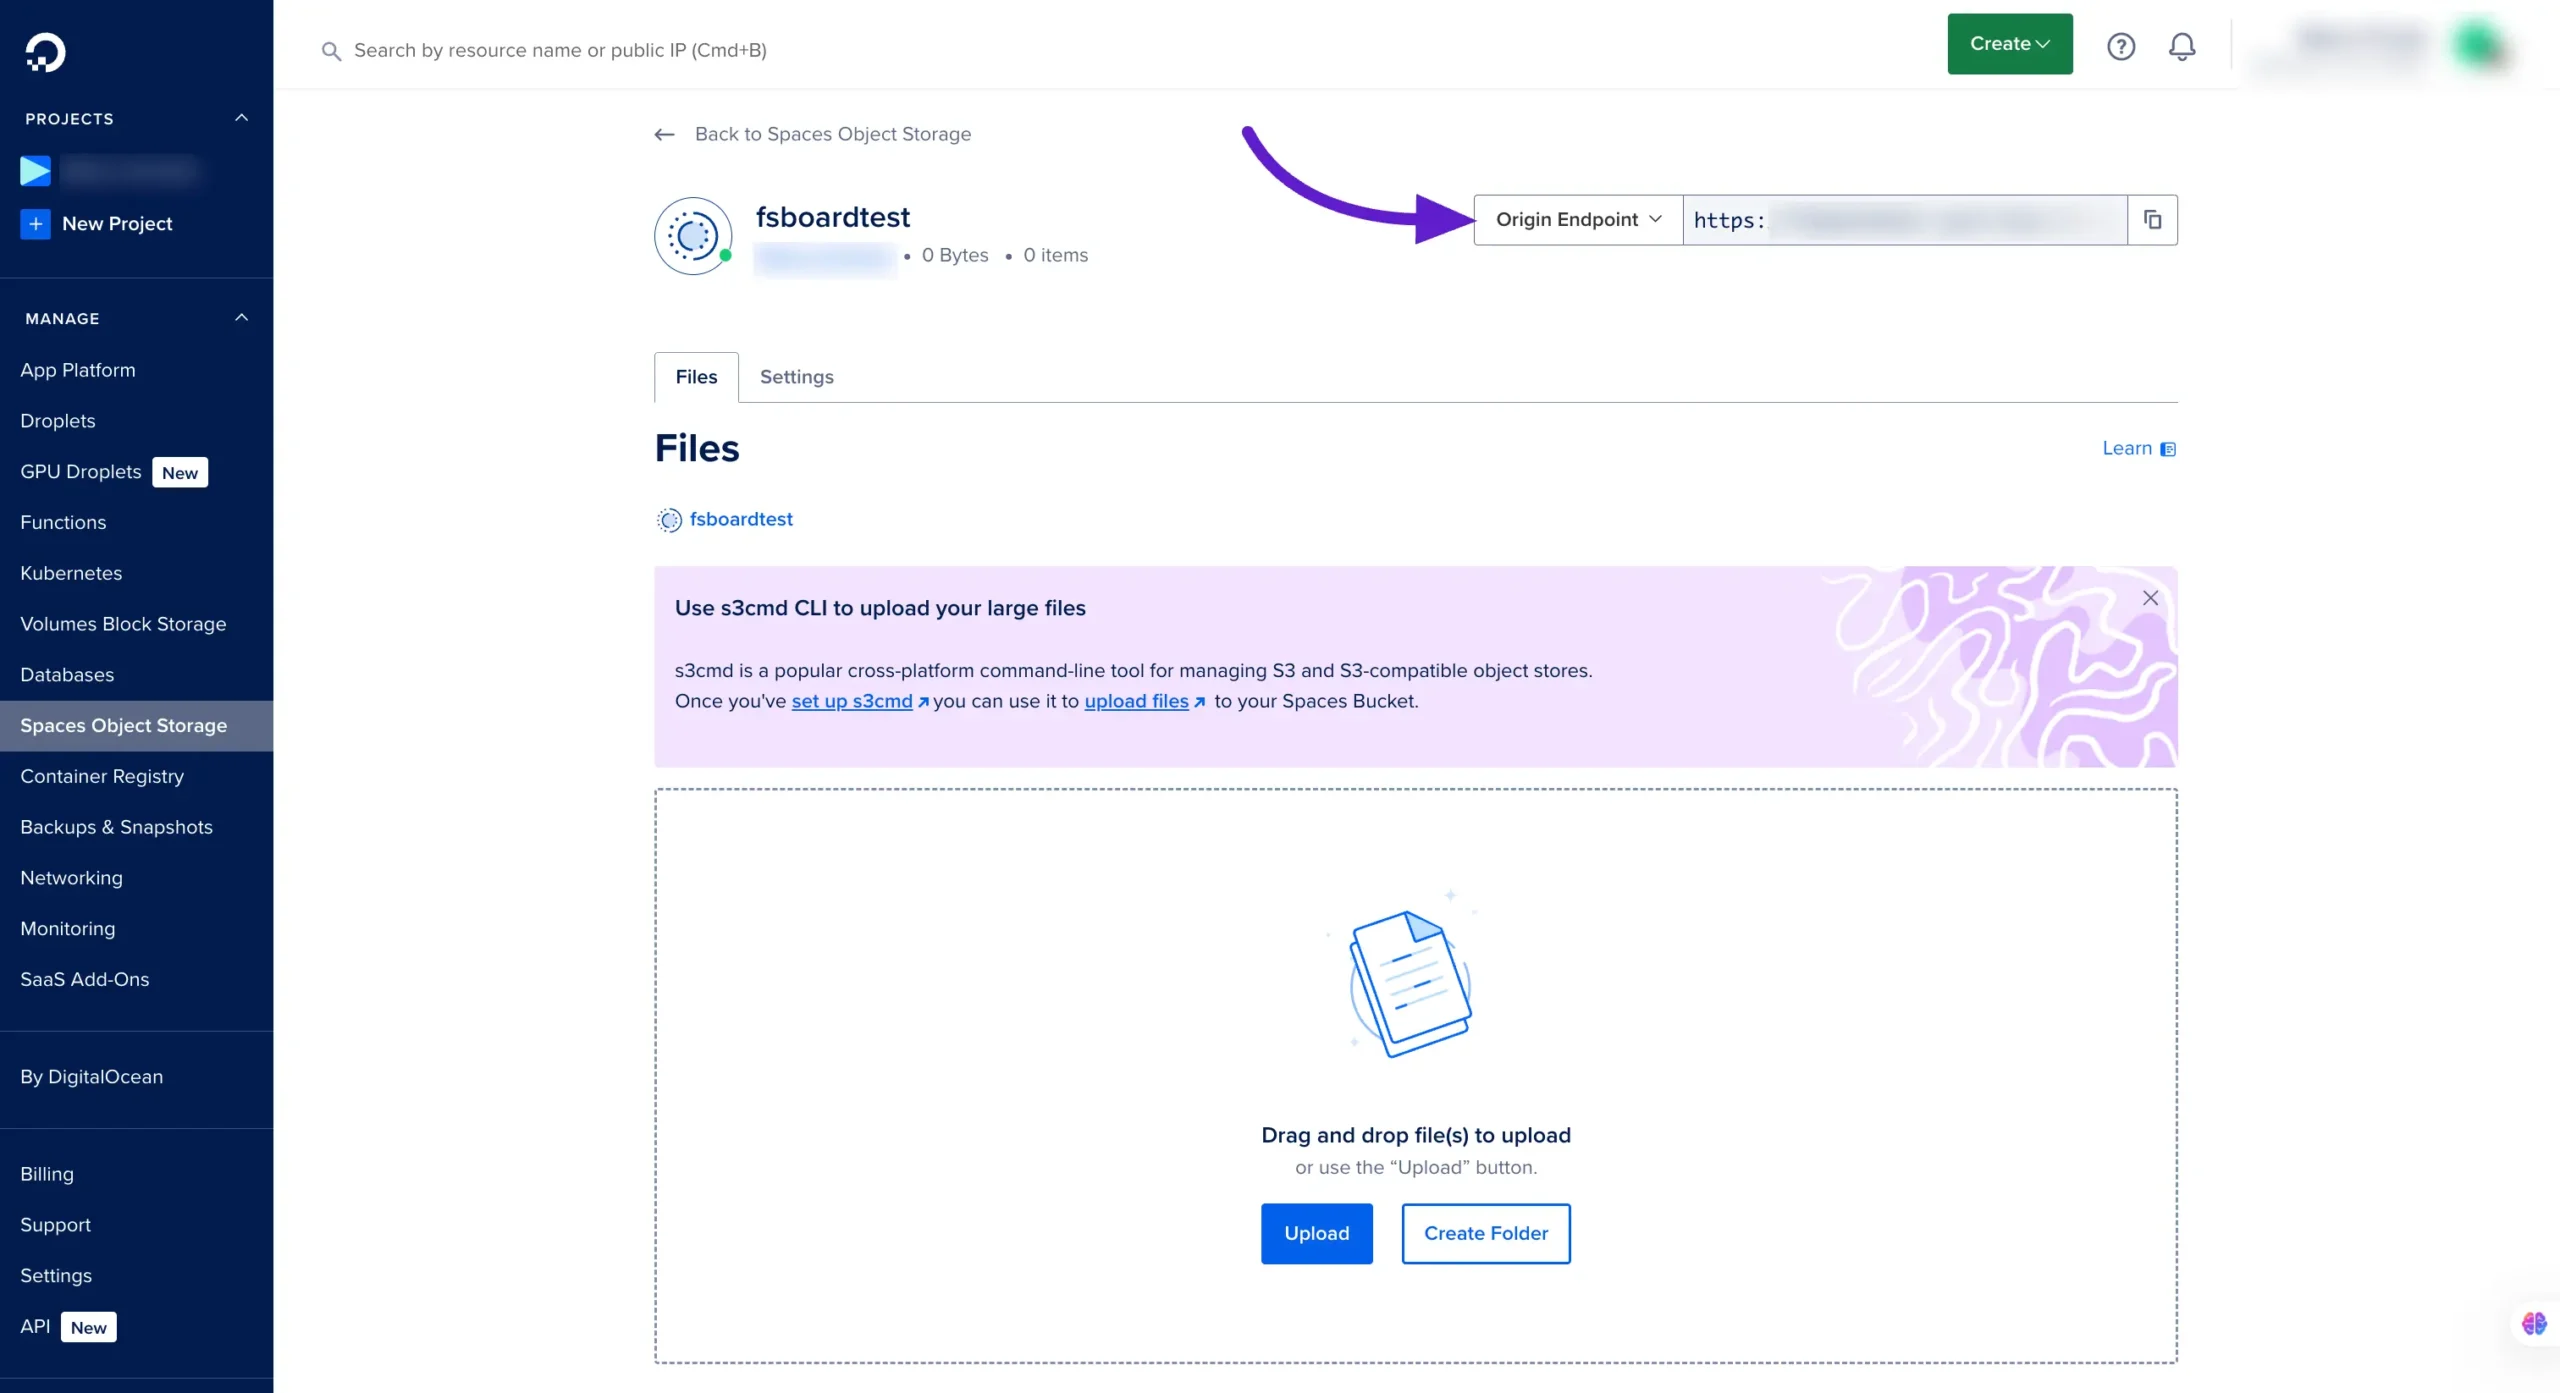
Now you will be redirected to a page where you will see the Origin Endpoint. Copy the Endpoint from here and save it for later use.
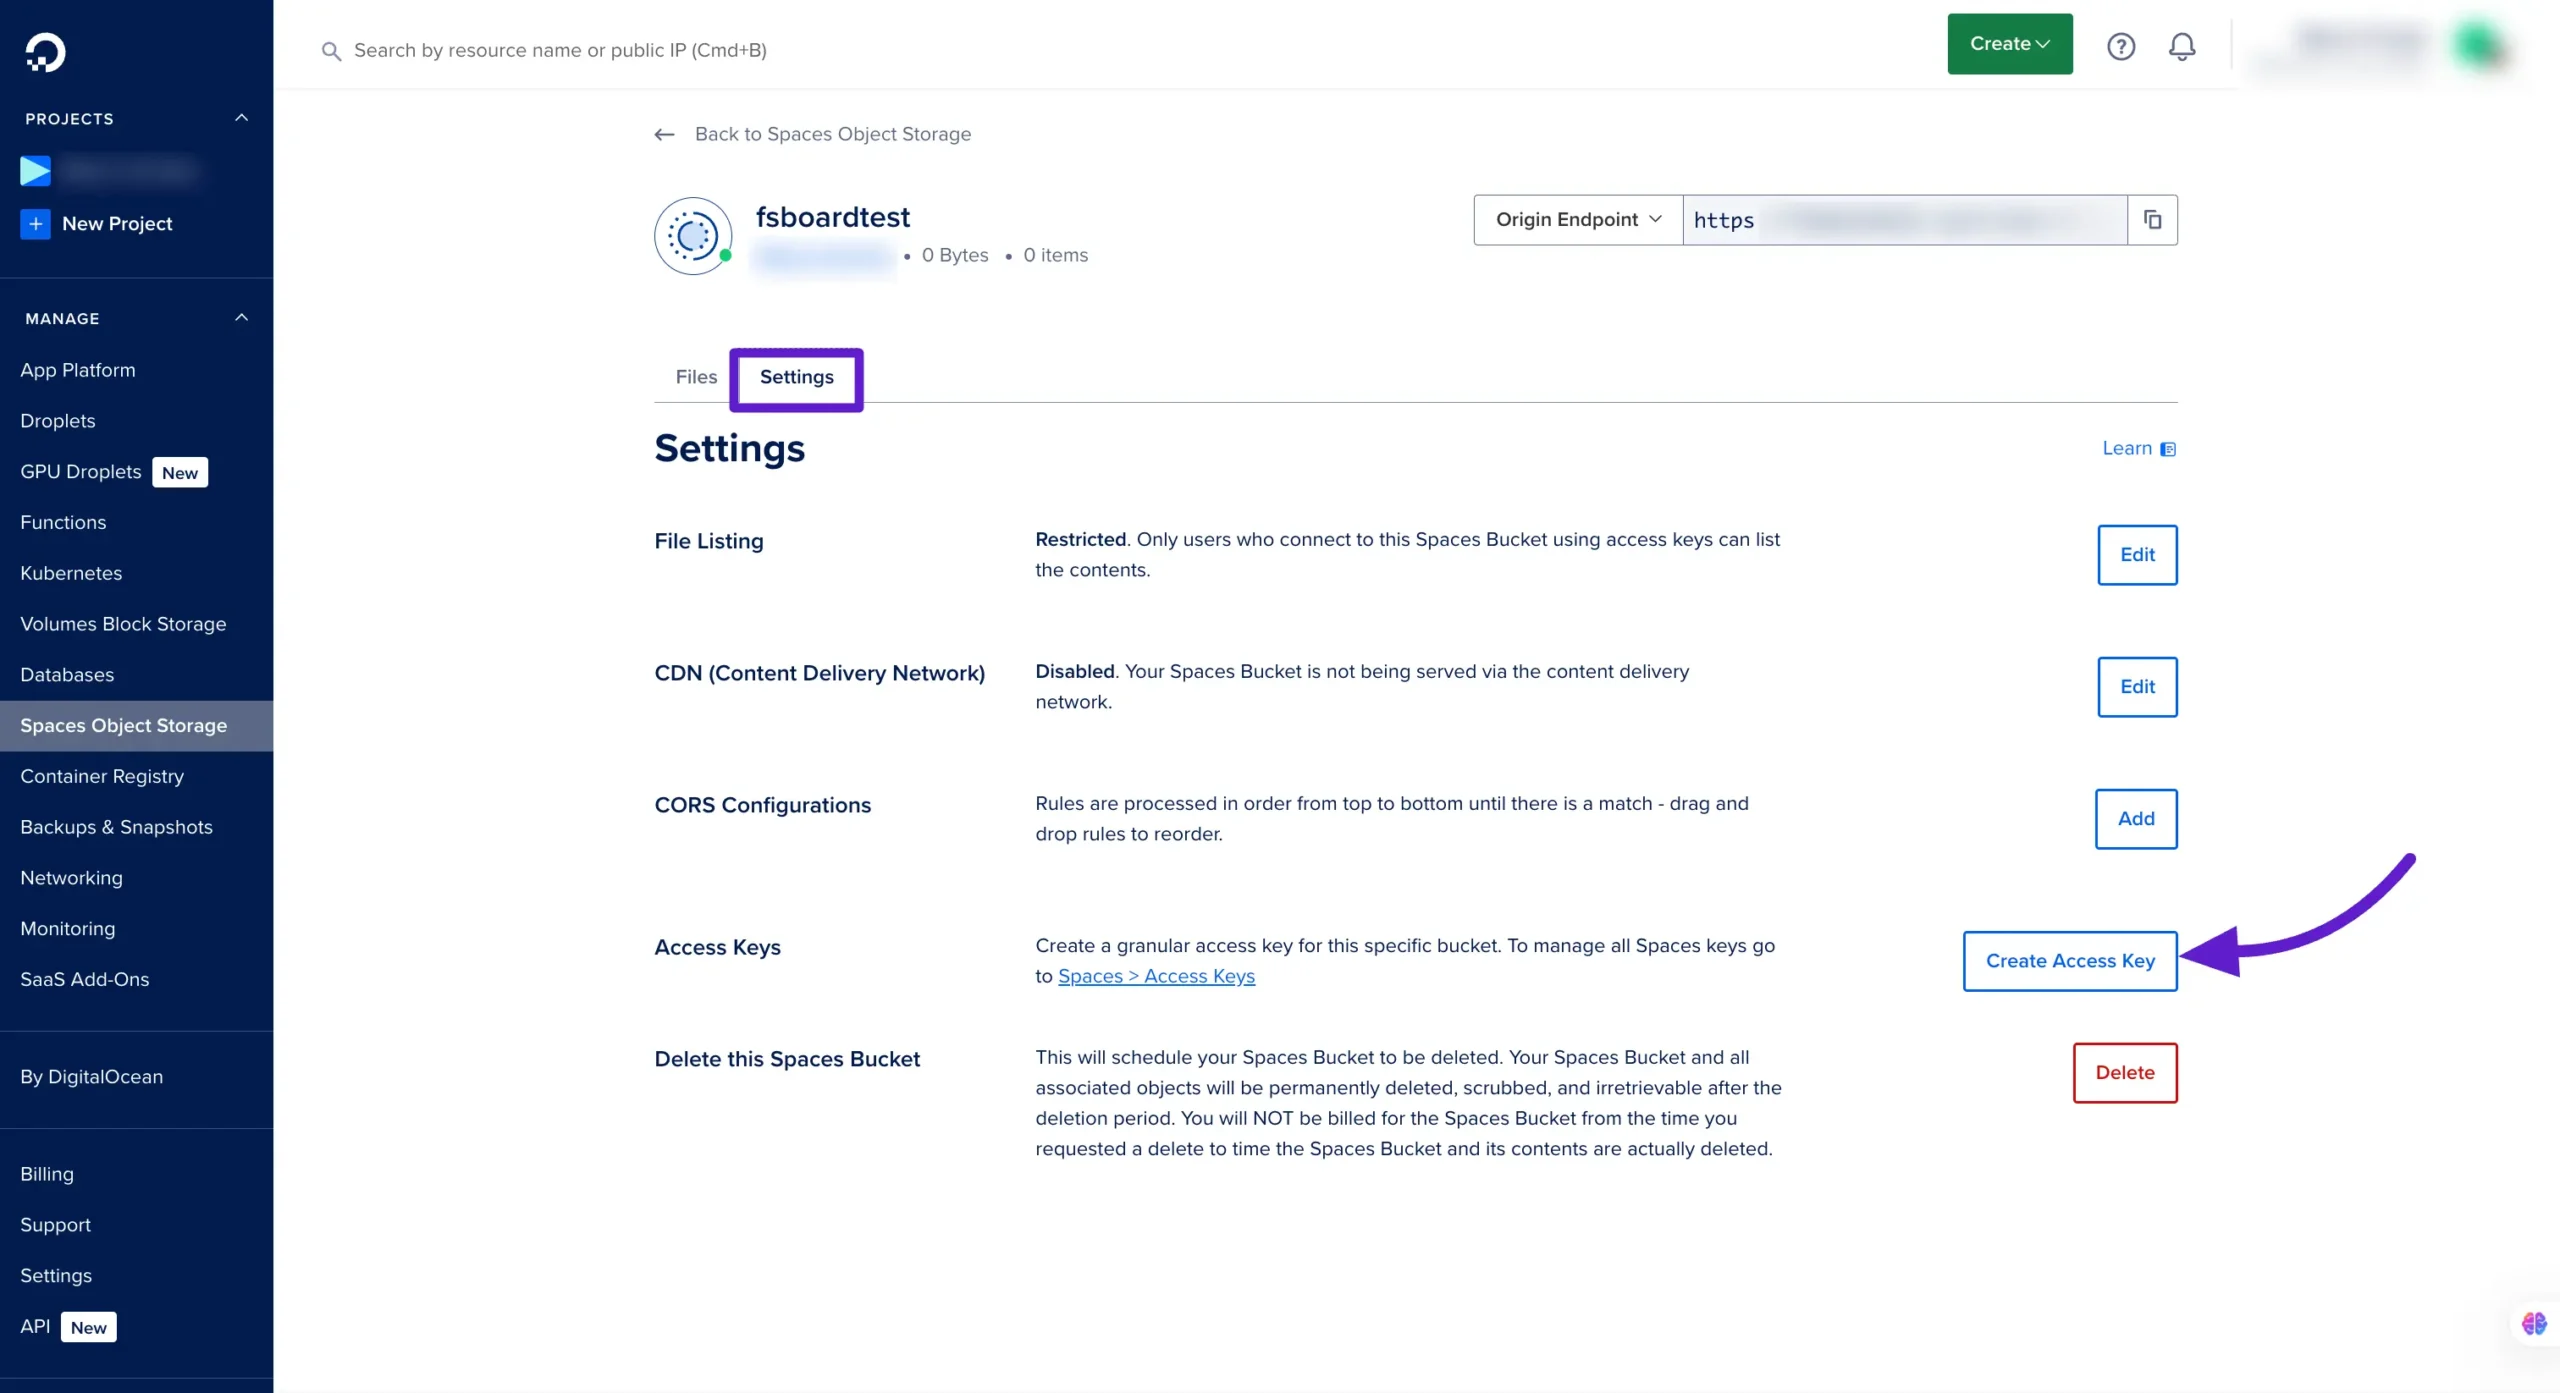
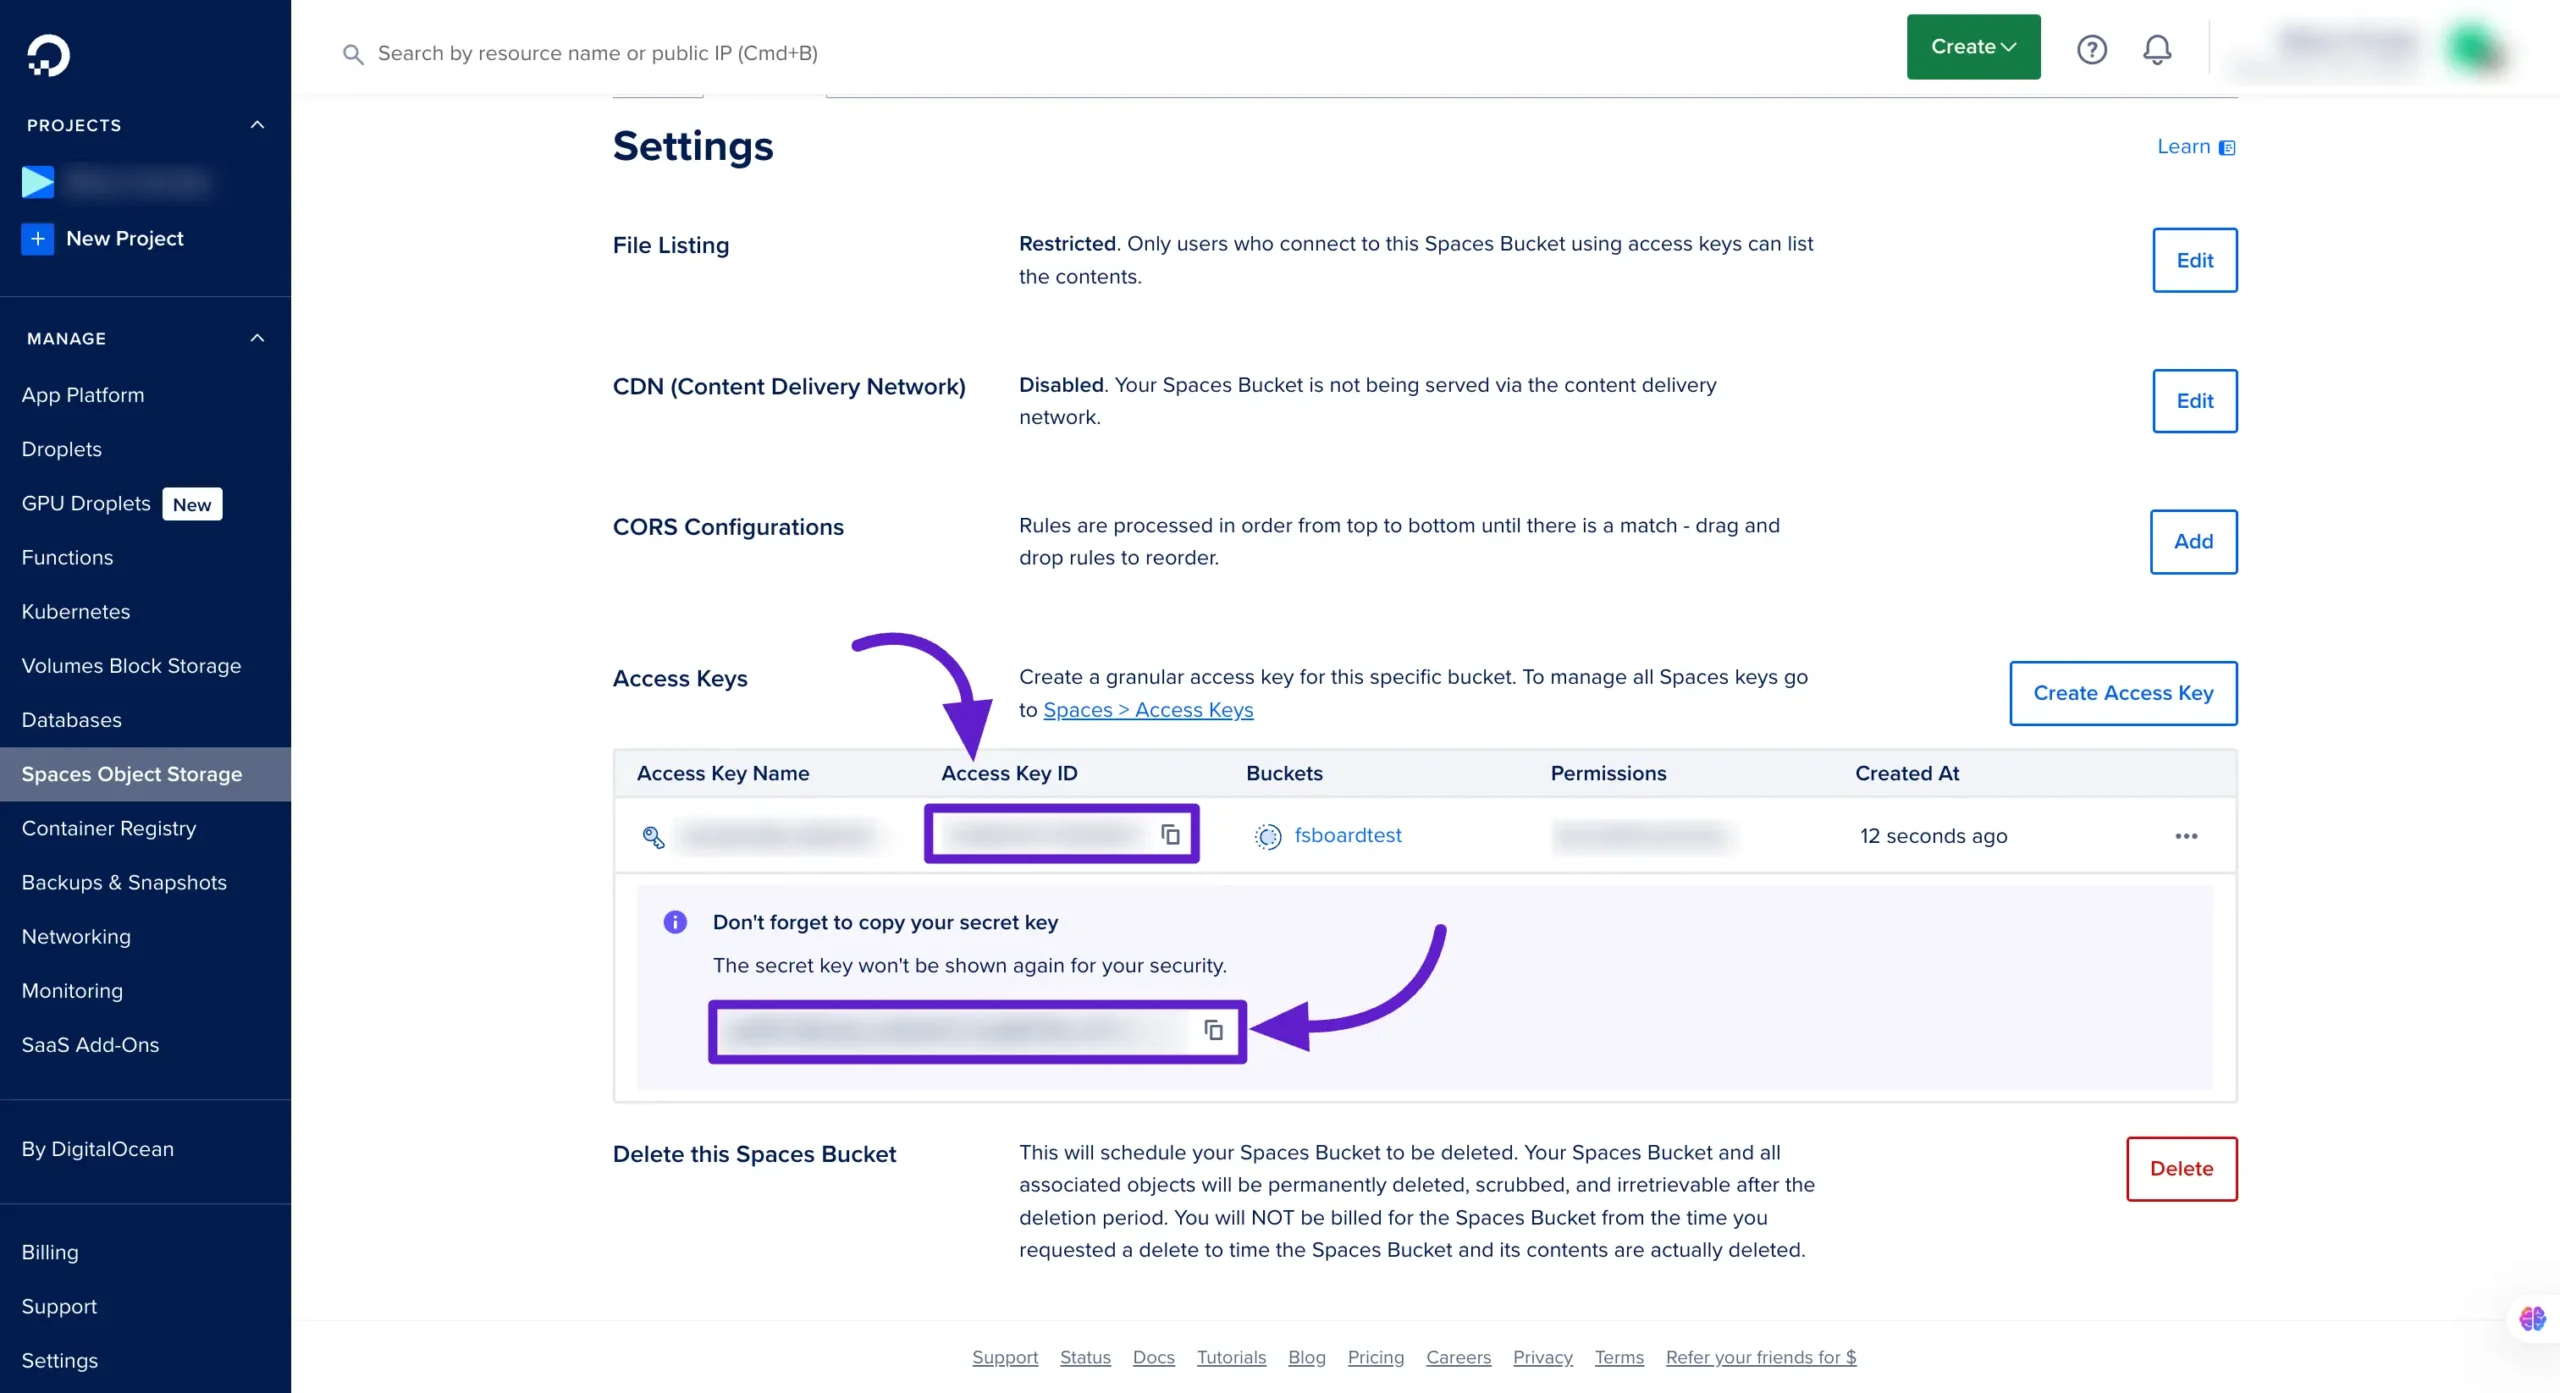
Next, go to the Settings tab. Here, you need to create an Access Key. Click on the Create Access Key button to proceed to the next step.
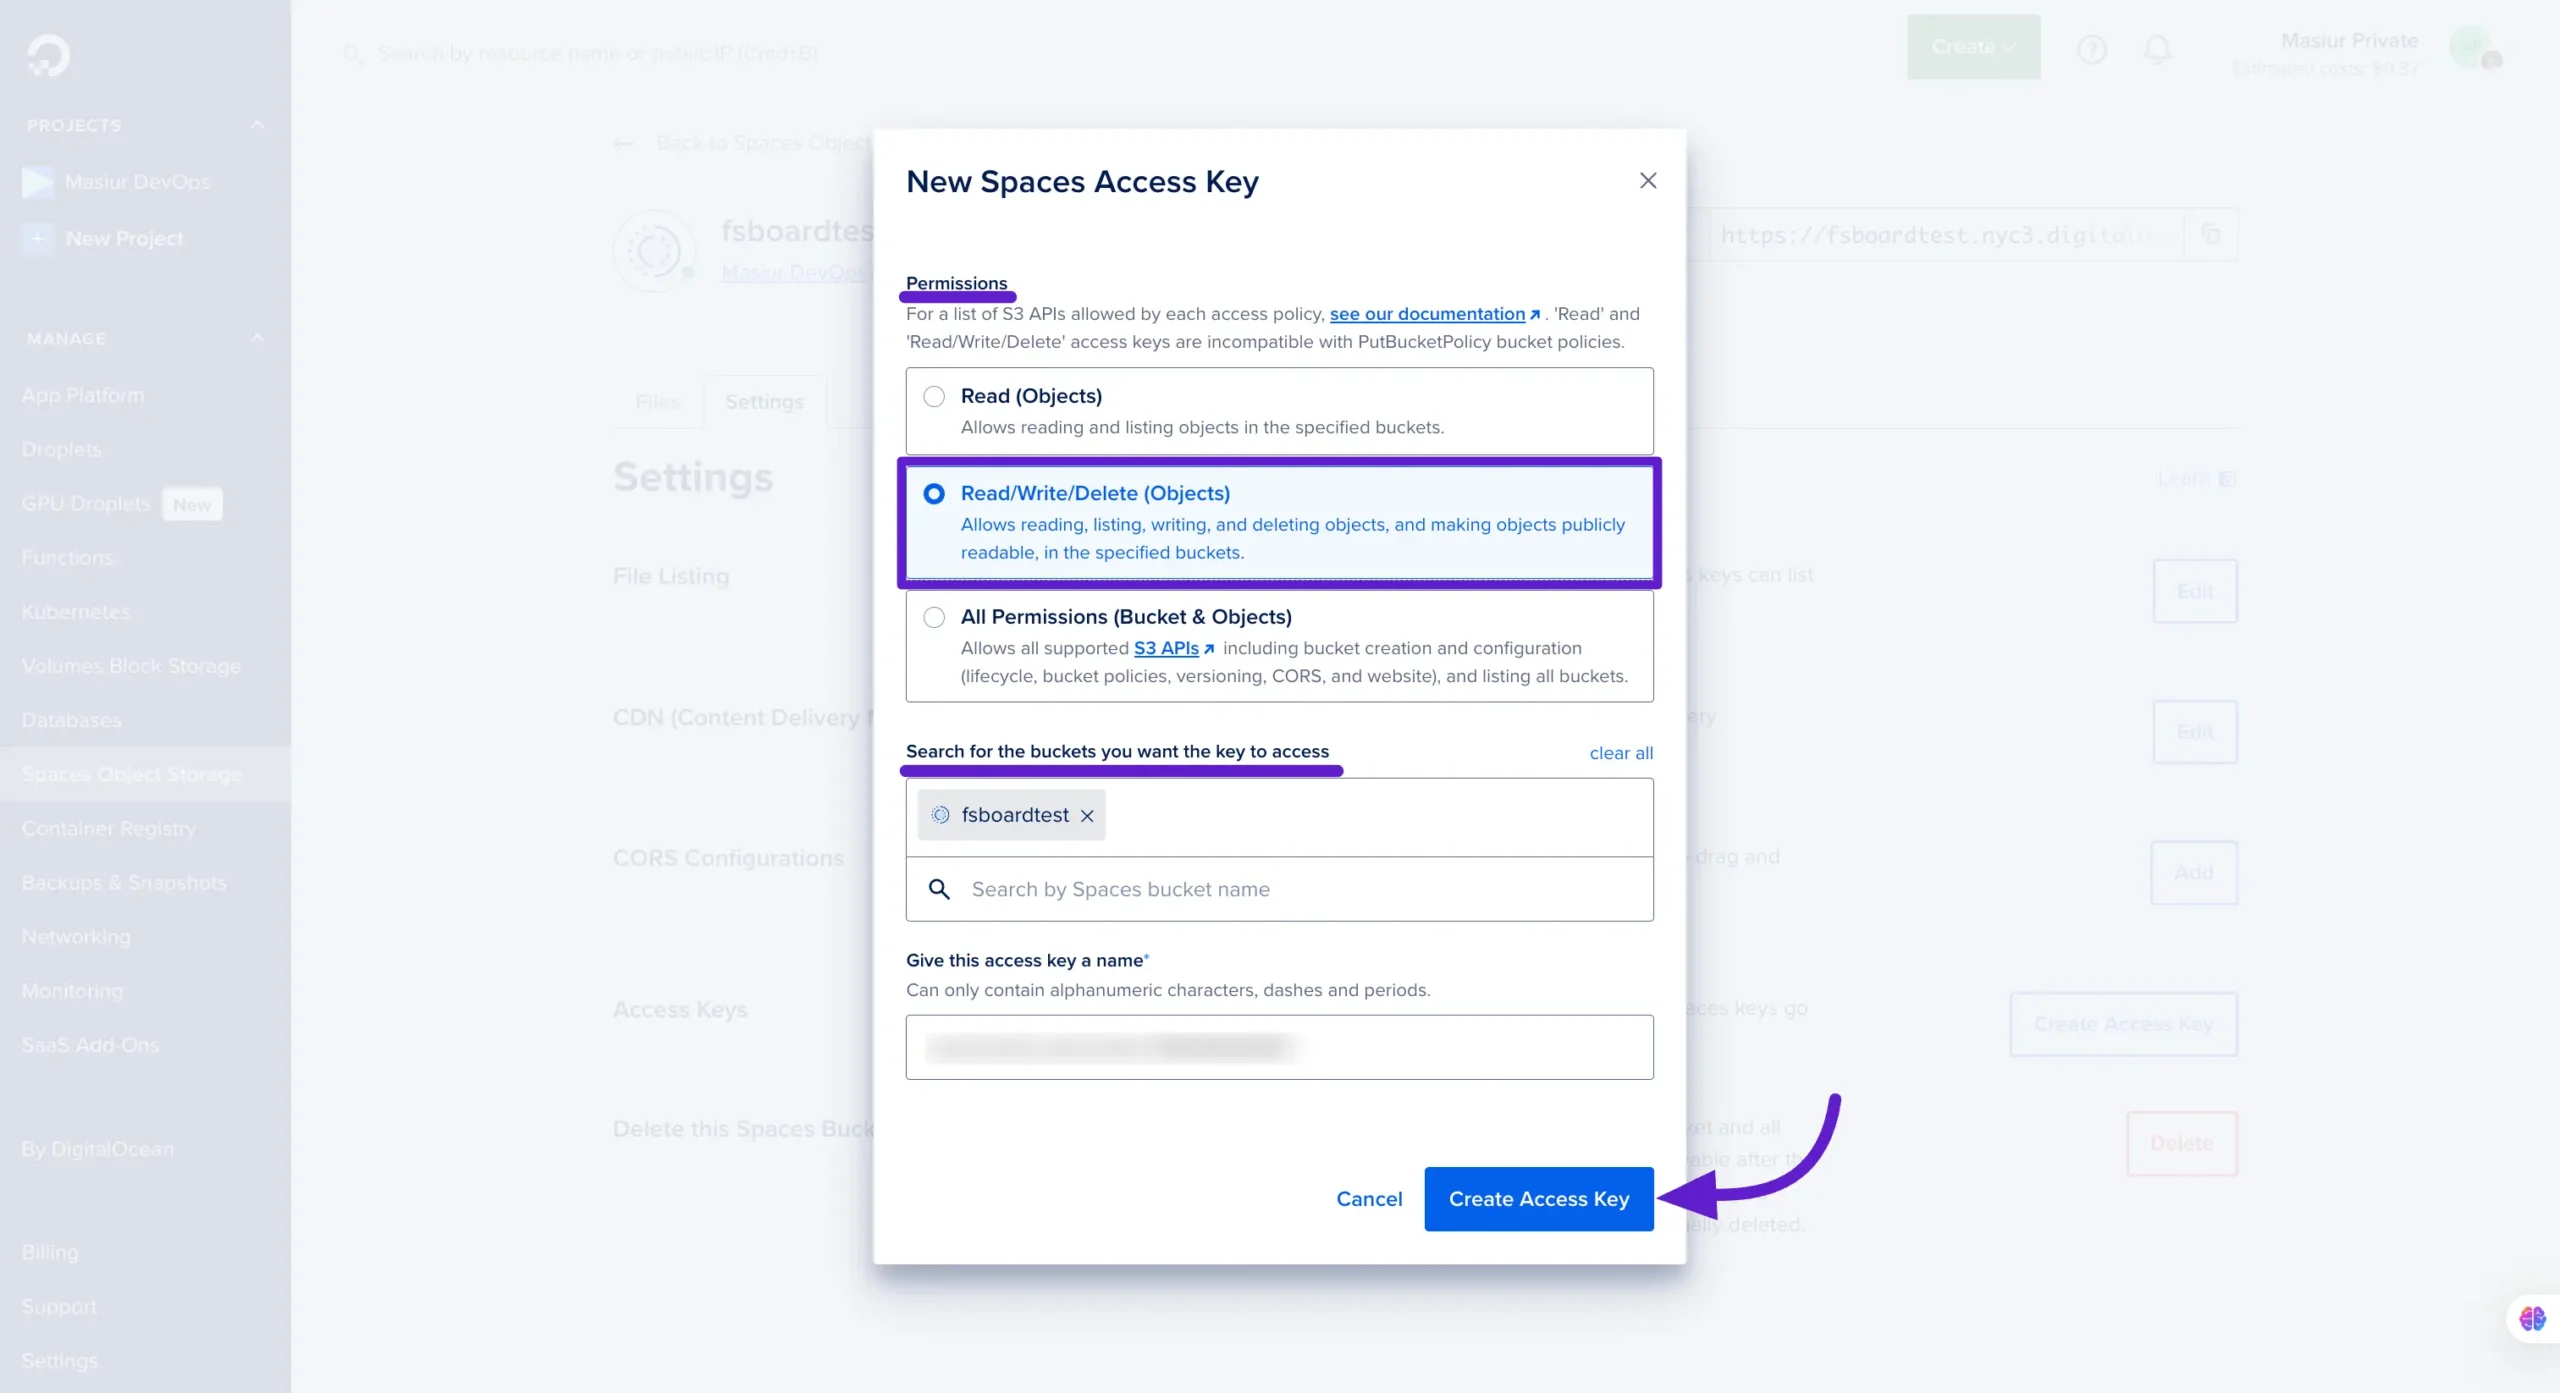
A pop-up will appear after clicking on the button and here you will see the settings for your Access Key. Now select Read/Write/Delete (Objects) from here. After that select the Bucket for which you want to create this Access Key.
Giving the Name of the Access Key is optional you can give the name as you want or you can keep the name as it is. Click on the Create Access Key button now.
Now your Access Key ID and Secret Key will be displayed. Copy them from here and save them securely for later use.
Configure DigitalOcean in DPMS #
Now, paste the credentials into the dedicated fields of DPMS (Powered by FluentBoard). When you enter the Endpoint, the Storage Bucket Name and Region will be automatically populated.
The Bucket Subfolder field is optional—you can add a subfolder if needed. Finally, click the Save Settings button to successfully set up your DigitalOcean bucket as the cloud storage for DPMS.