You can easily add and manage tasks within your DPMS boards. Powered by FluentBoard, DPMS ensures a smooth and efficient workflow for NGOs. This guide will walk you through the process of adding and organizing tasks.
Adding Tasks to Your Board #
DPMS makes task management effortless with an intuitive interface. To create a new task:
1️⃣ Open your Board where you want to add a task.
2️⃣ Click the “Add Task” button.
3️⃣ Enter task details such as title, description, due date, and assignees.
4️⃣ Assign the task to a specific stage (e.g., To-Do, In Progress, Completed).
5️⃣ Click Save, and your task will be added to the board!
Managing Tasks Efficiently #
With DPMS (Powered by FluentBoard), you can:
✔️ Edit task details anytime
✔️ Move tasks between different stages using drag-and-drop
✔️ Assign tasks to multiple team members
✔️ Track progress with real-time updates
By leveraging DPMS, NGOs can ensure seamless project execution, improving collaboration and productivity. 🚀
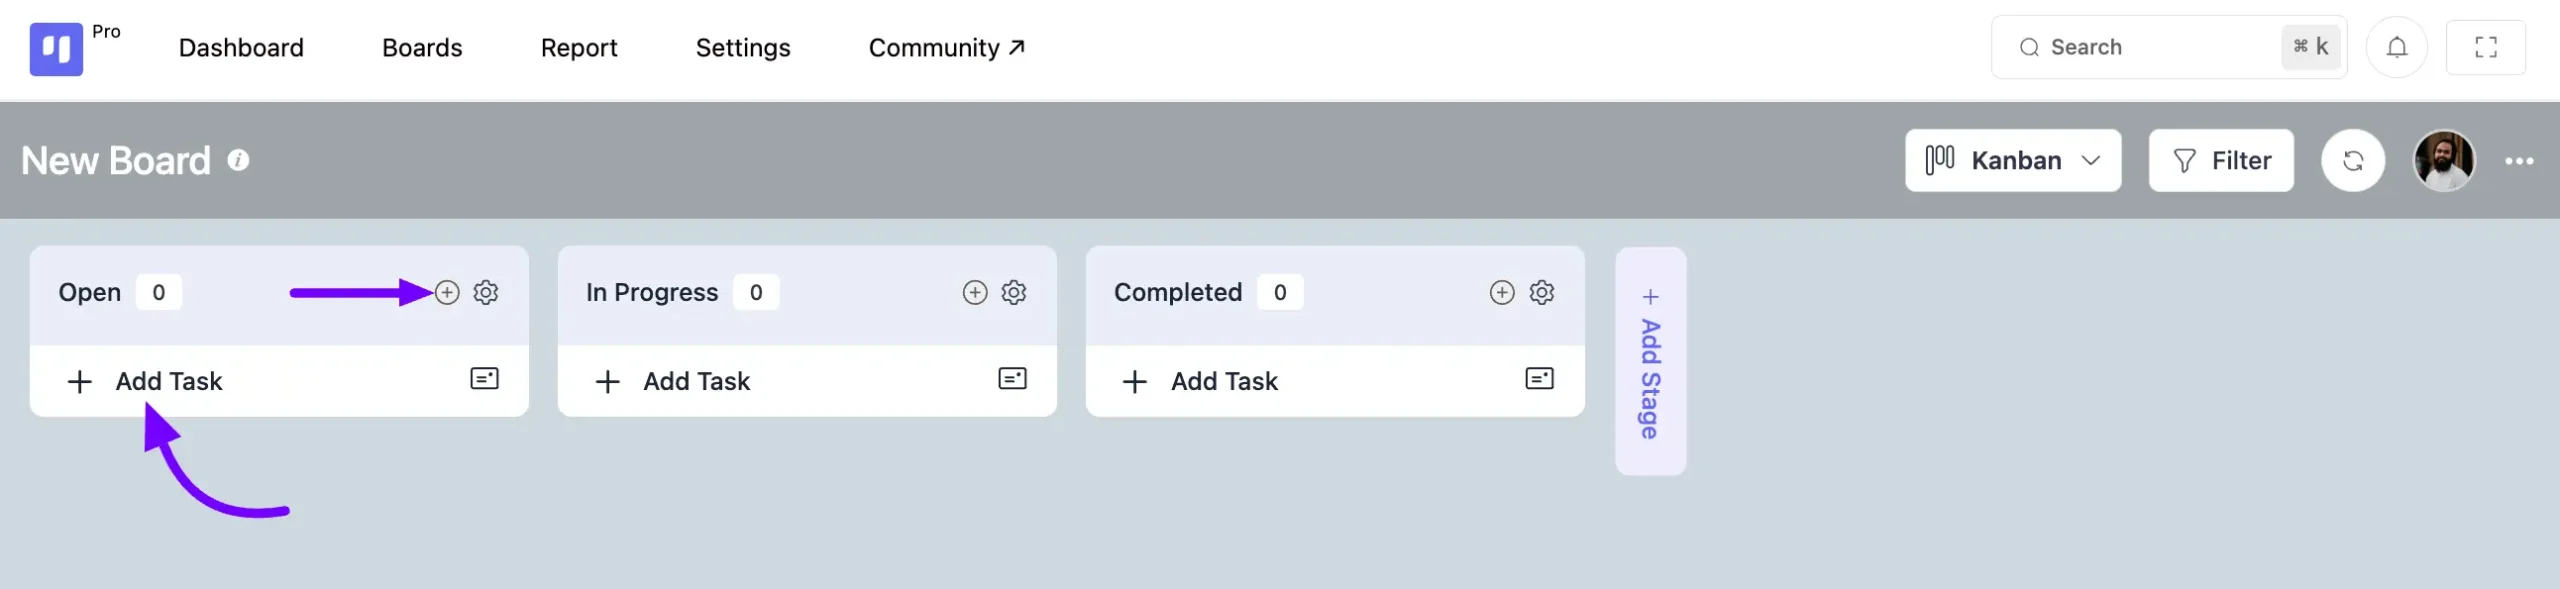
Adding New Task #
Just head over to the board where you want to add the task. Then, you can either click on the Add Task button within the stages or click on the Plus icon button at the top of the stage to add a task.
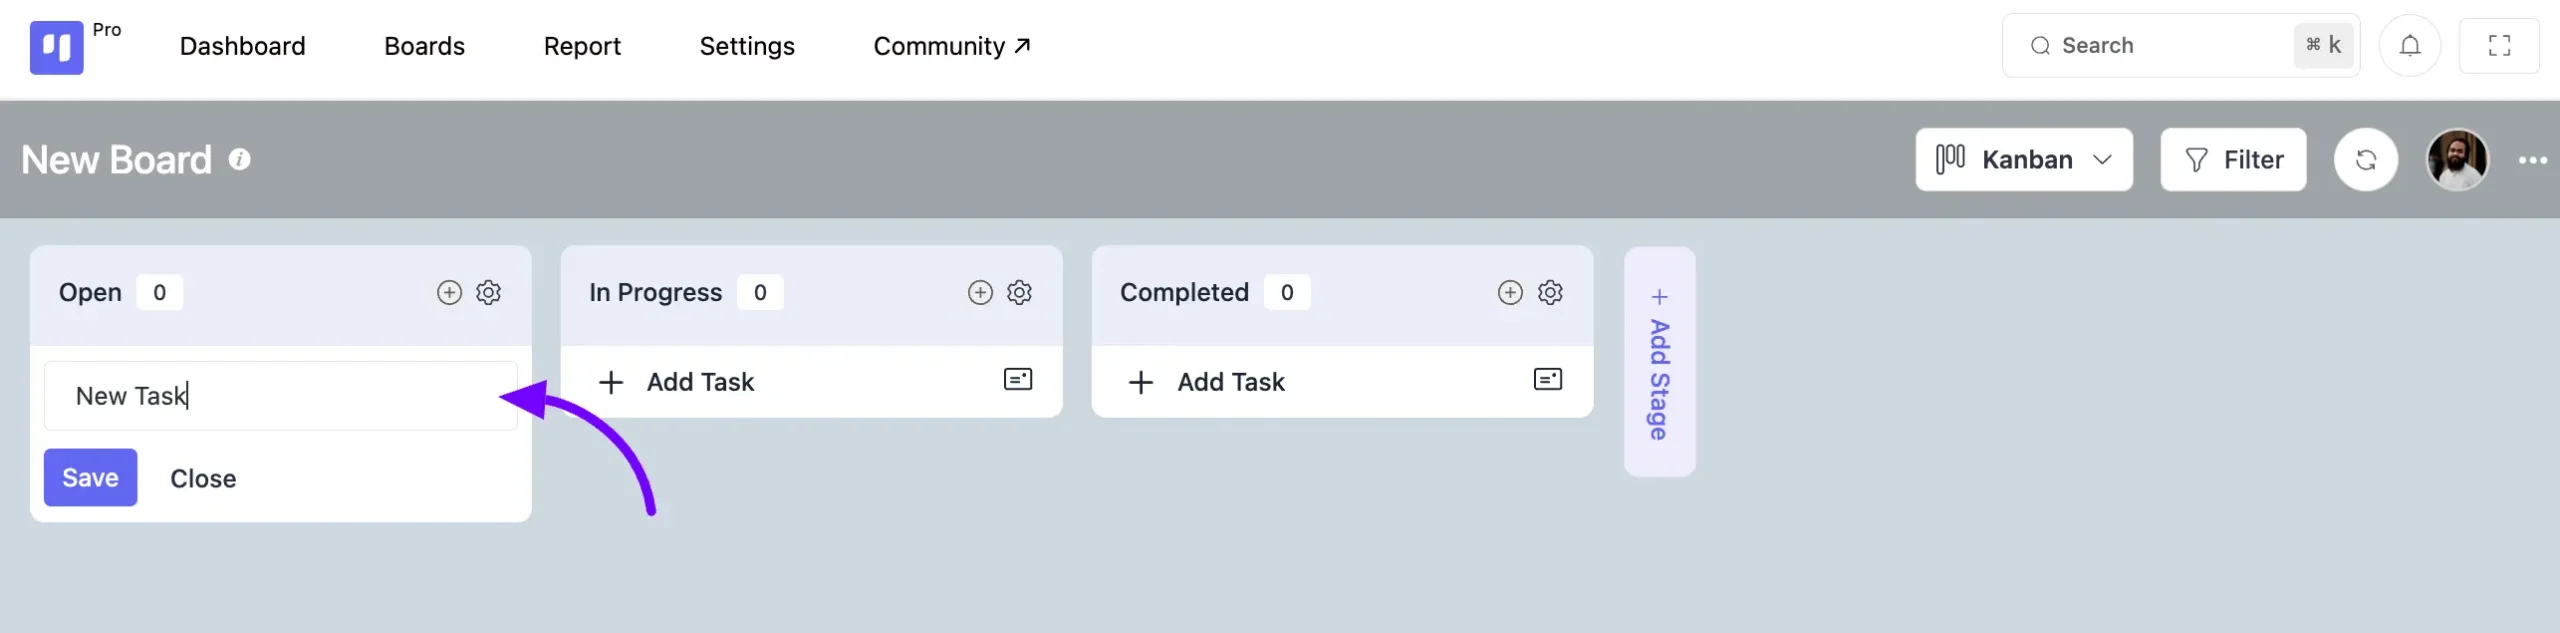
Give a Title for your Task and click on the Save button then your task will be added to your board stage.
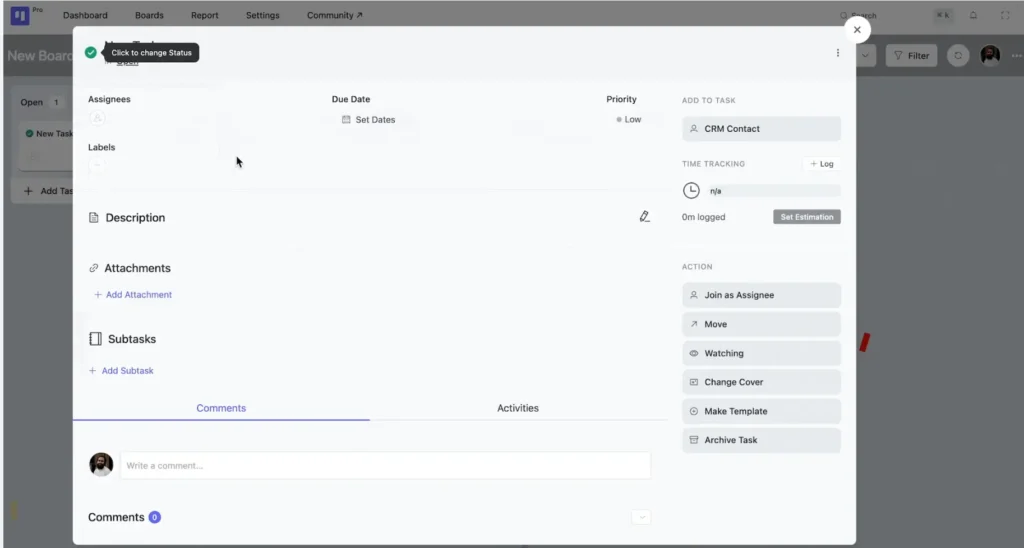
Task Management Options #
Click on the task card, and you’ll find many features here to help you manage your task effectively. Below, we’ll describe each of them in detail.
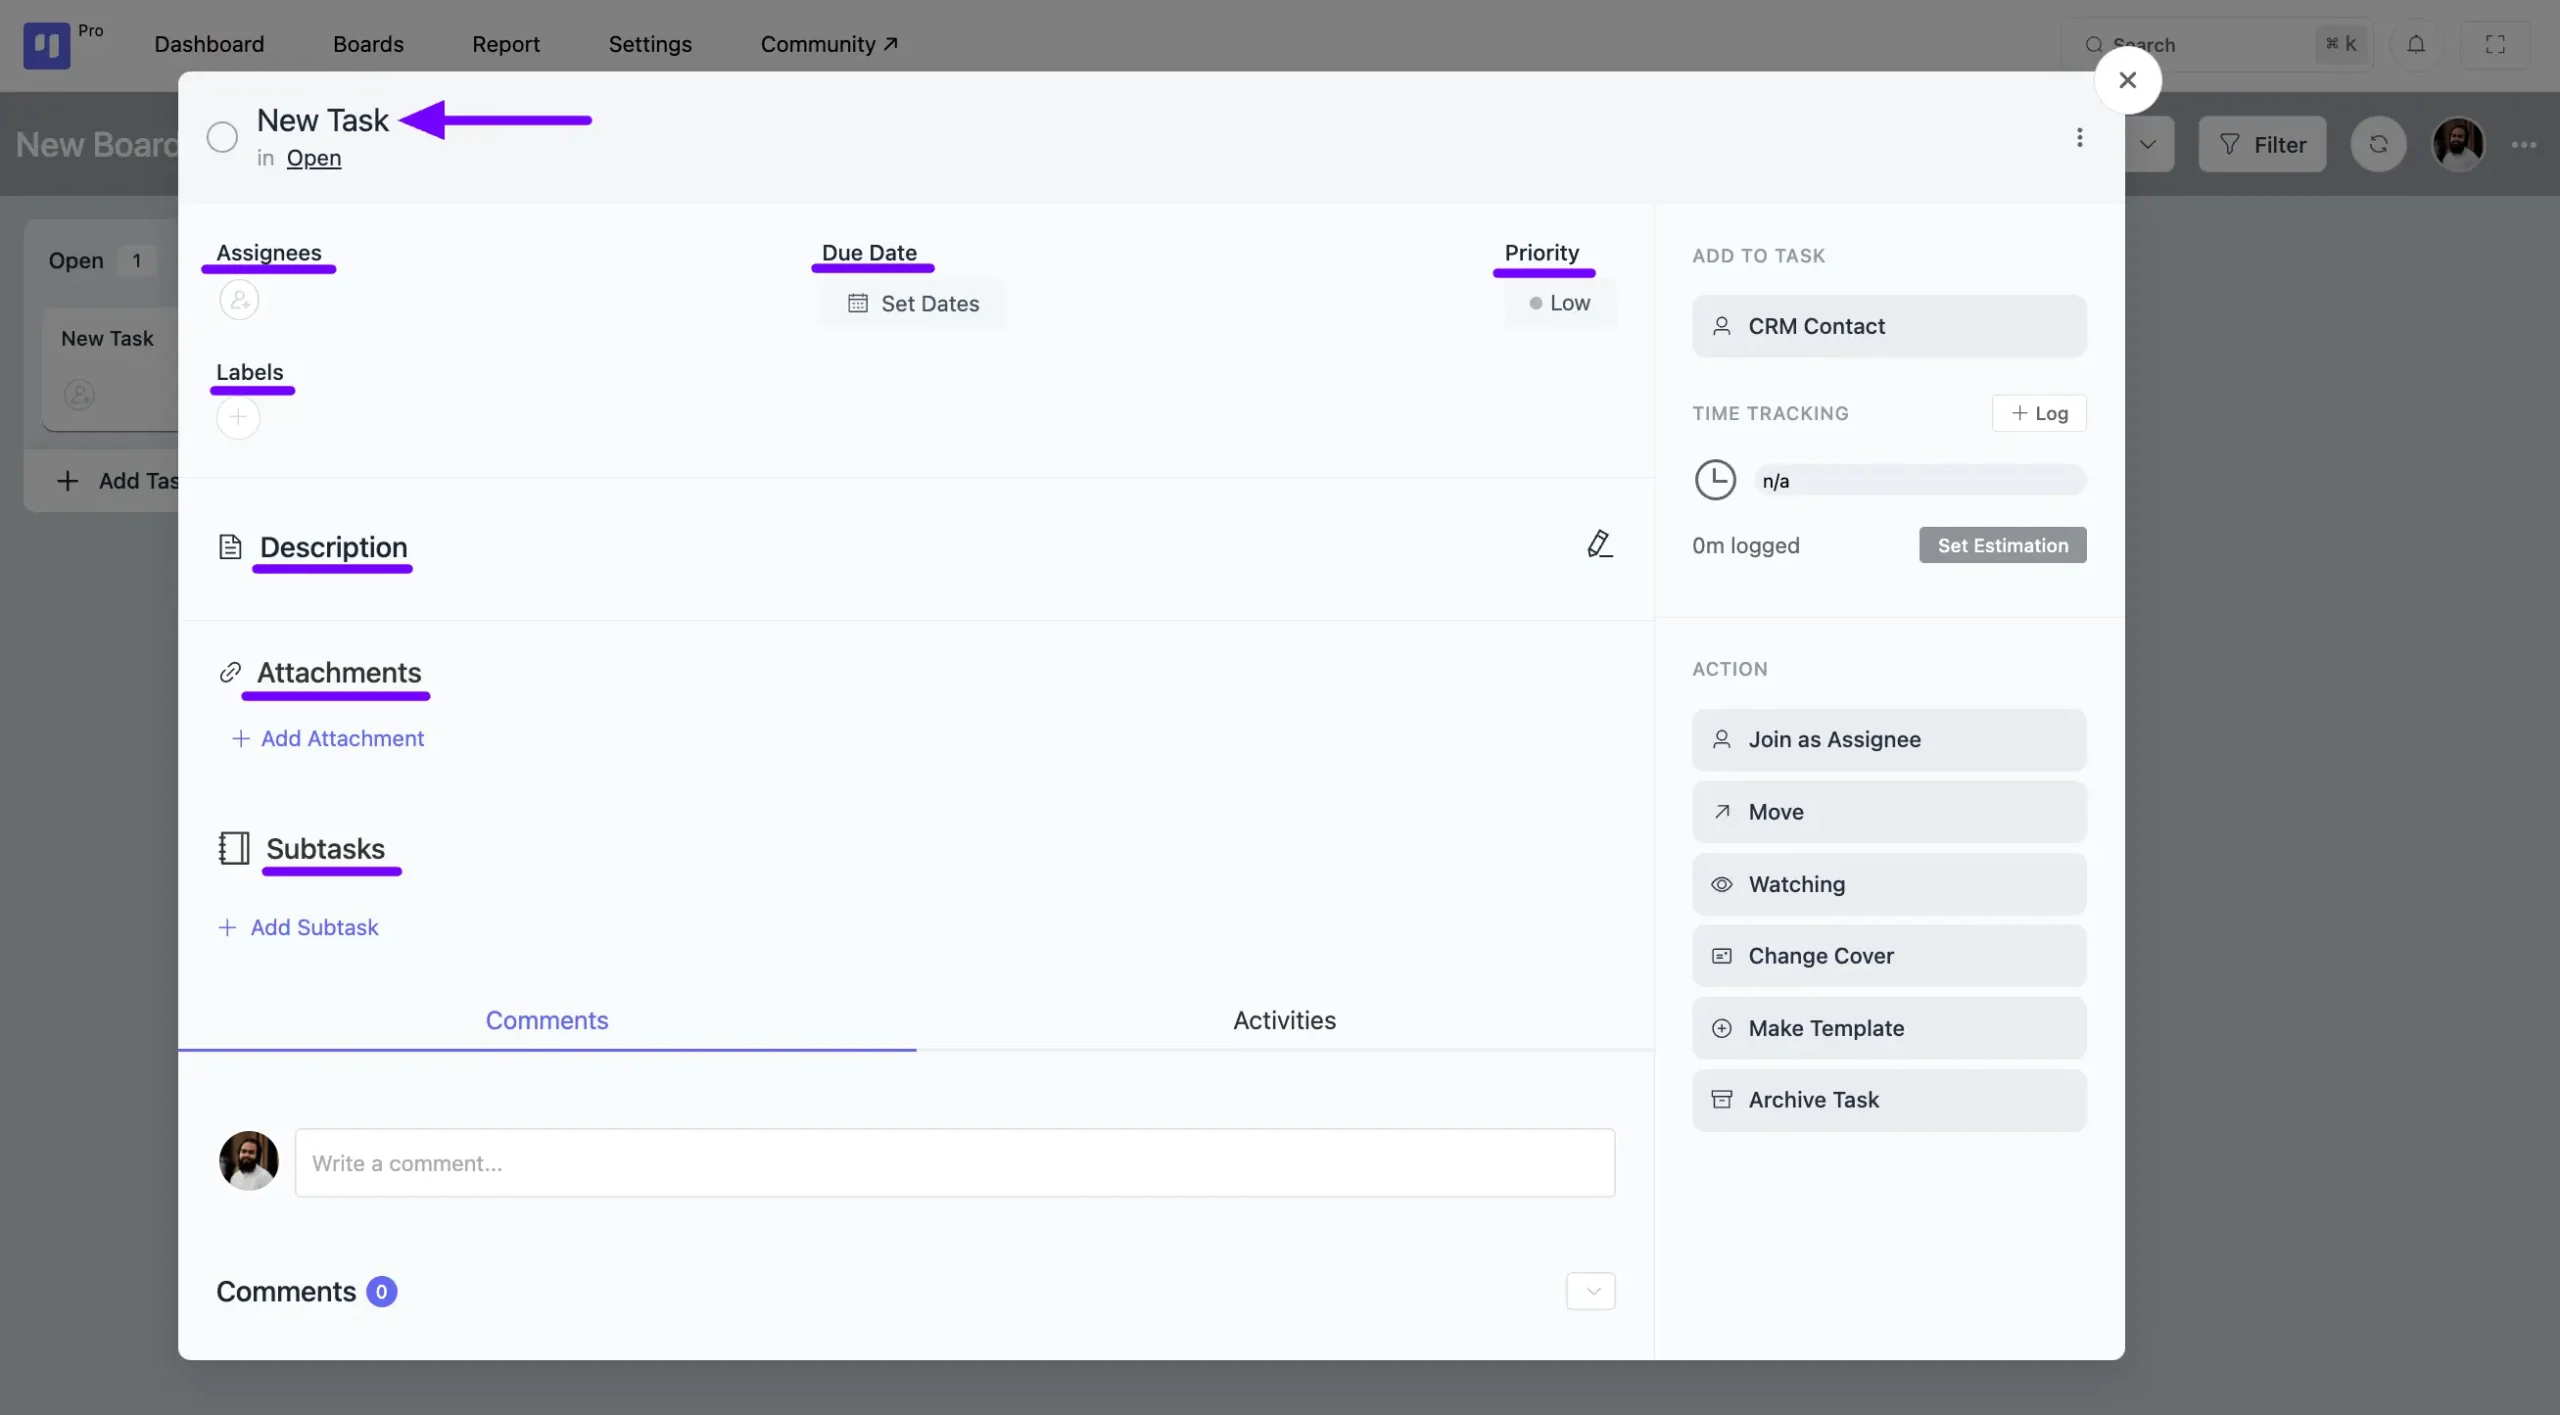
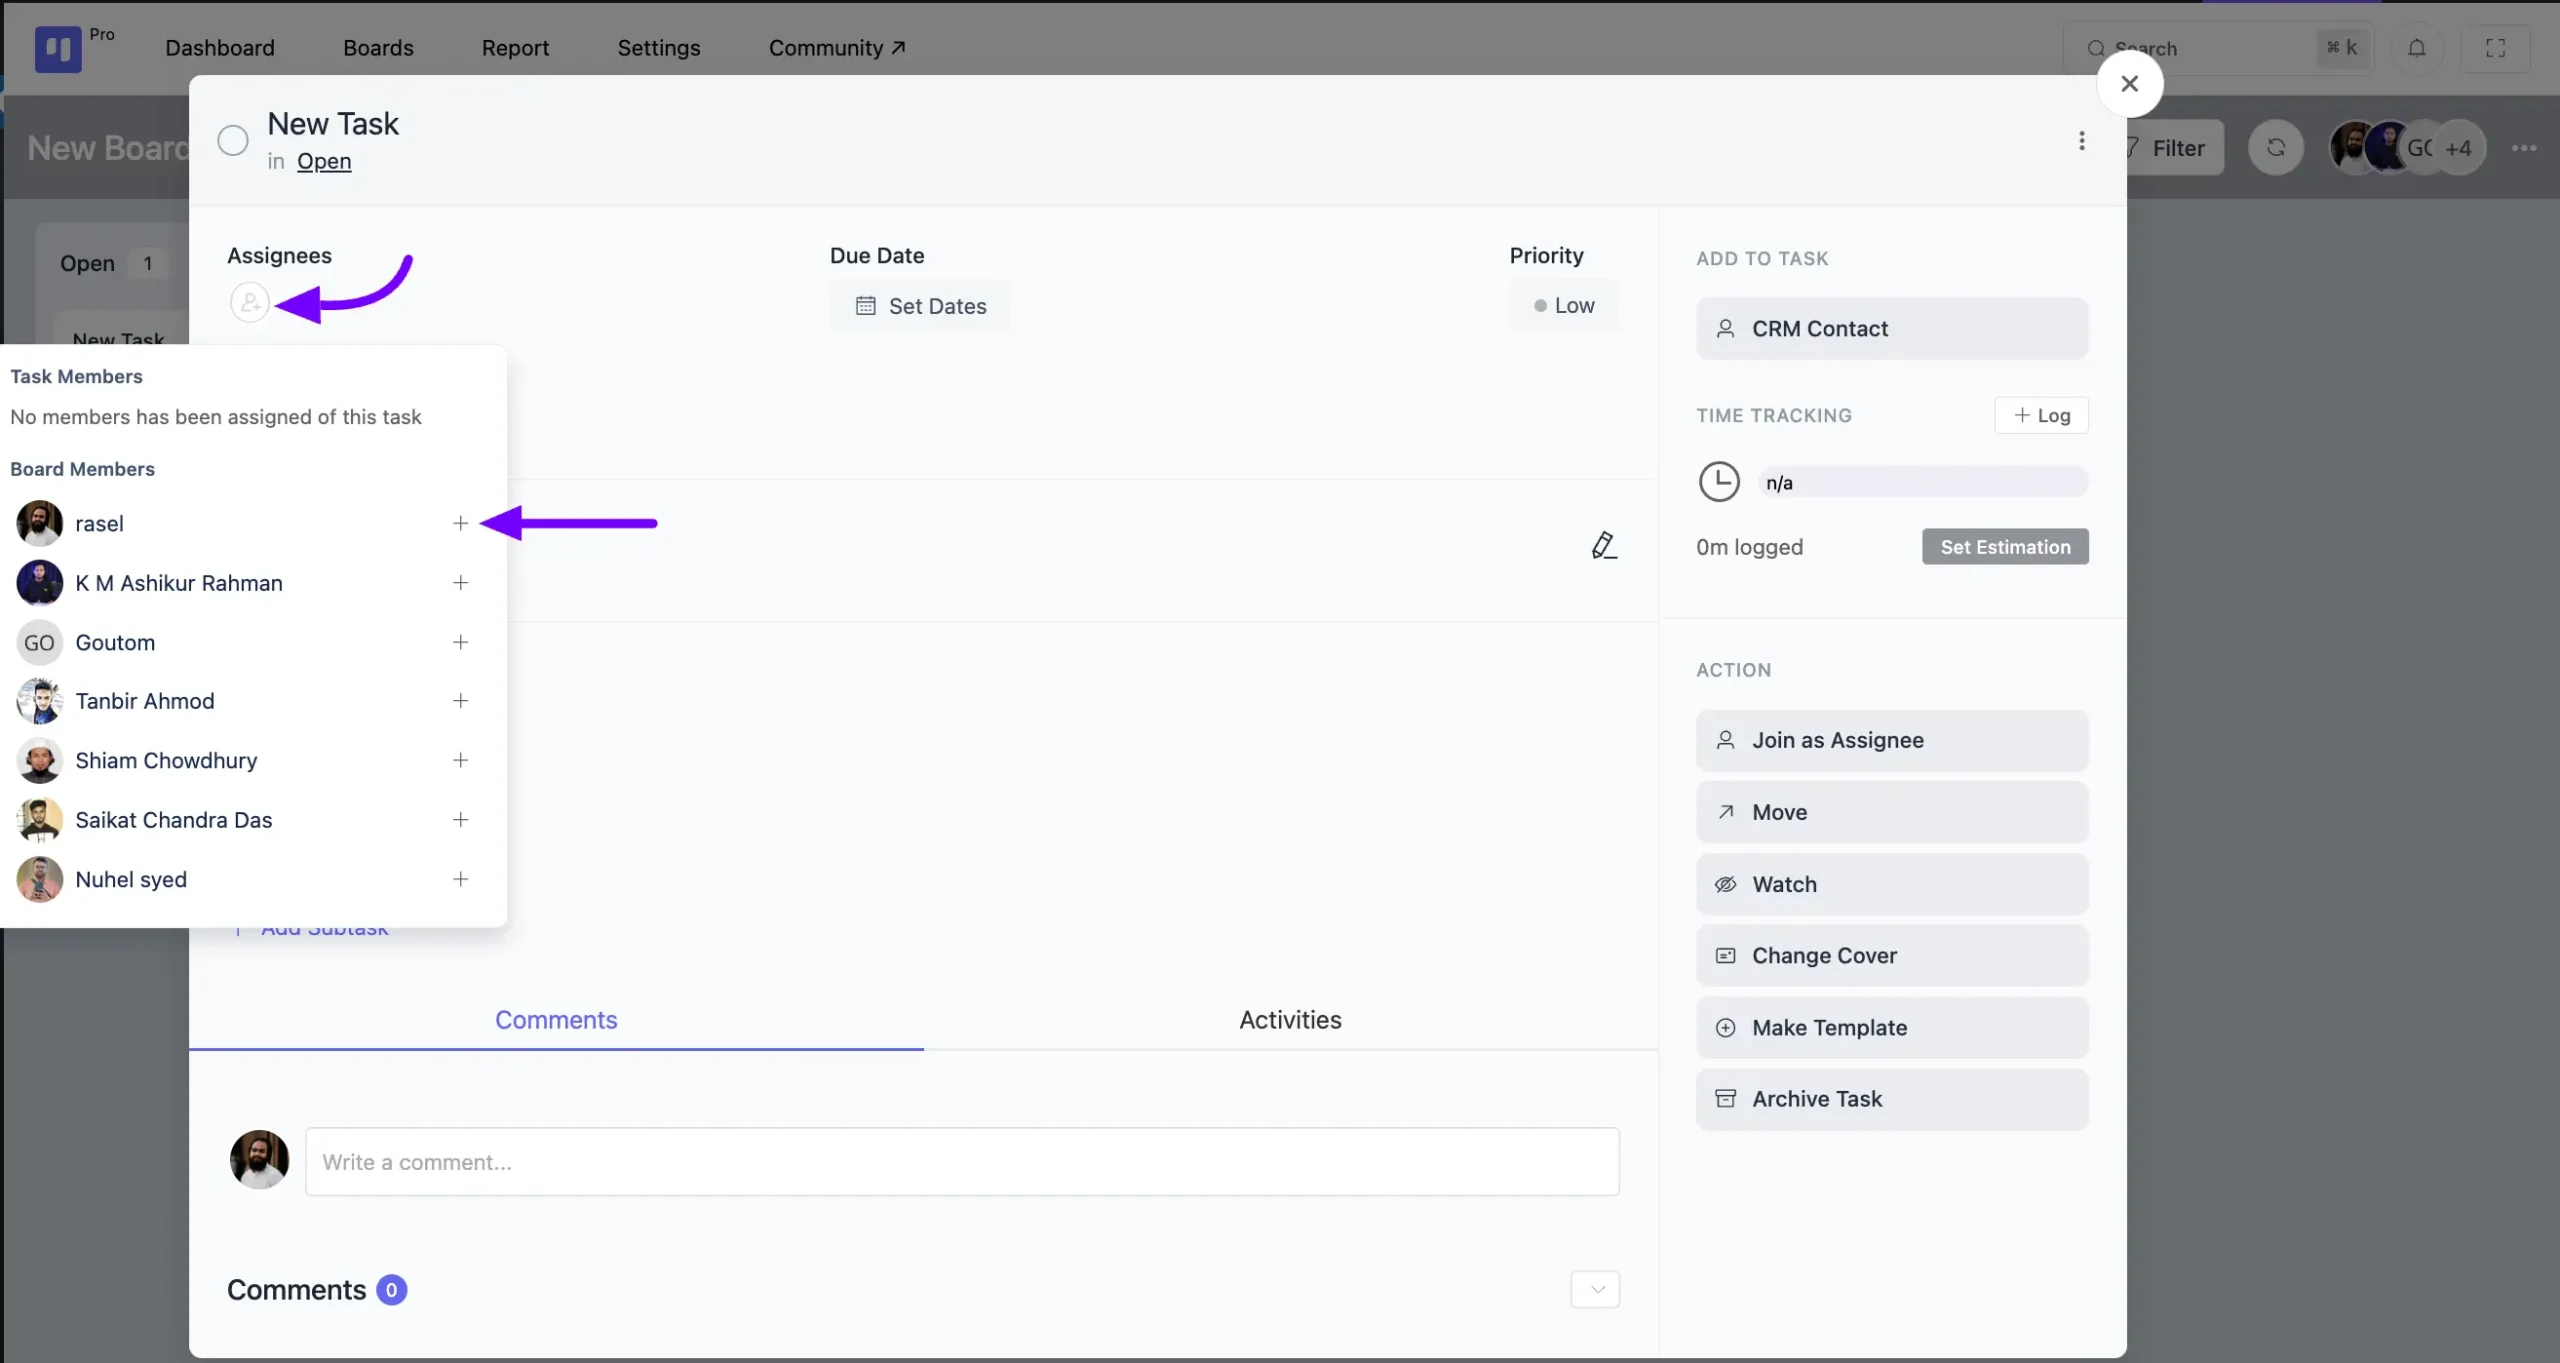
Assignees #
Click on the Assignee Add button to see all the board members listed. Click on the Plus icon next to the members’ names to add them as assignees to your task.
Due Date #
You have the option to add a start date and due date with time to your task. Simply click on the Set Dates button to access these options, input your desired dates, and then click Save. Your dates will be added to your task with time accordingly.

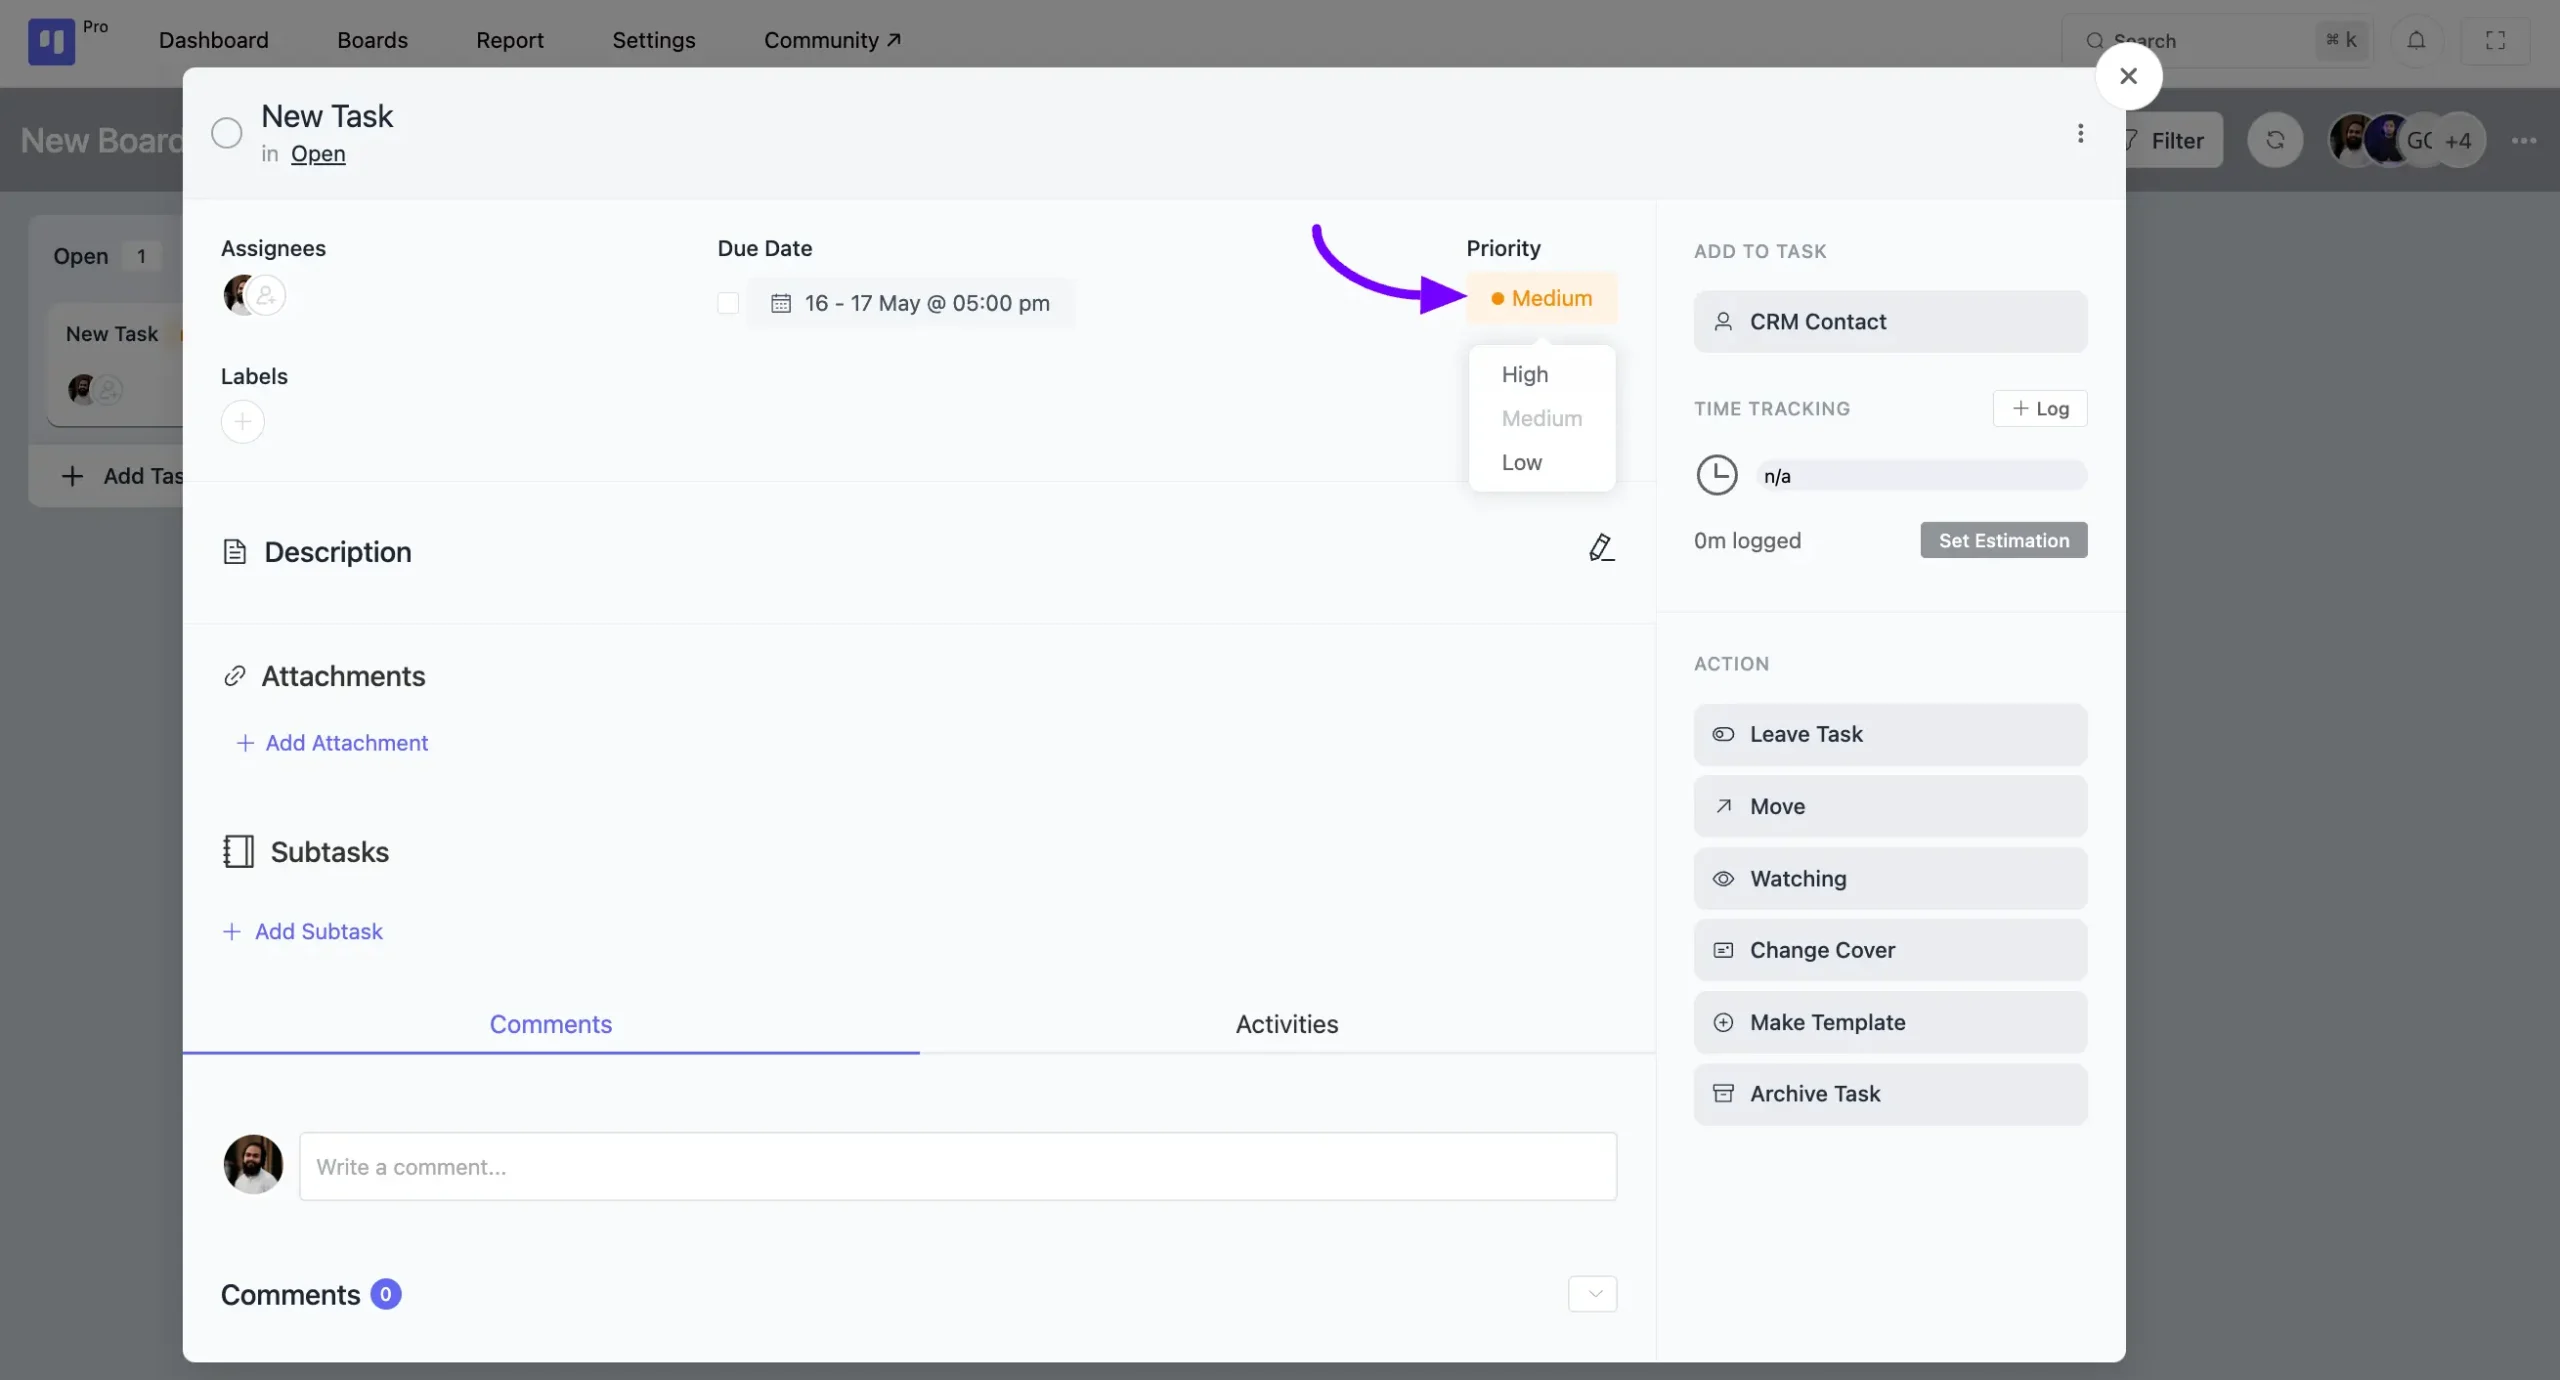
Priority #
Click on the Priority button to designate the priority level of your task as High, Medium, or Low.
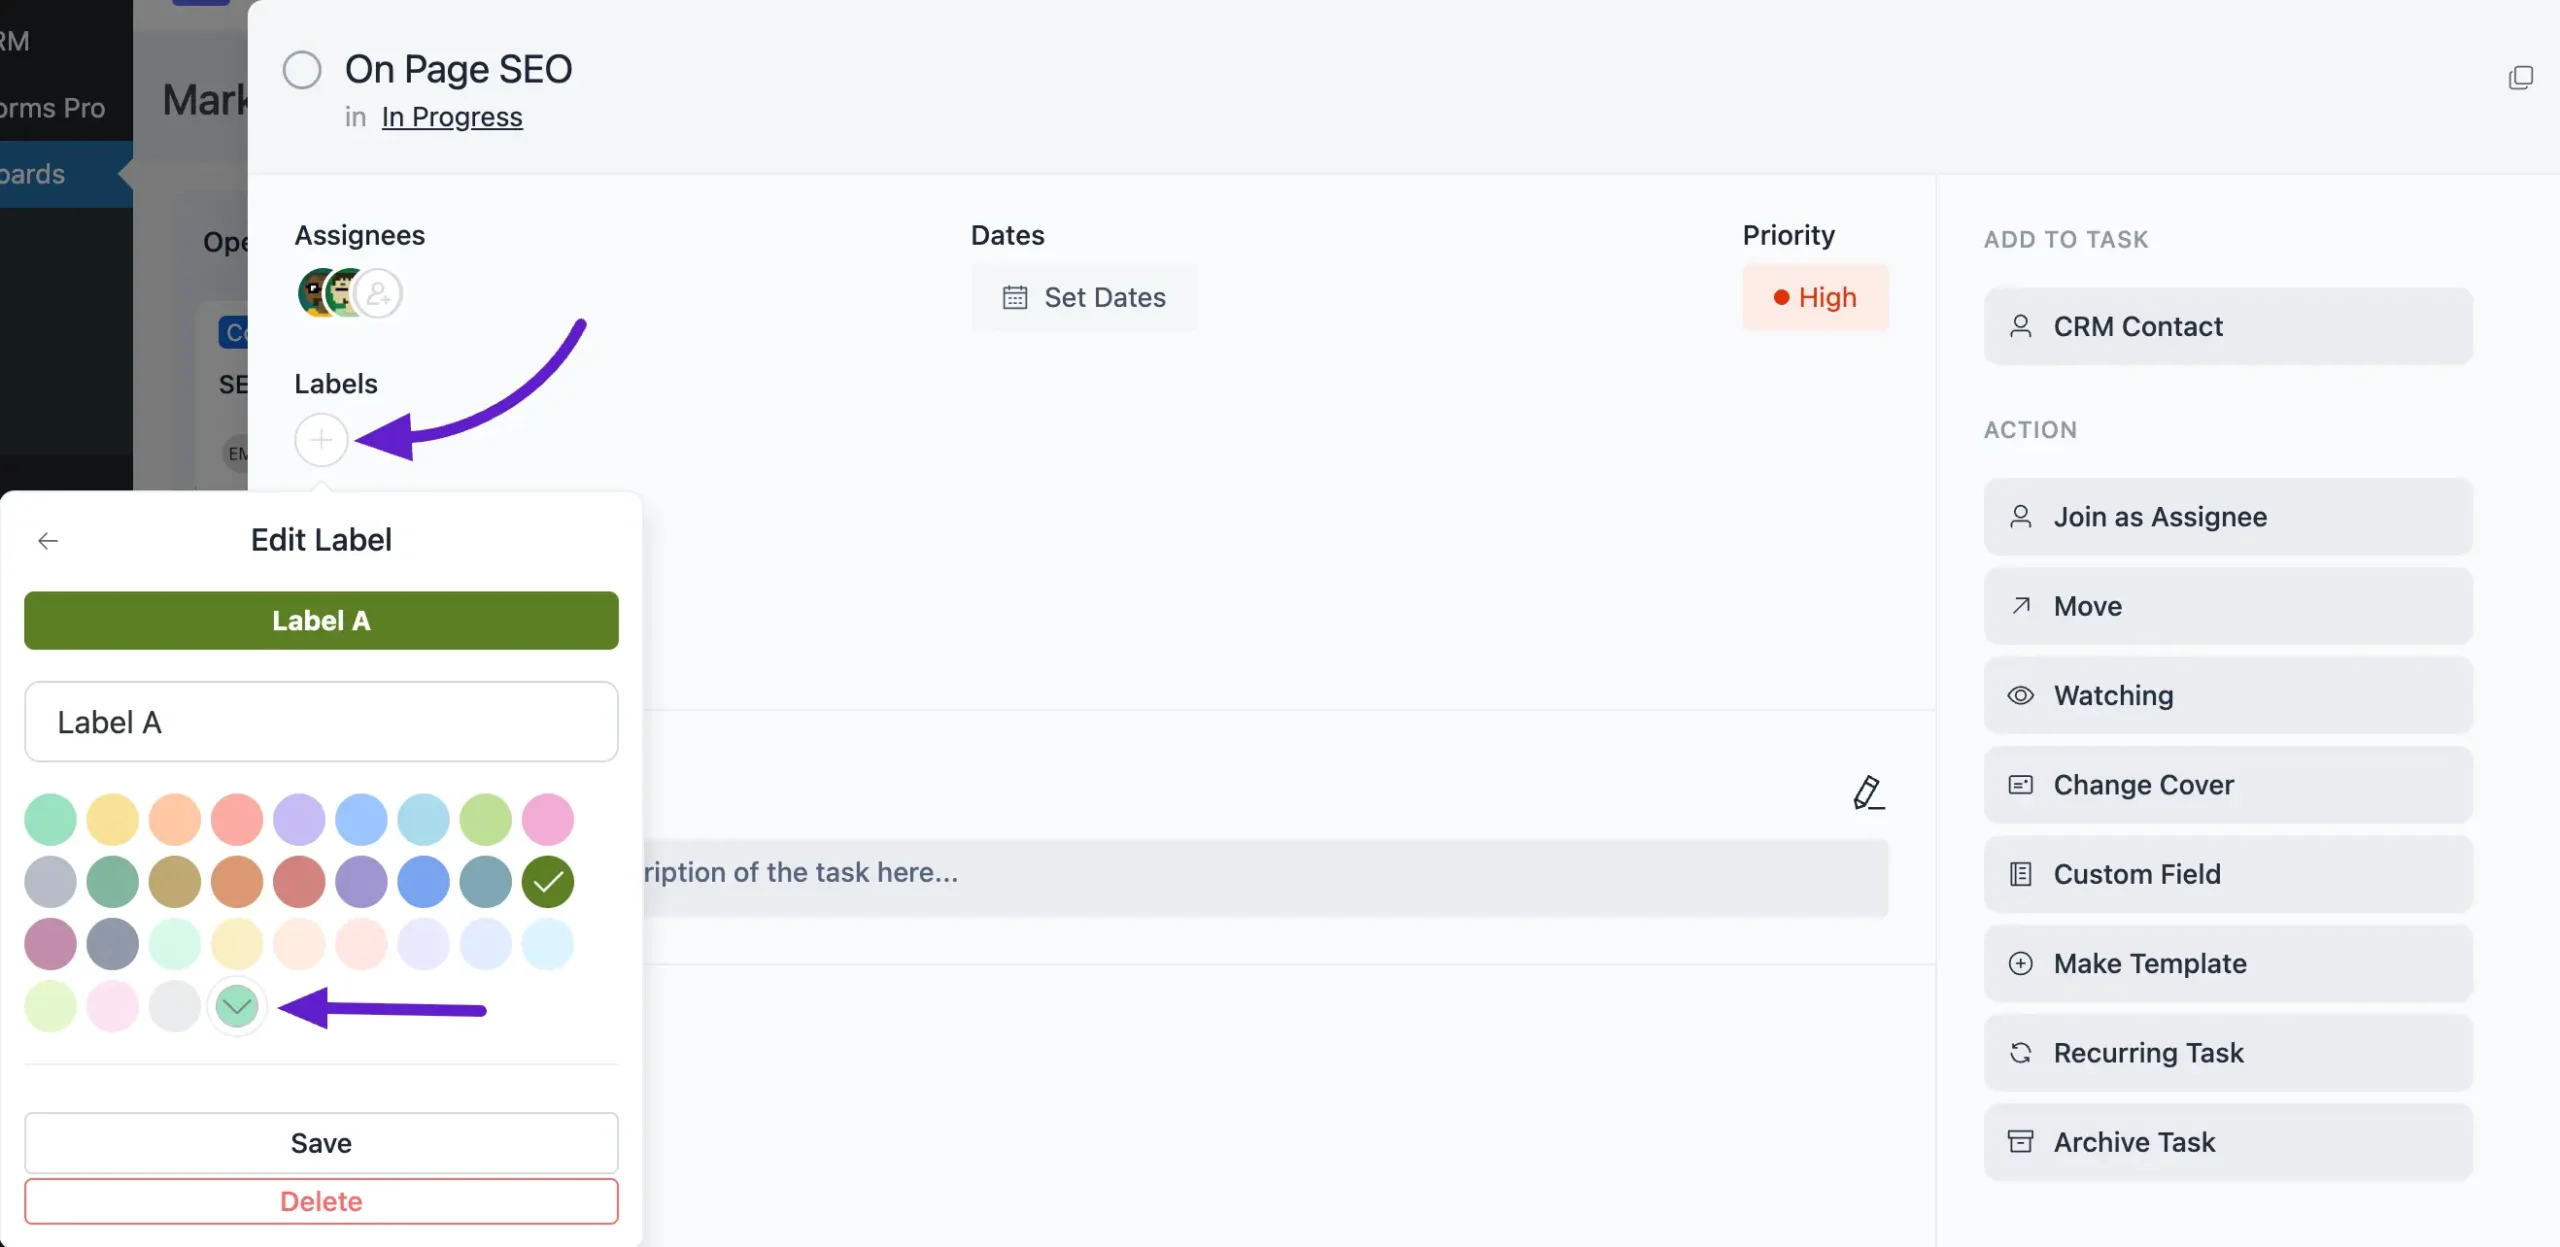
Labels #
You can add a Label to your task based on your needs. To add or create a label, click on the Plus icon button placed under Label.
A pop-up will appear where you need to click on the Add New Label button or Pencil icon button and enter a name for your label. You can also choose a color for your label from the default options or select a custom color of your choice. Now click on the Save button if you want to remove the label, simply click on the Delete button.
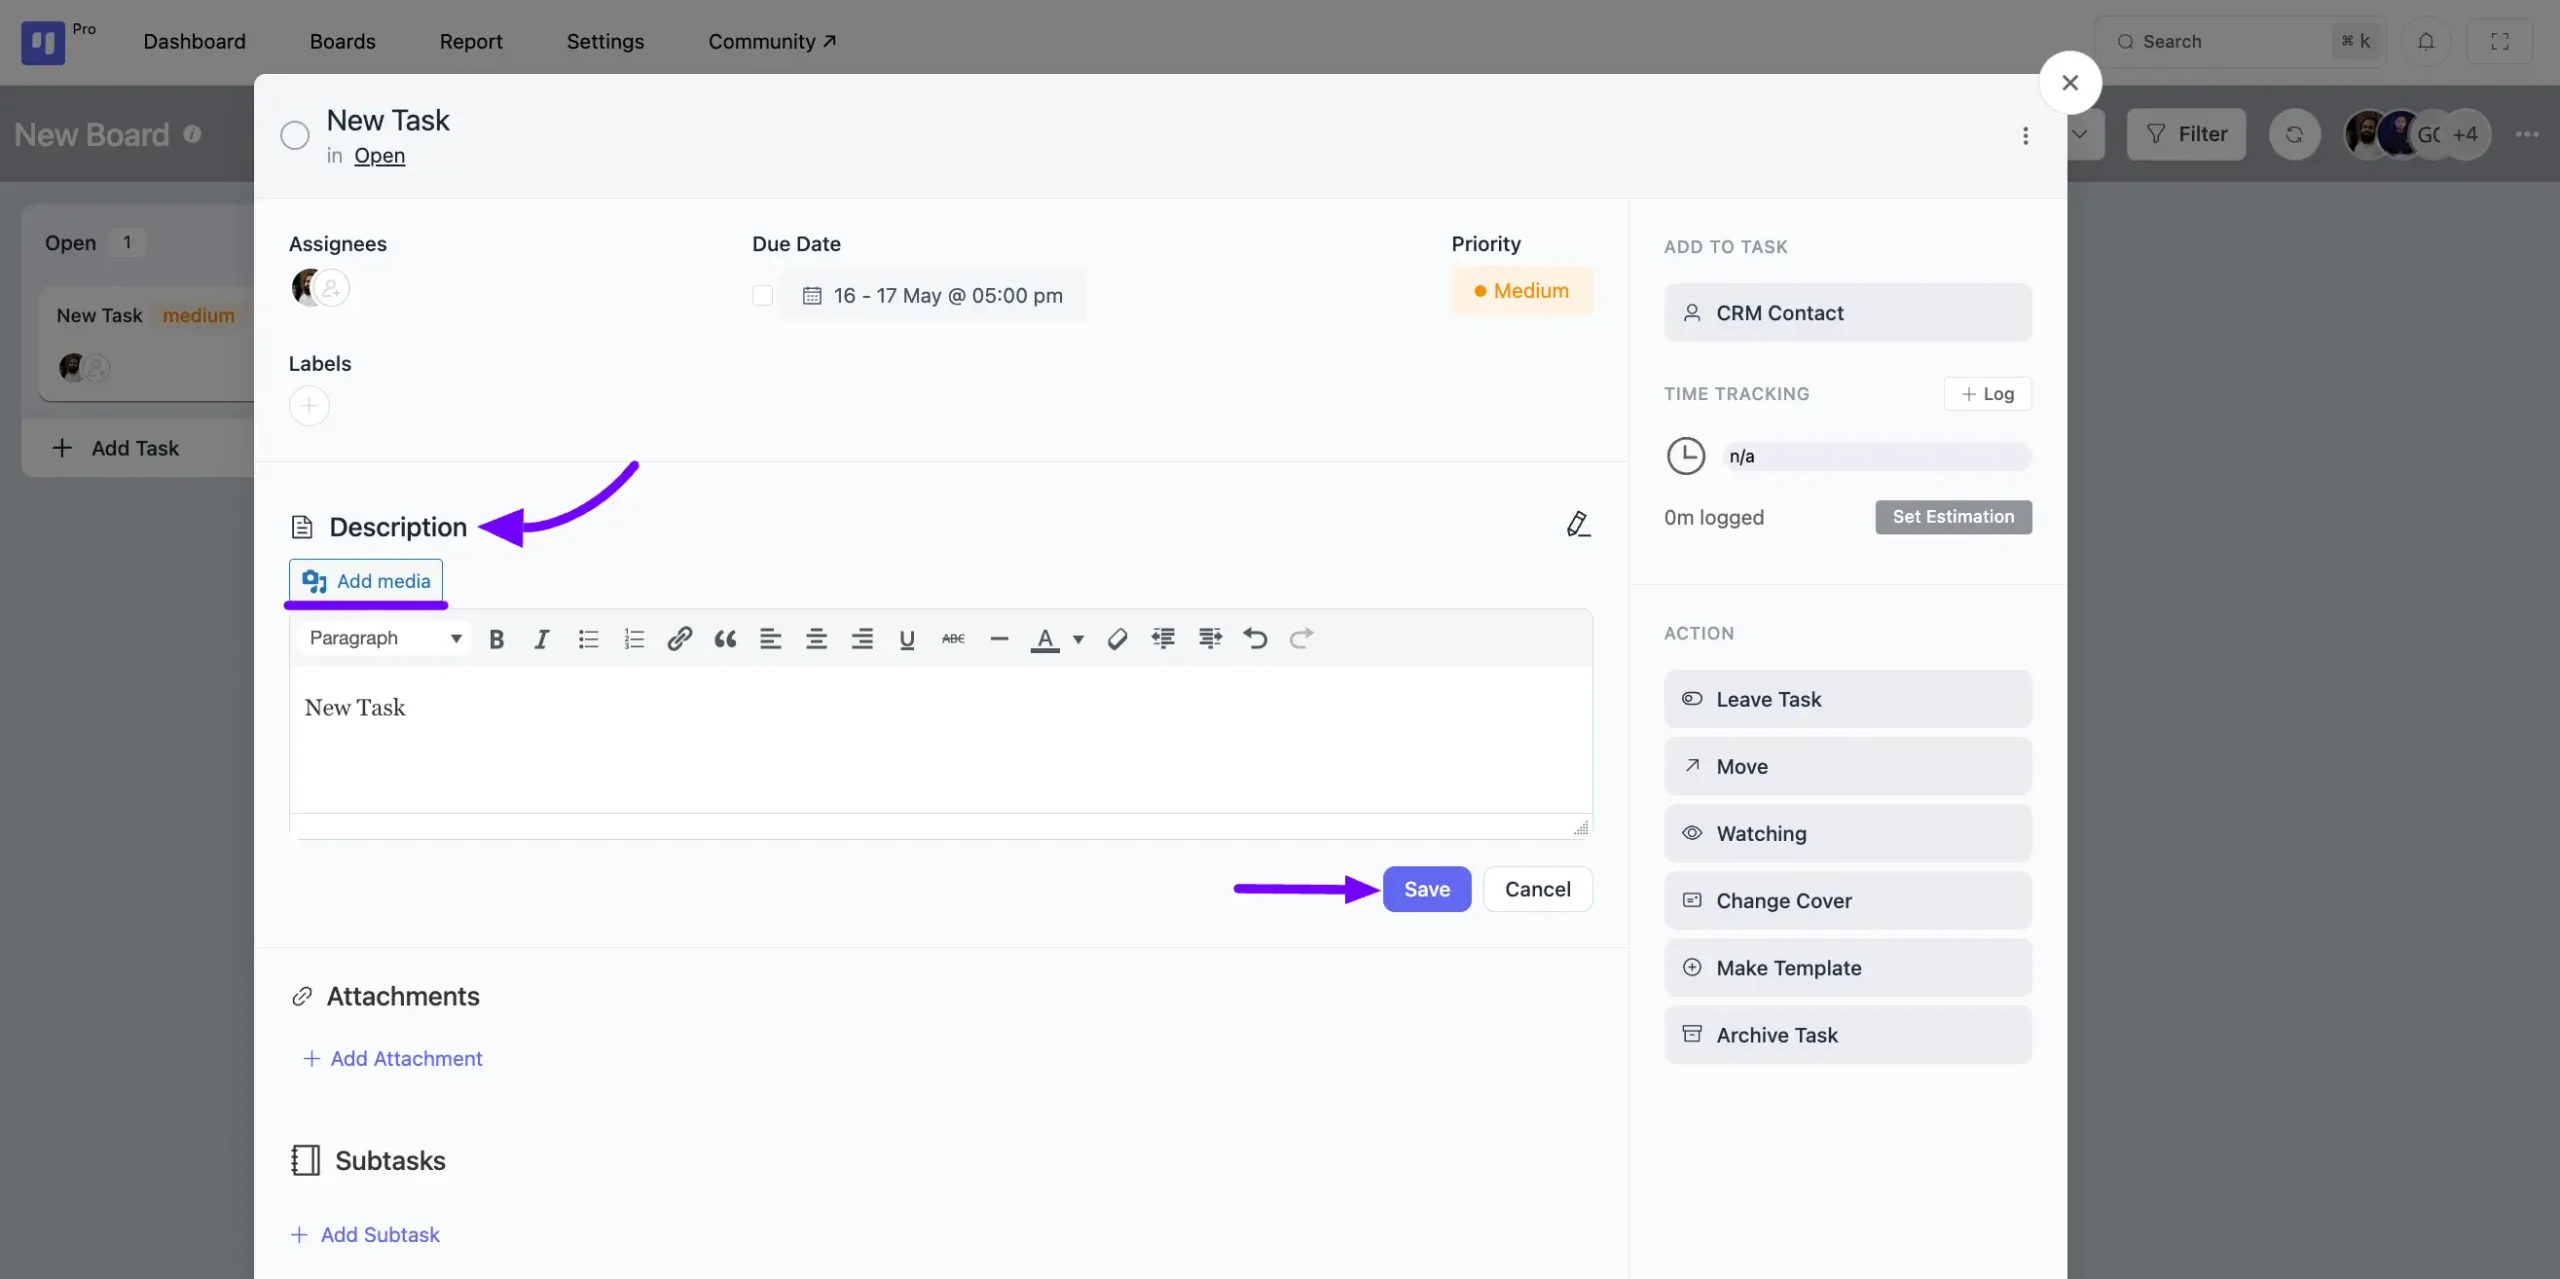
Description #
You can provide a detailed description by utilizing the Add Media and various options available in the Description field. Once you’ve added your description, simply click on the Save button.
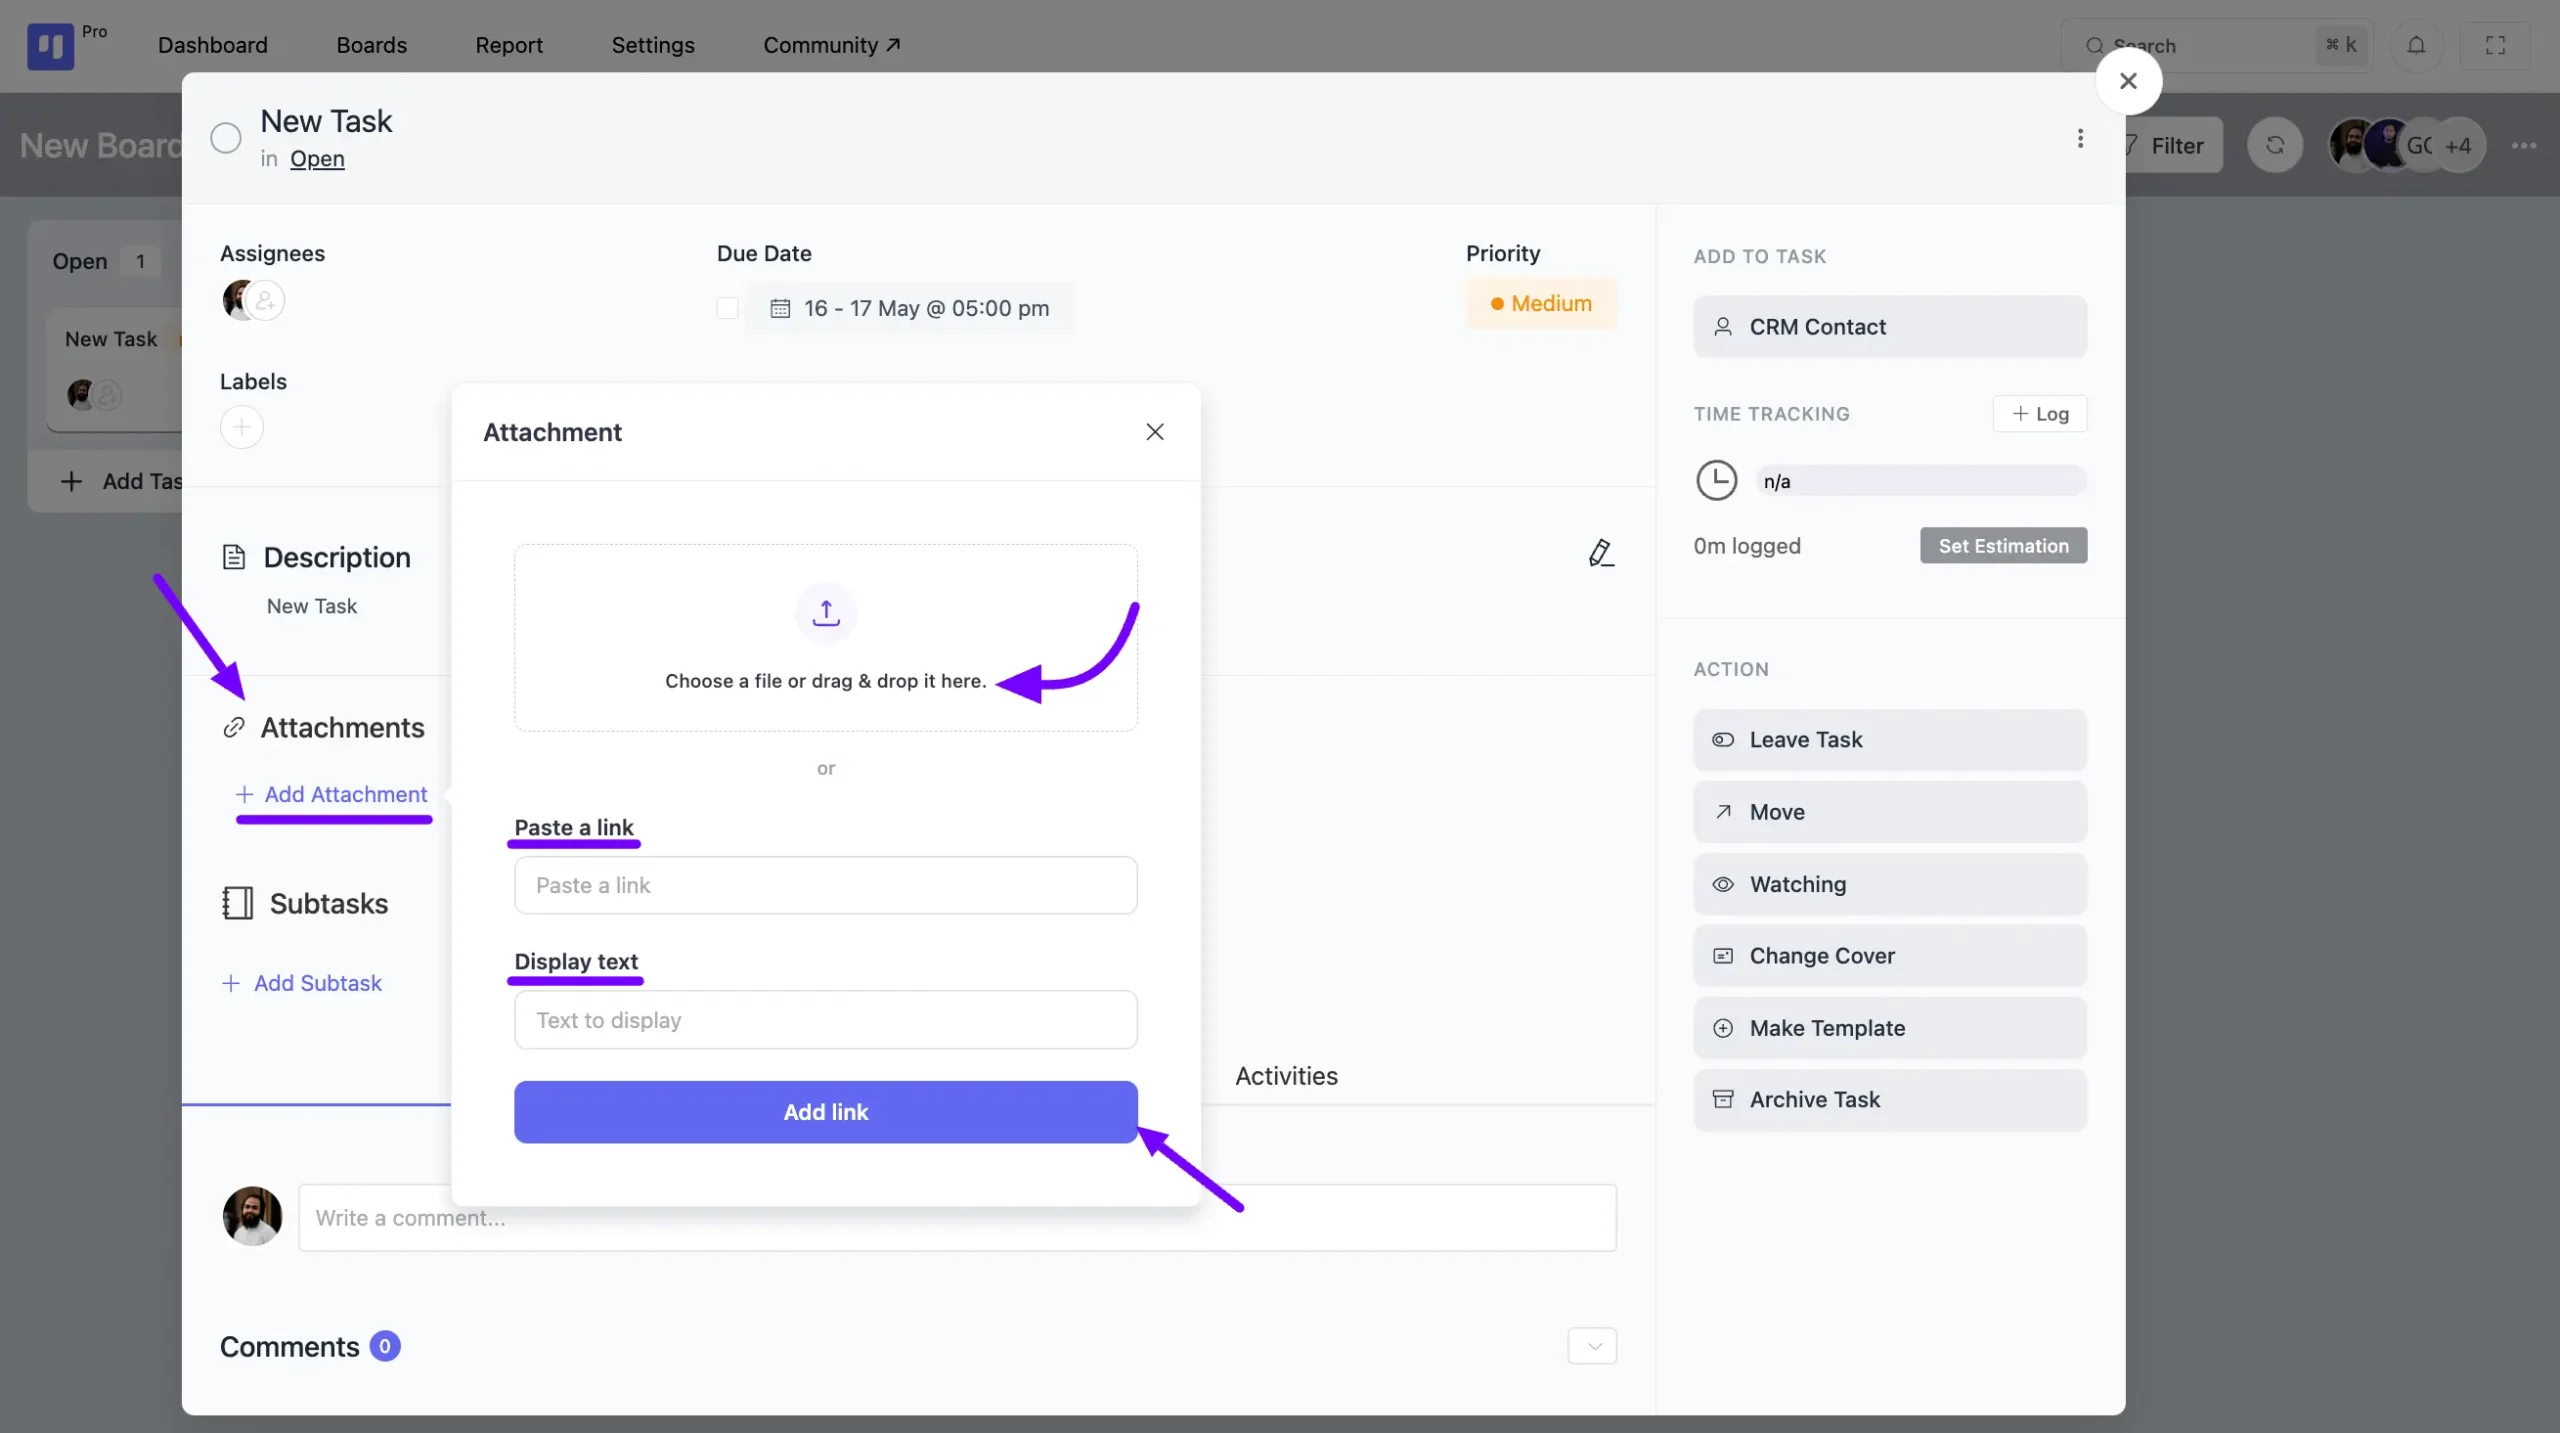
Attachments #
Click on the Add Attachment button, and a pop-up will appear with options to attach any file, link, or text to your task. Once you’ve added the attachment, click on the Add Link button.
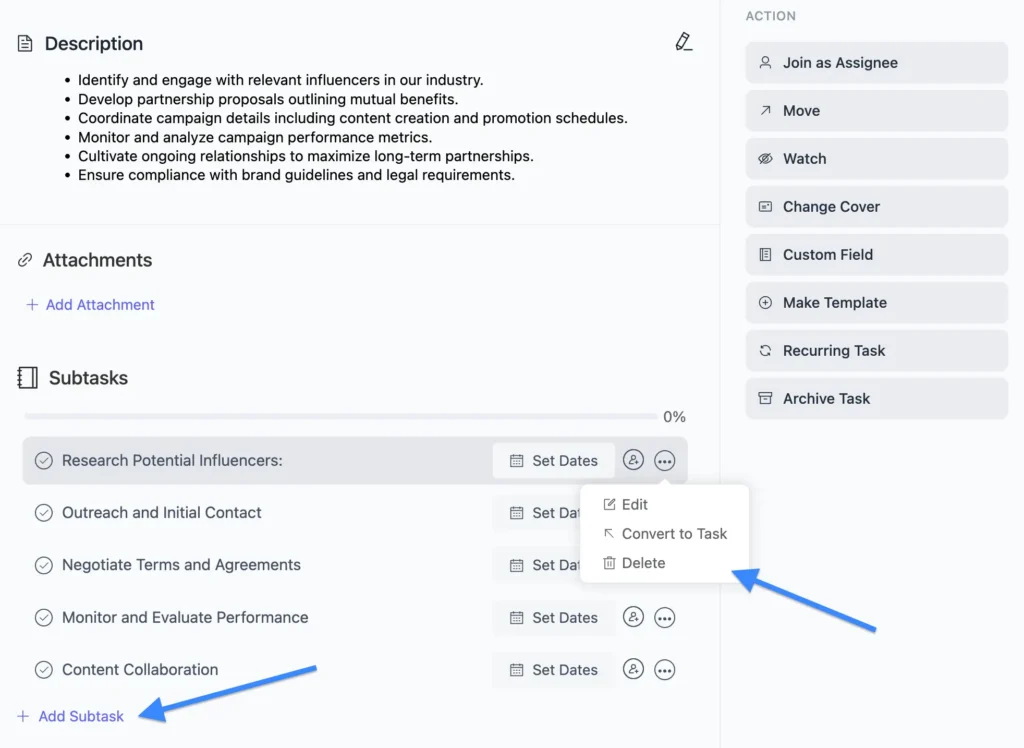
Subtask #
You can add multiple subtasks to your task, each with its own set of options:
Set Dates: You can specify dates for each subtask.
Add Assignee: Assign an individual to the subtask. Only one assignee per subtask is allowed.
Three-Dot Button: Clicking on the three-dot button provides three options for your subtask:
- Edit: It allows you to make changes to the subtask.
- Convert to a Task: Transform the subtask into a main task.
- Delete: Remove the subtask from the list.
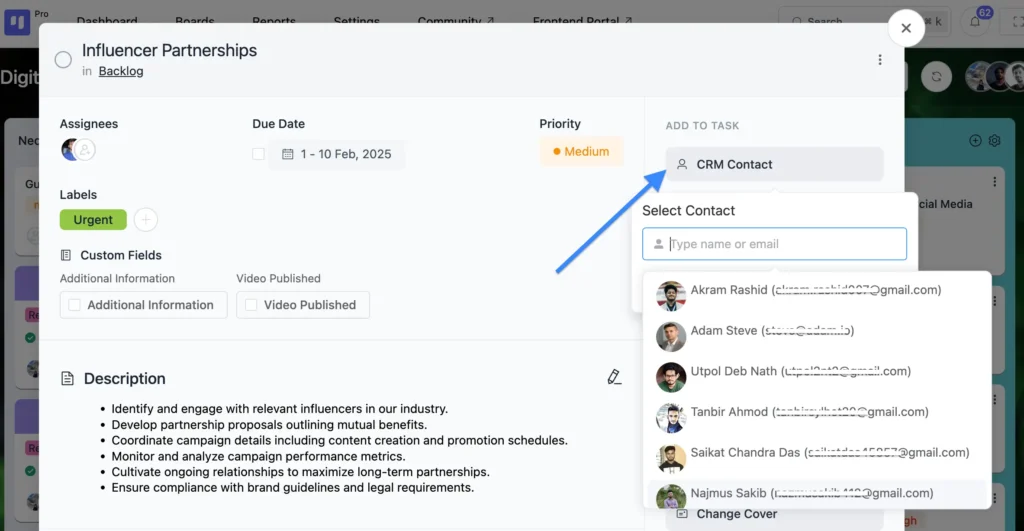
CRM Contact #
Add a CRM contact to your task, click on the CRM Contact button, and choose the CRM Contact you want to associate with your task.
If needed, you can also remove the CRM contact from your task by clicking on the Delete button along with the CRM contact.
Mark as Task Completed #
Click on the Circle icon button to mark your task as completed.
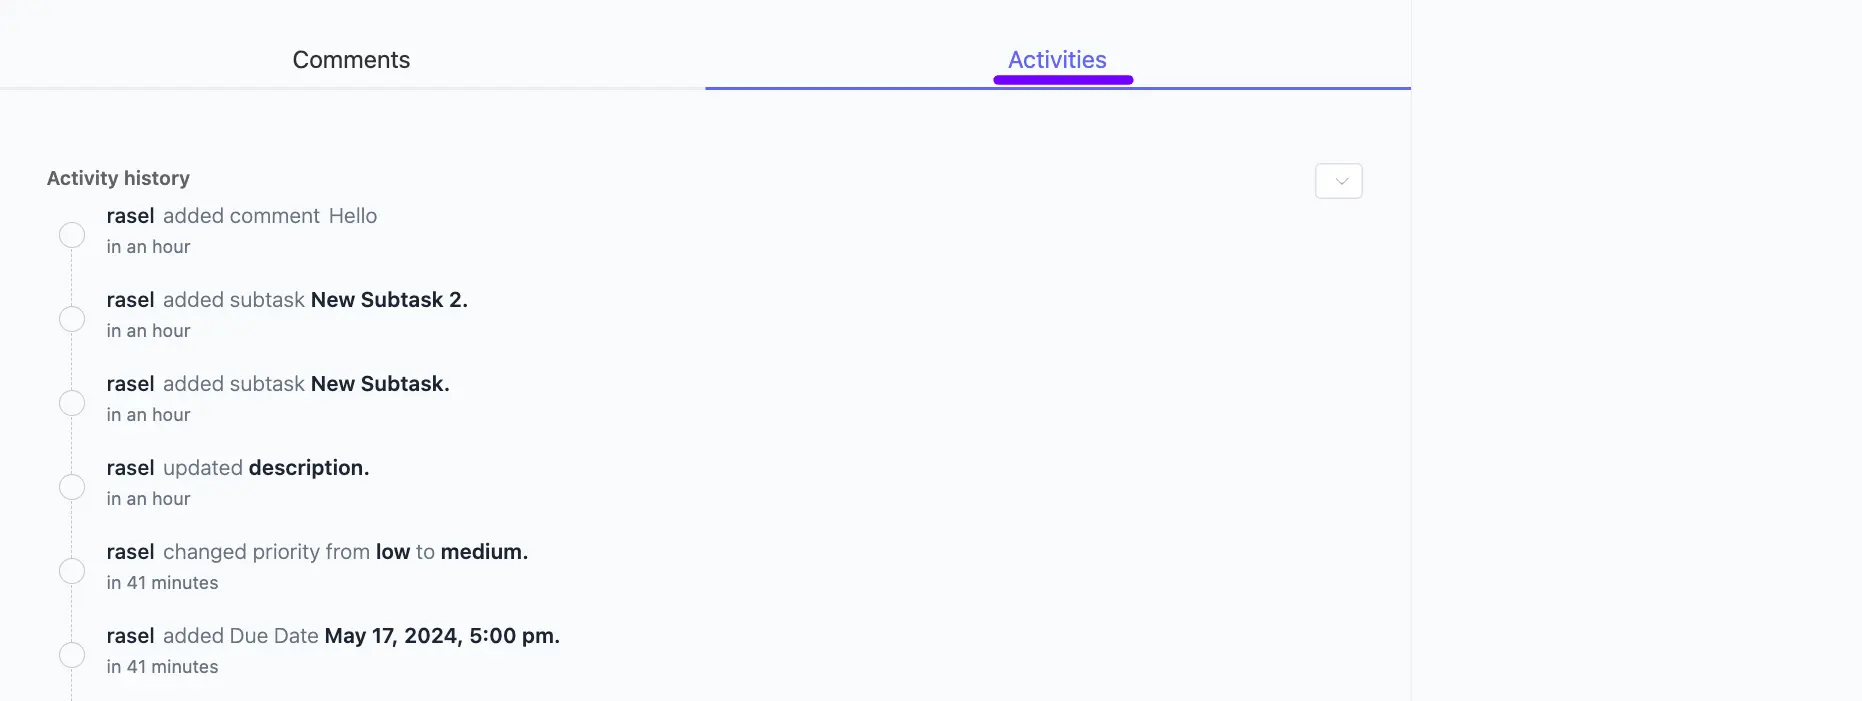
Task Comments and Activities #
Below, you’ll find the Comments and Activities section for the task. Only board members have the ability to comment on tasks and reply to them.
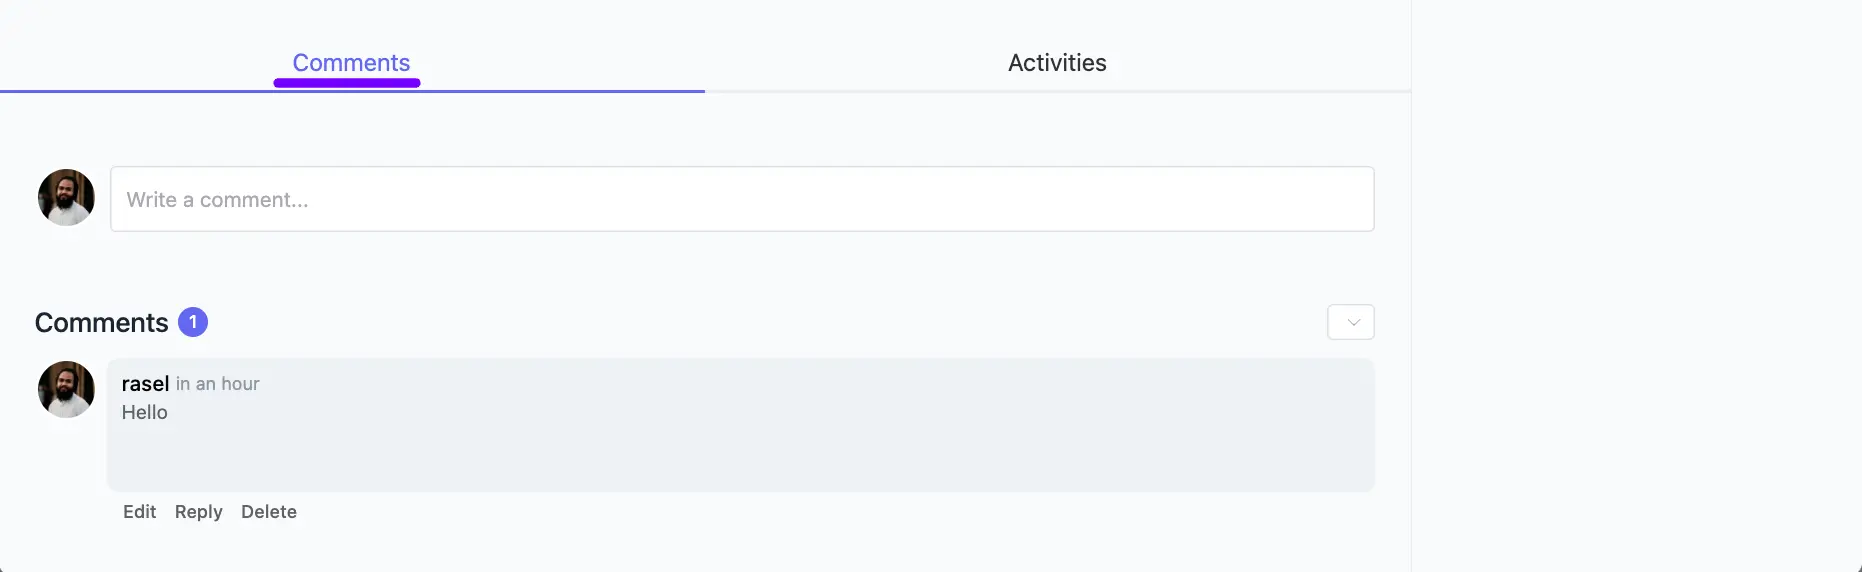
Click on the Activities button and you will see all the Activities related to the Task.