Powered by FluentBoard, Backblaze is a cloud storage solution designed for media hosting, data backups, and application development using S3-compatible APIs. It provides a secure and convenient way to store and access data, simplifying backup management.
By integrating DPMS with Backblaze B2 Cloud Storage, you can directly connect with your cloud storage, ensuring efficient data storage and management.
Backblaze Settings #
To connect DPMS (Powered by FluentBoard) with Backblaze, navigate to the Settings section of DPMS. Then, select the Features and Addons tab from the left sidebar. Locate the Media Storage option and click the Settings button next to it.
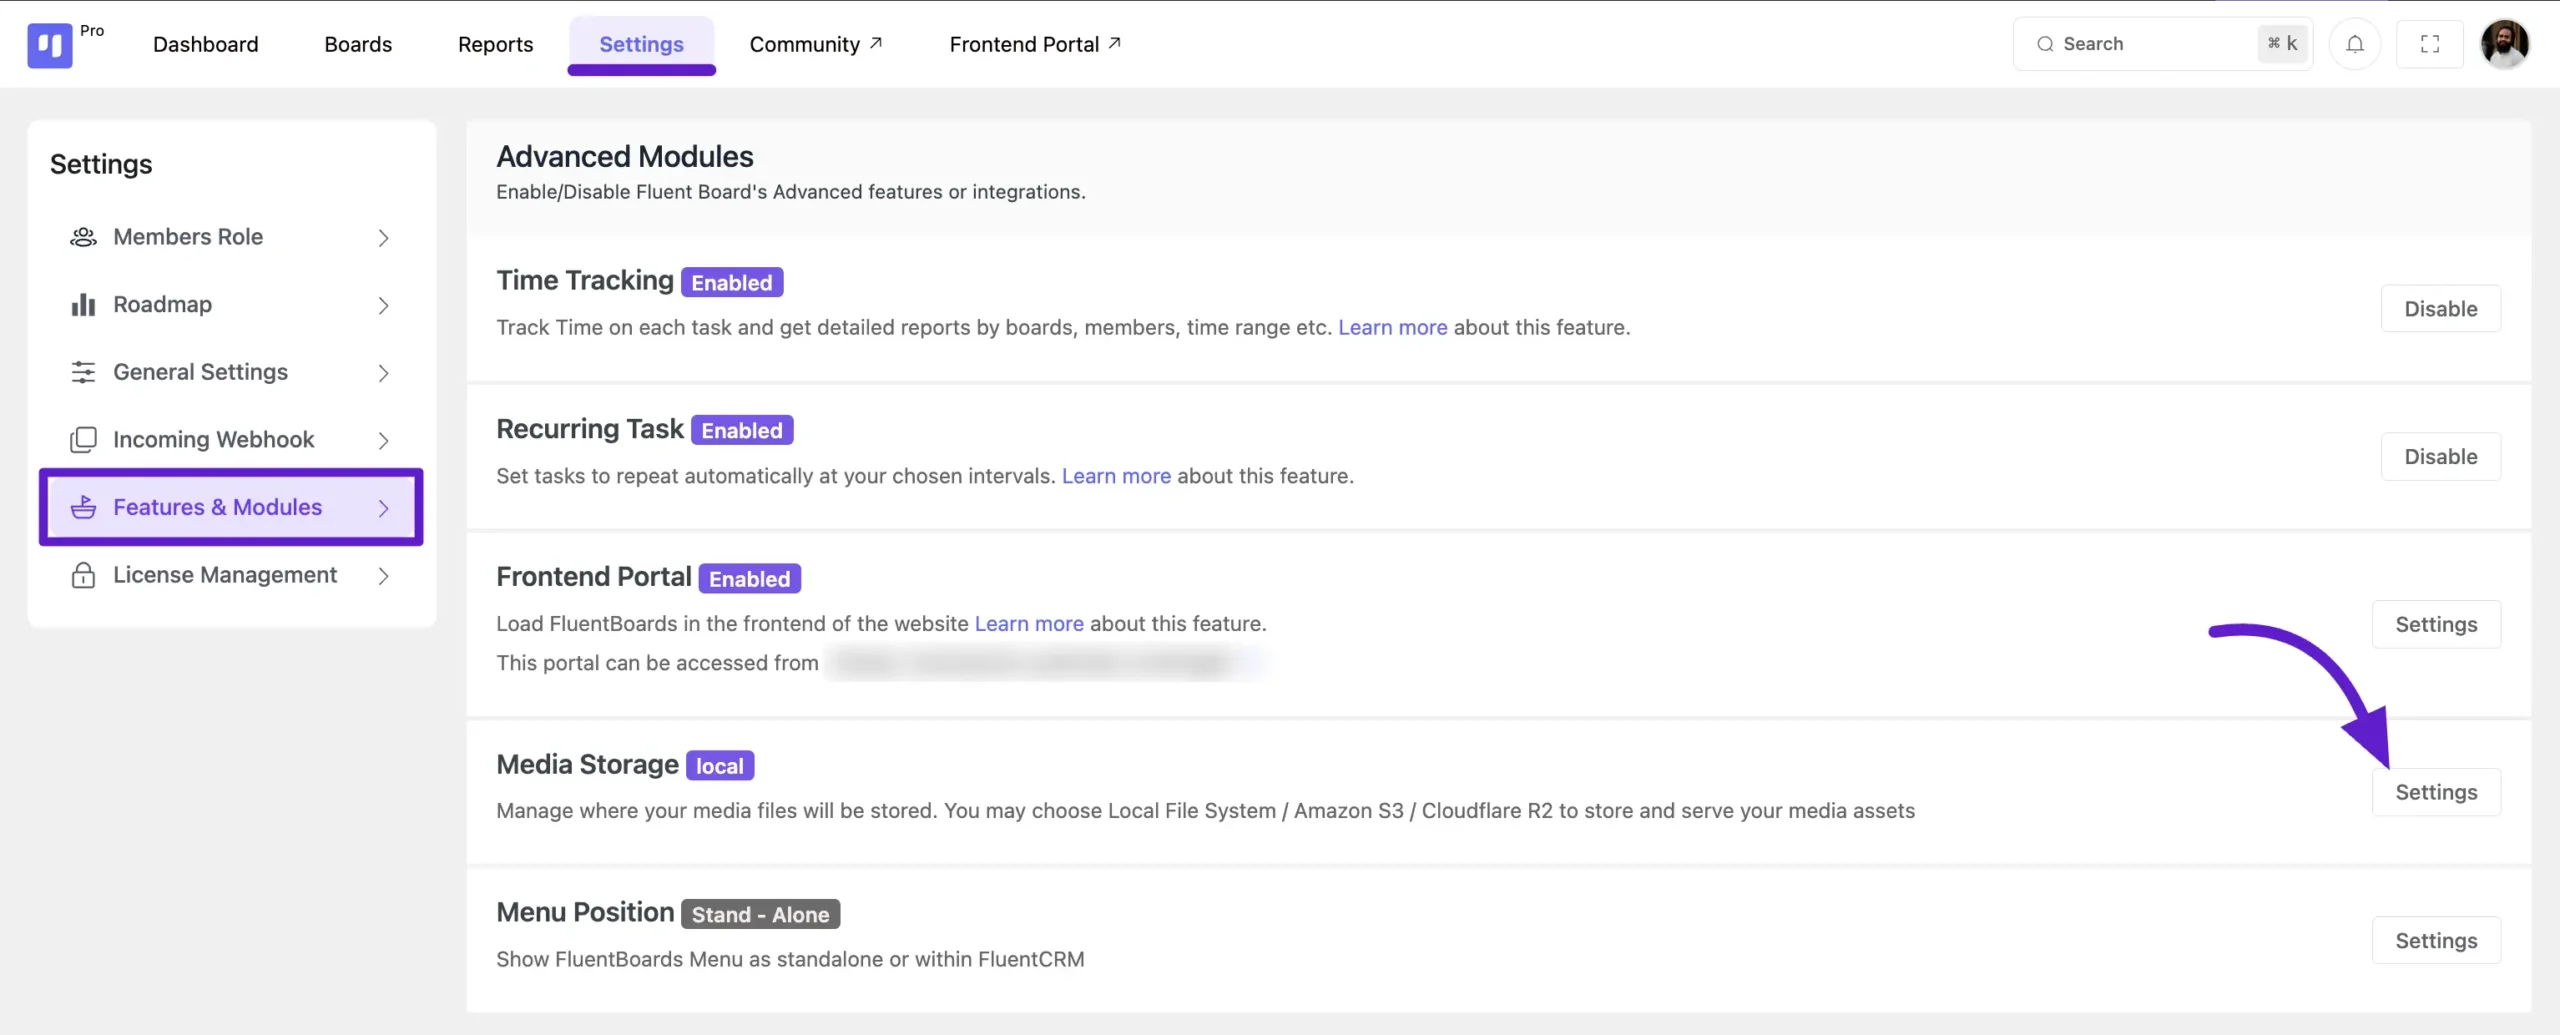
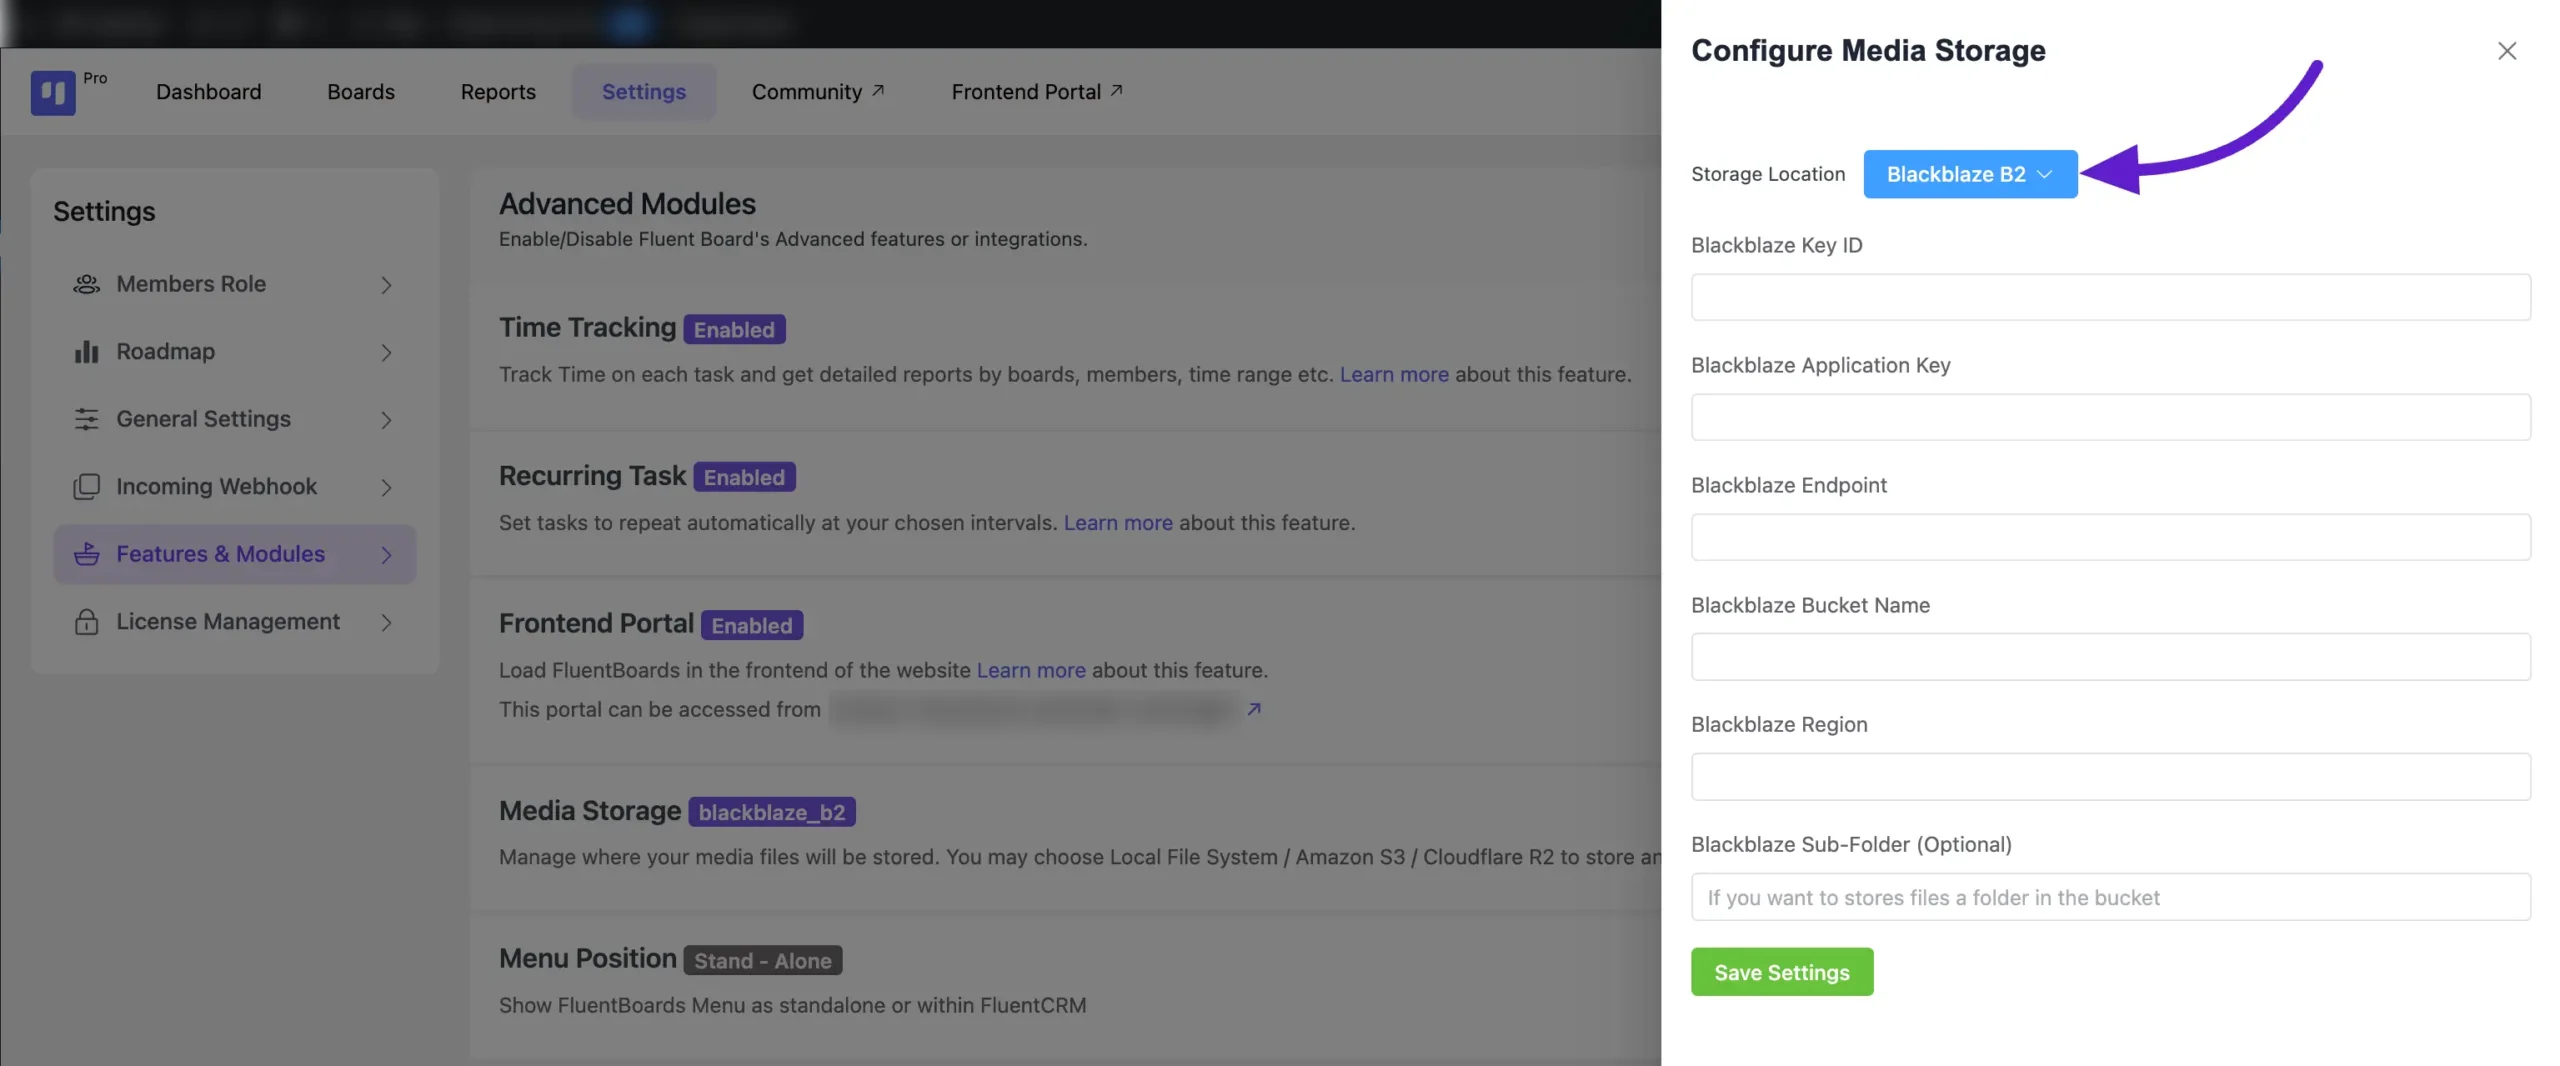
A pop-up will appear. From here, select Storage Location: Backblaze B2 from the dropdown menu. You’ll now need some credentials to connect with Backblaze.
Let’s get started with collecting the required credentials.
Get Backblaze Creadentials #
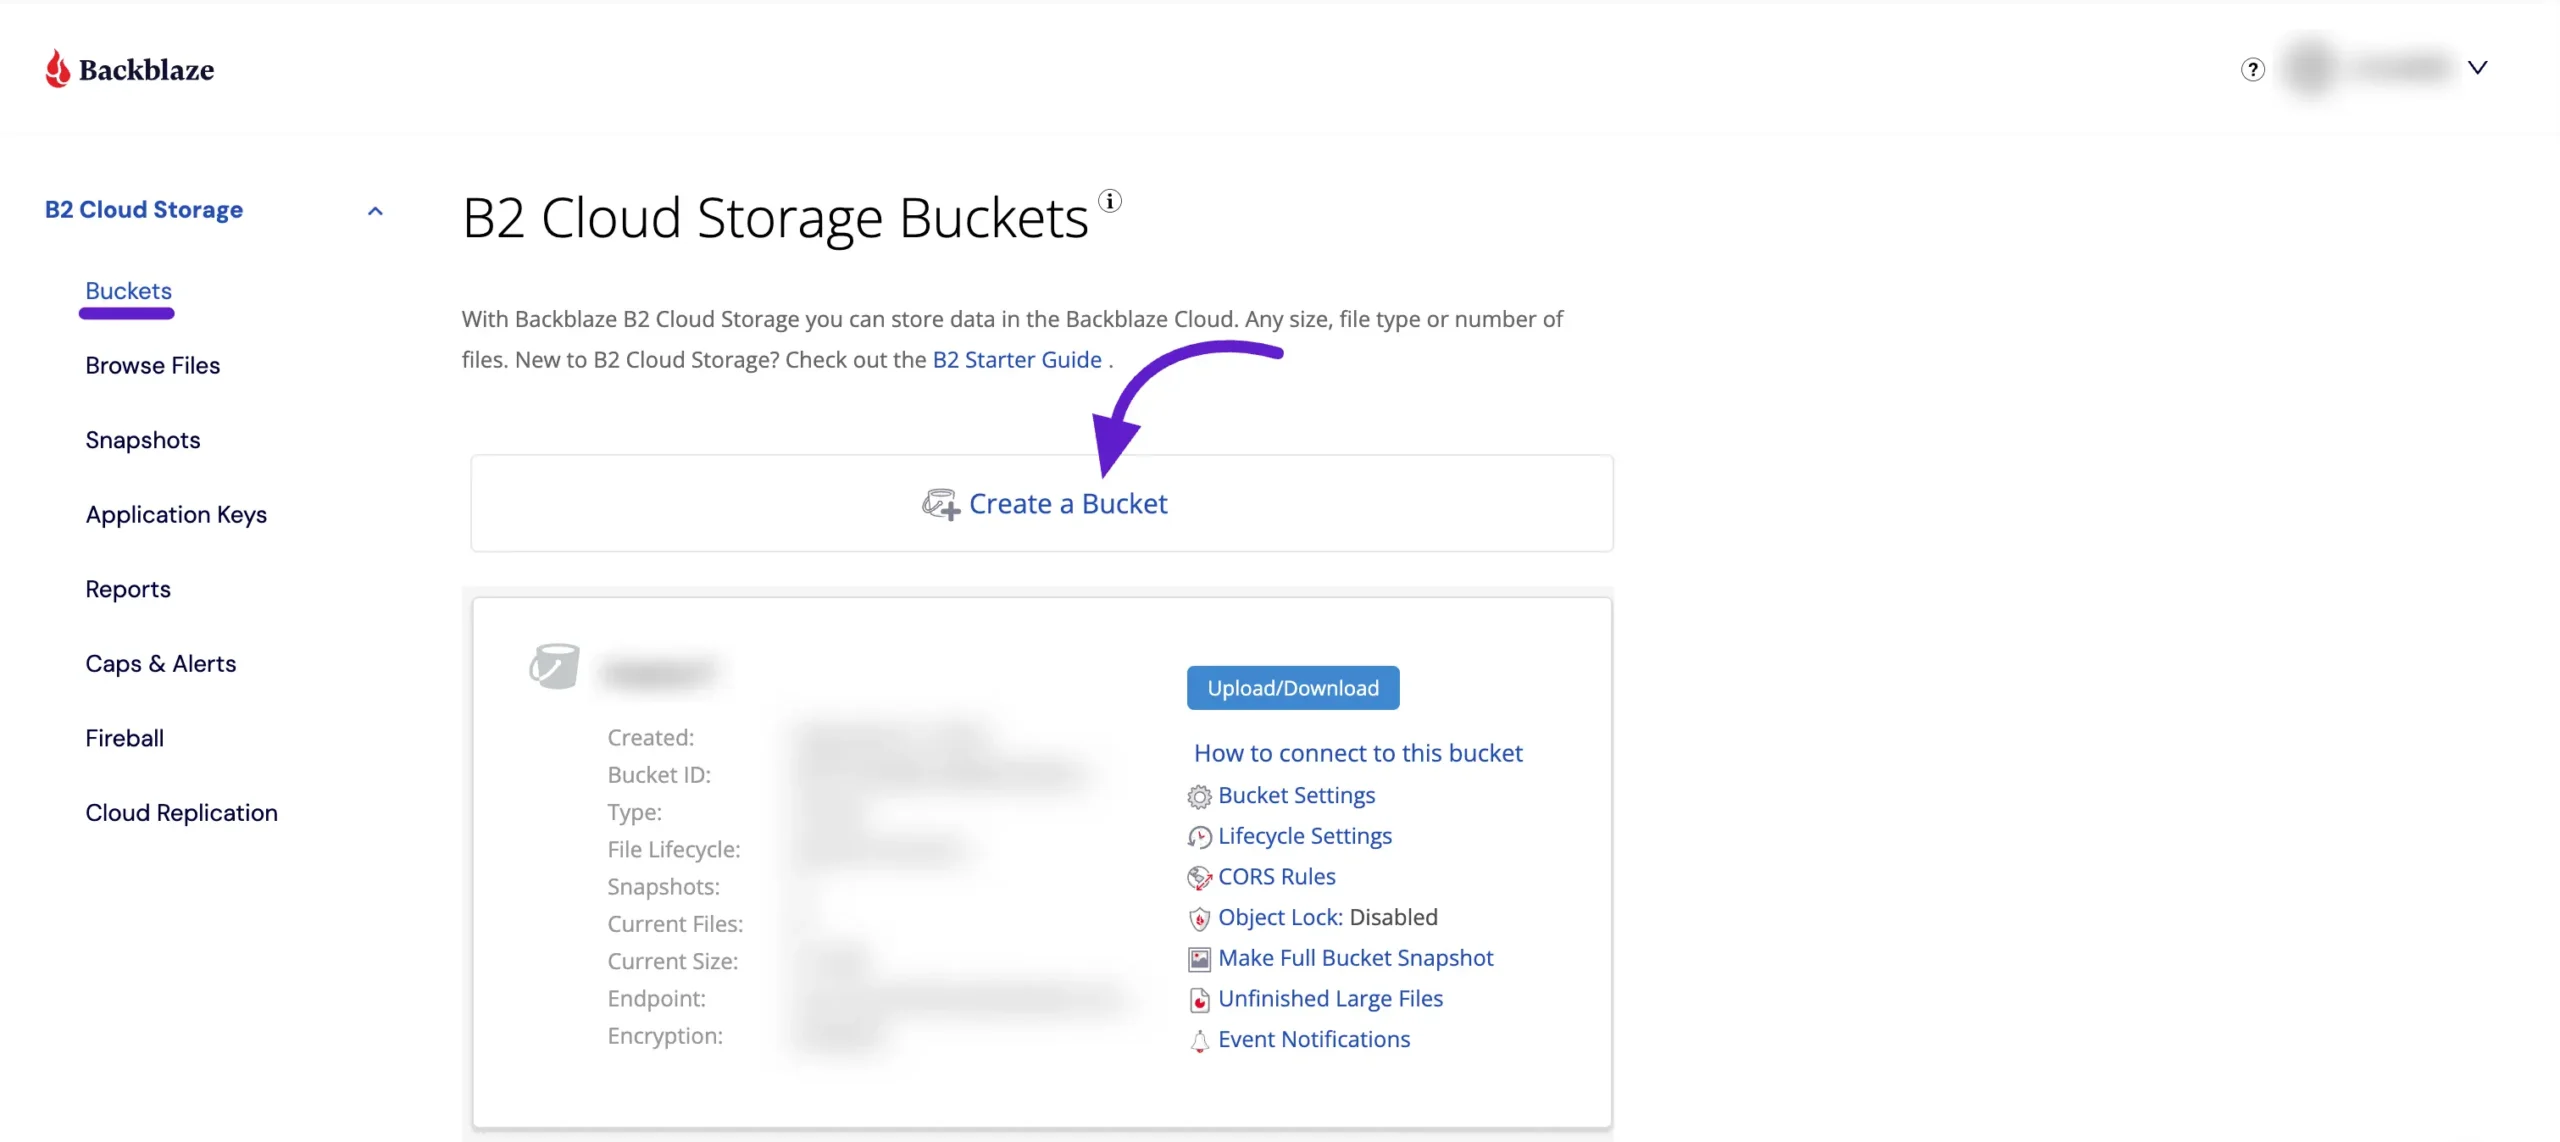
Log in to your Backblaze account. Once you’re in, you’ll need to create a Bucket to upload and save your files. Go to the Buckets section from the left-hand sidebar and click on the Create New Bucket button.
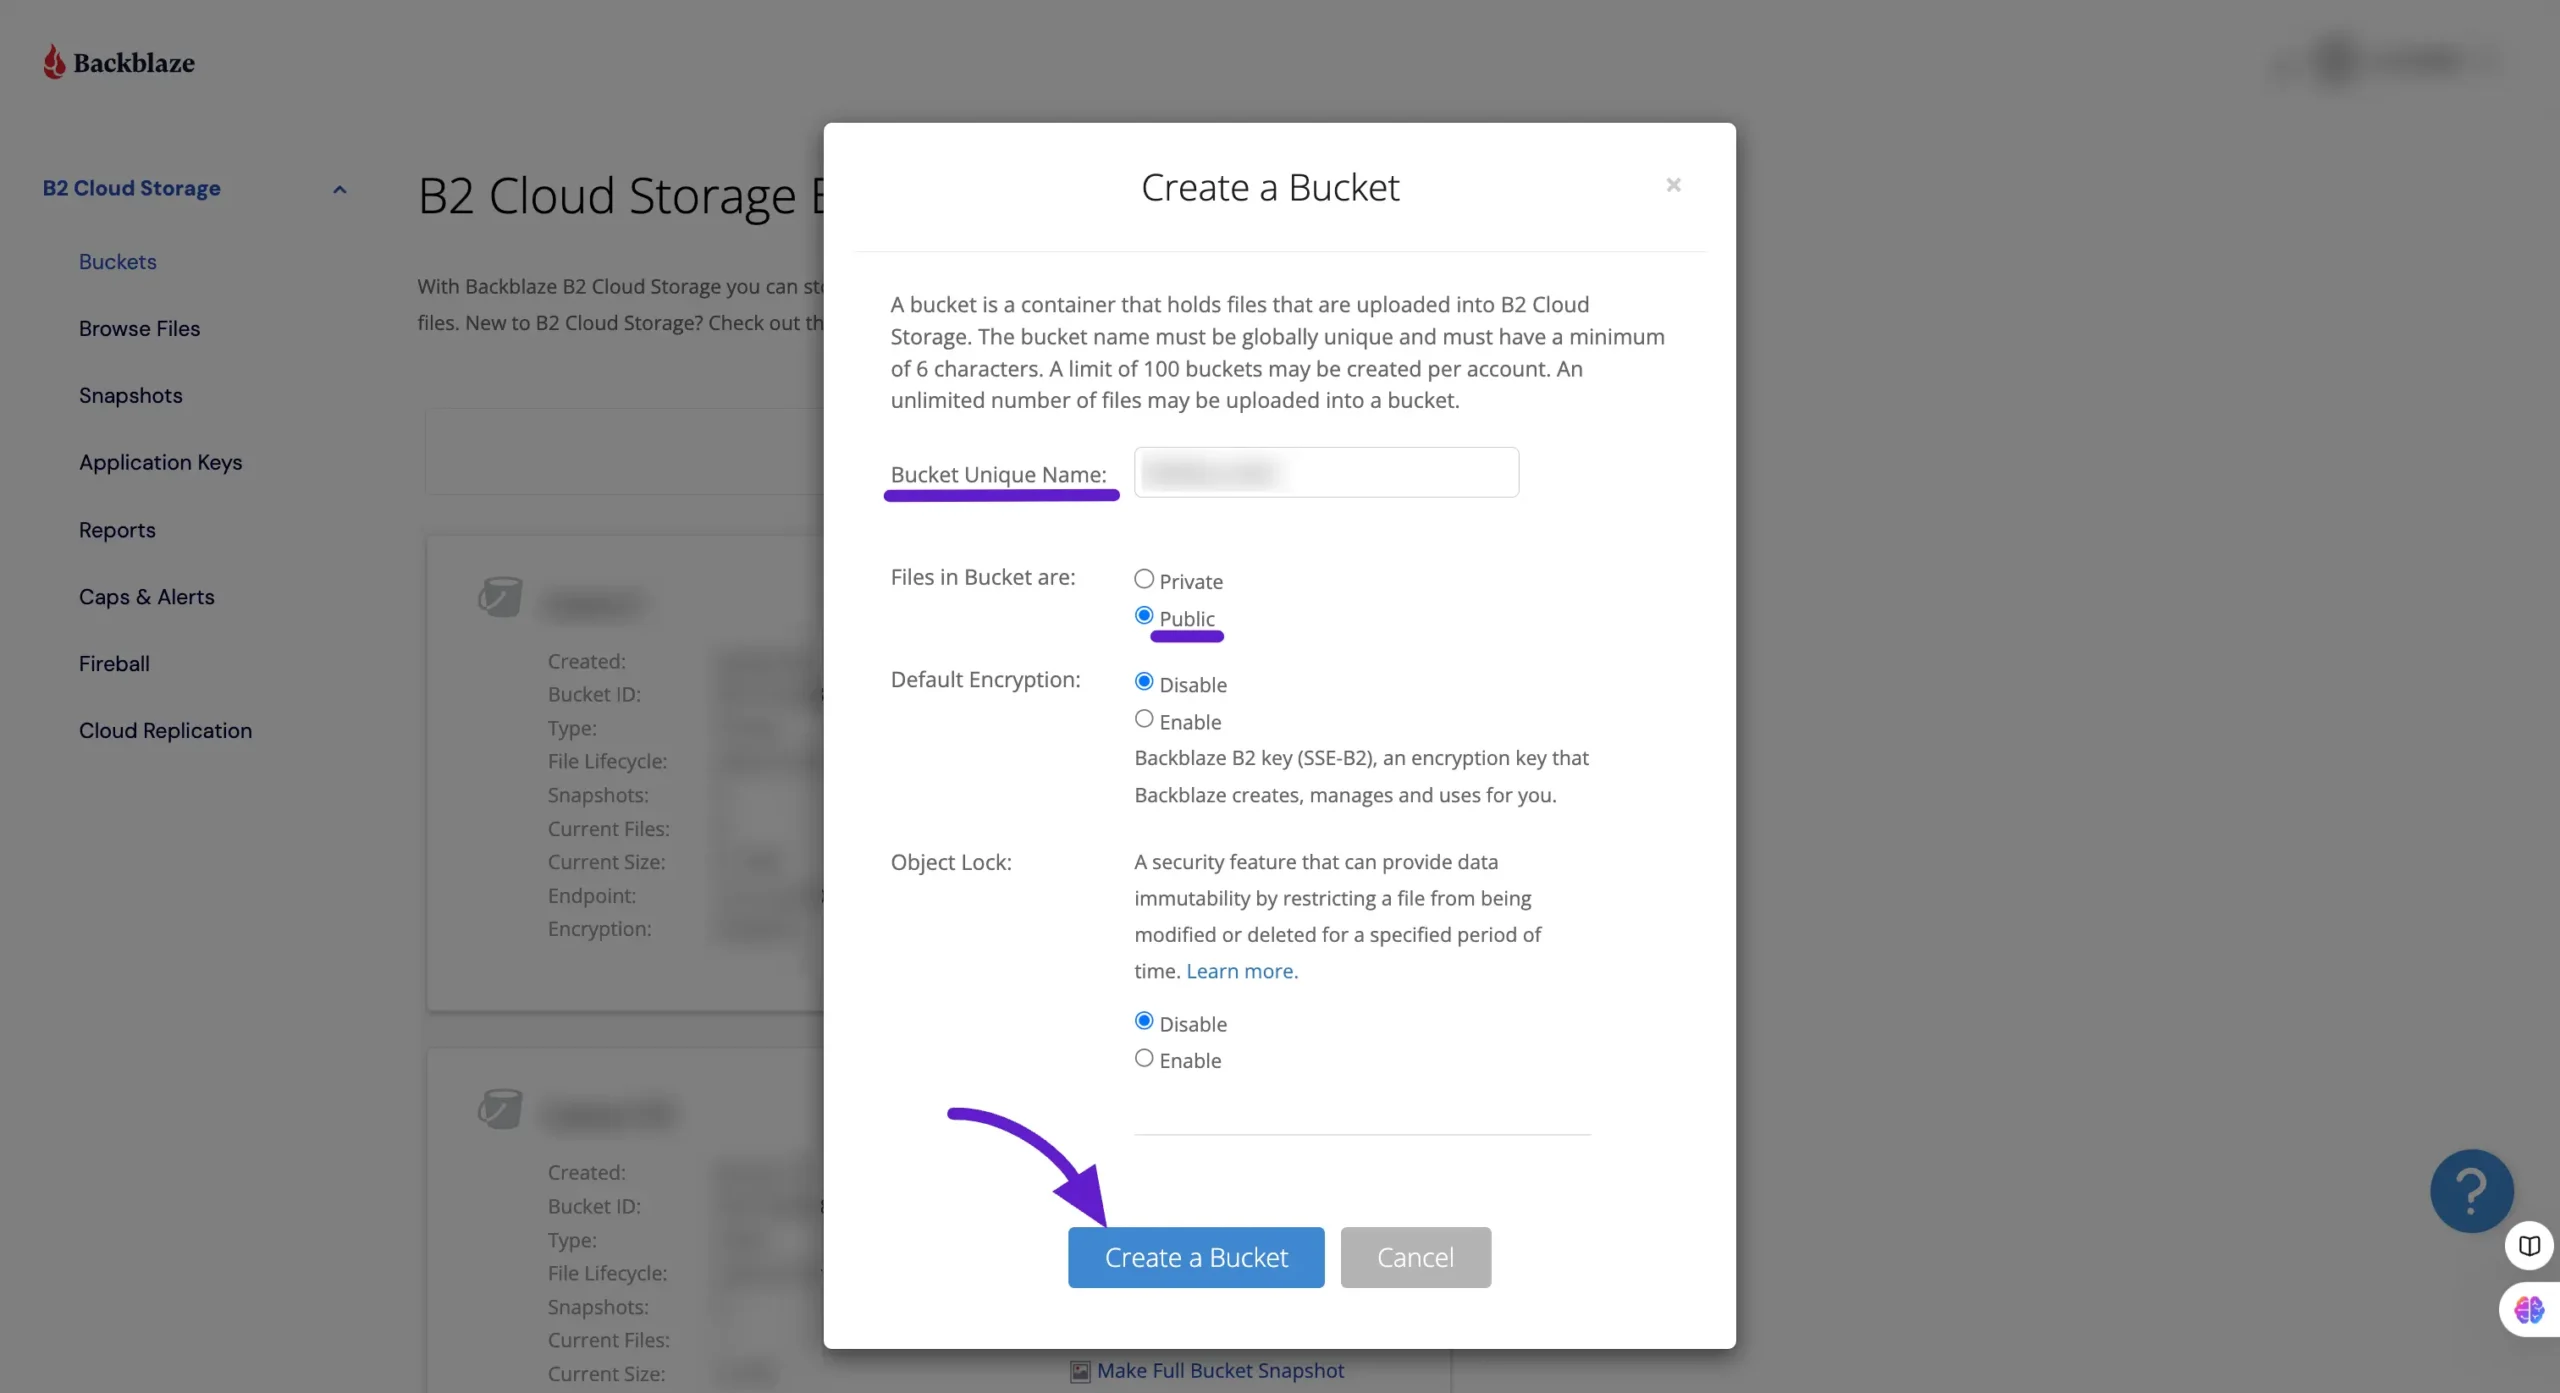
After clicking the Create New Bucket button, a pop-up window will appear where you can configure your bucket settings. Enter a Bucket Name that reflects its purpose (e.g., “FluentBoardsData”).
You must have to set the Files in Bucket option to Public. This ensures that files stored in the bucket are accessible as needed.
Once configured, click the Create a Bucket button to finalize the setup.
Now you will see that your bucket has been created, and some credentials of your bucket will be displayed.
From here, you need to copy the Endpoint, which is one of the necessary credentials. Make sure to copy the Endpoint and save it for later use.

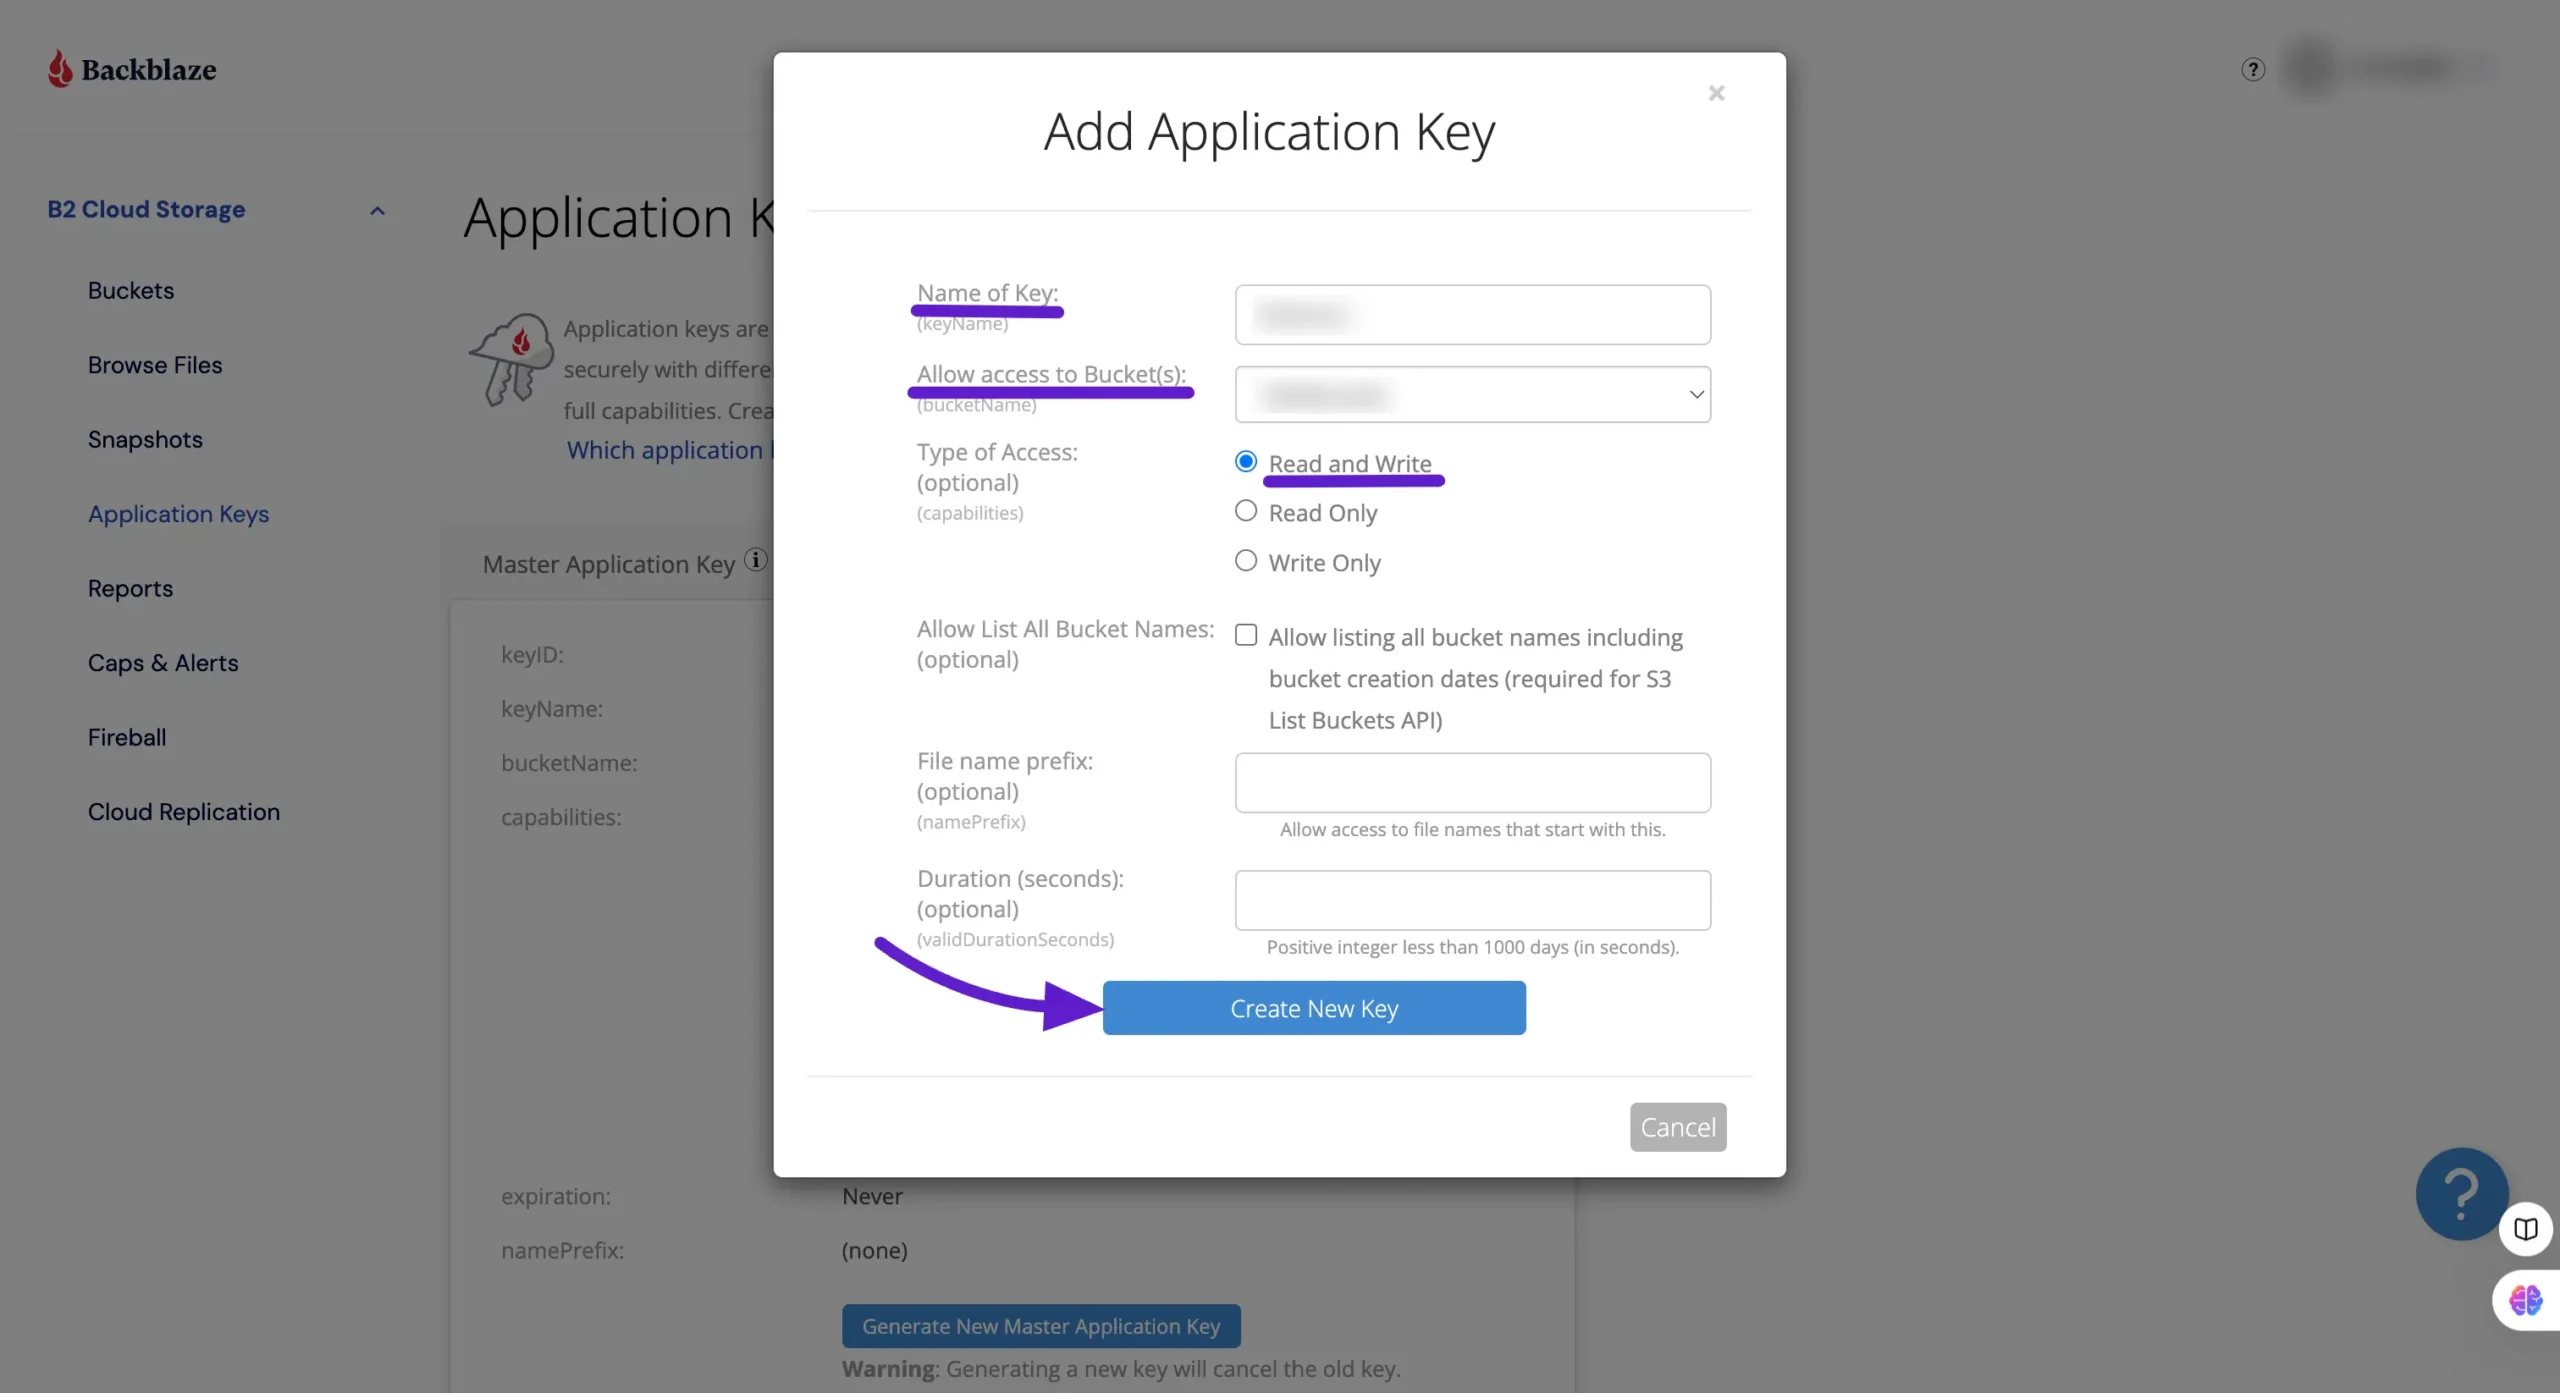
Select the Application Keys from the left sidebar and then you will see a button Add a New Application Key, click on it.

A pop-up will arrive to give the details about the Application Key. Here, first, you need to give the Key Name in the dedicated key name field. Then select the Bucket that you have created earlier.
After that, in the Type of Access, select Read and Write and then click on the Create New Key button.
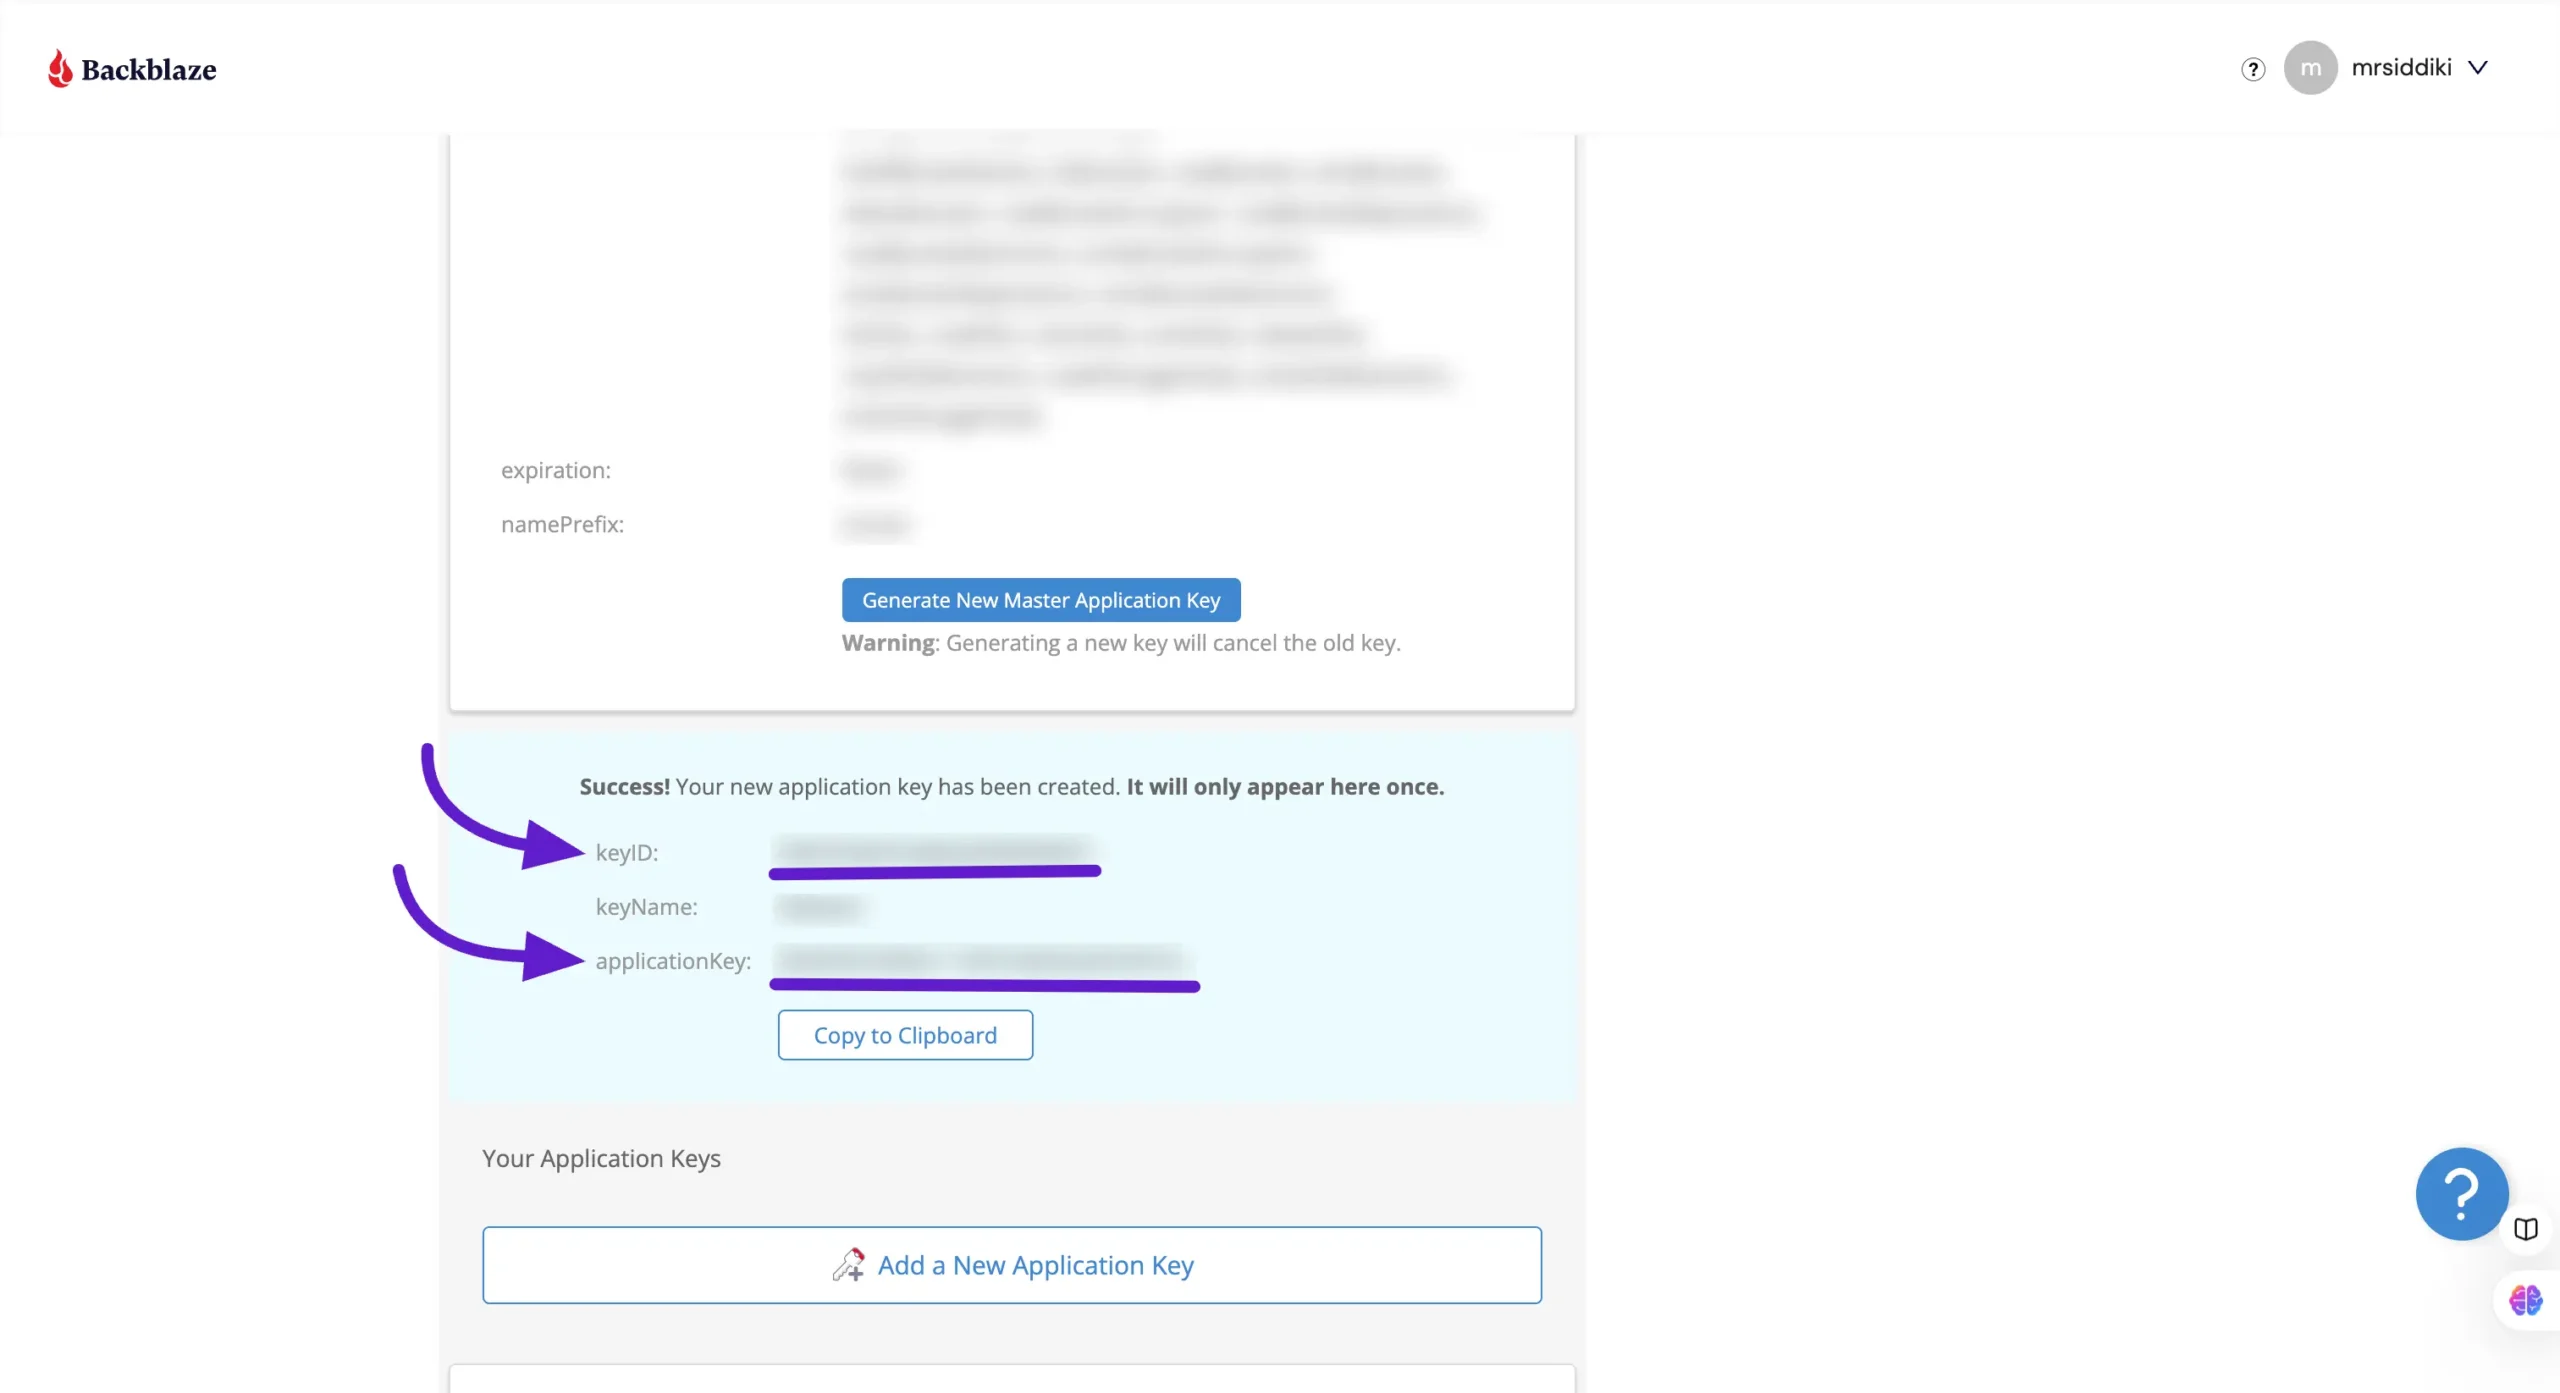
Now you will see that your Key ID and Application Key will be given here.
Note that this pop-up will appear only once. So make sure to copy the credentials as soon as the pop-up arrives.
Configure Backblaze in DPMS #
Now, paste the credentials into the DPMS (Powered by FluentBoard) Backblaze Configuration section. When you enter the Endpoint of Backblaze, the Region and Bucket Name fields will be automatically populated based on the Endpoint details.
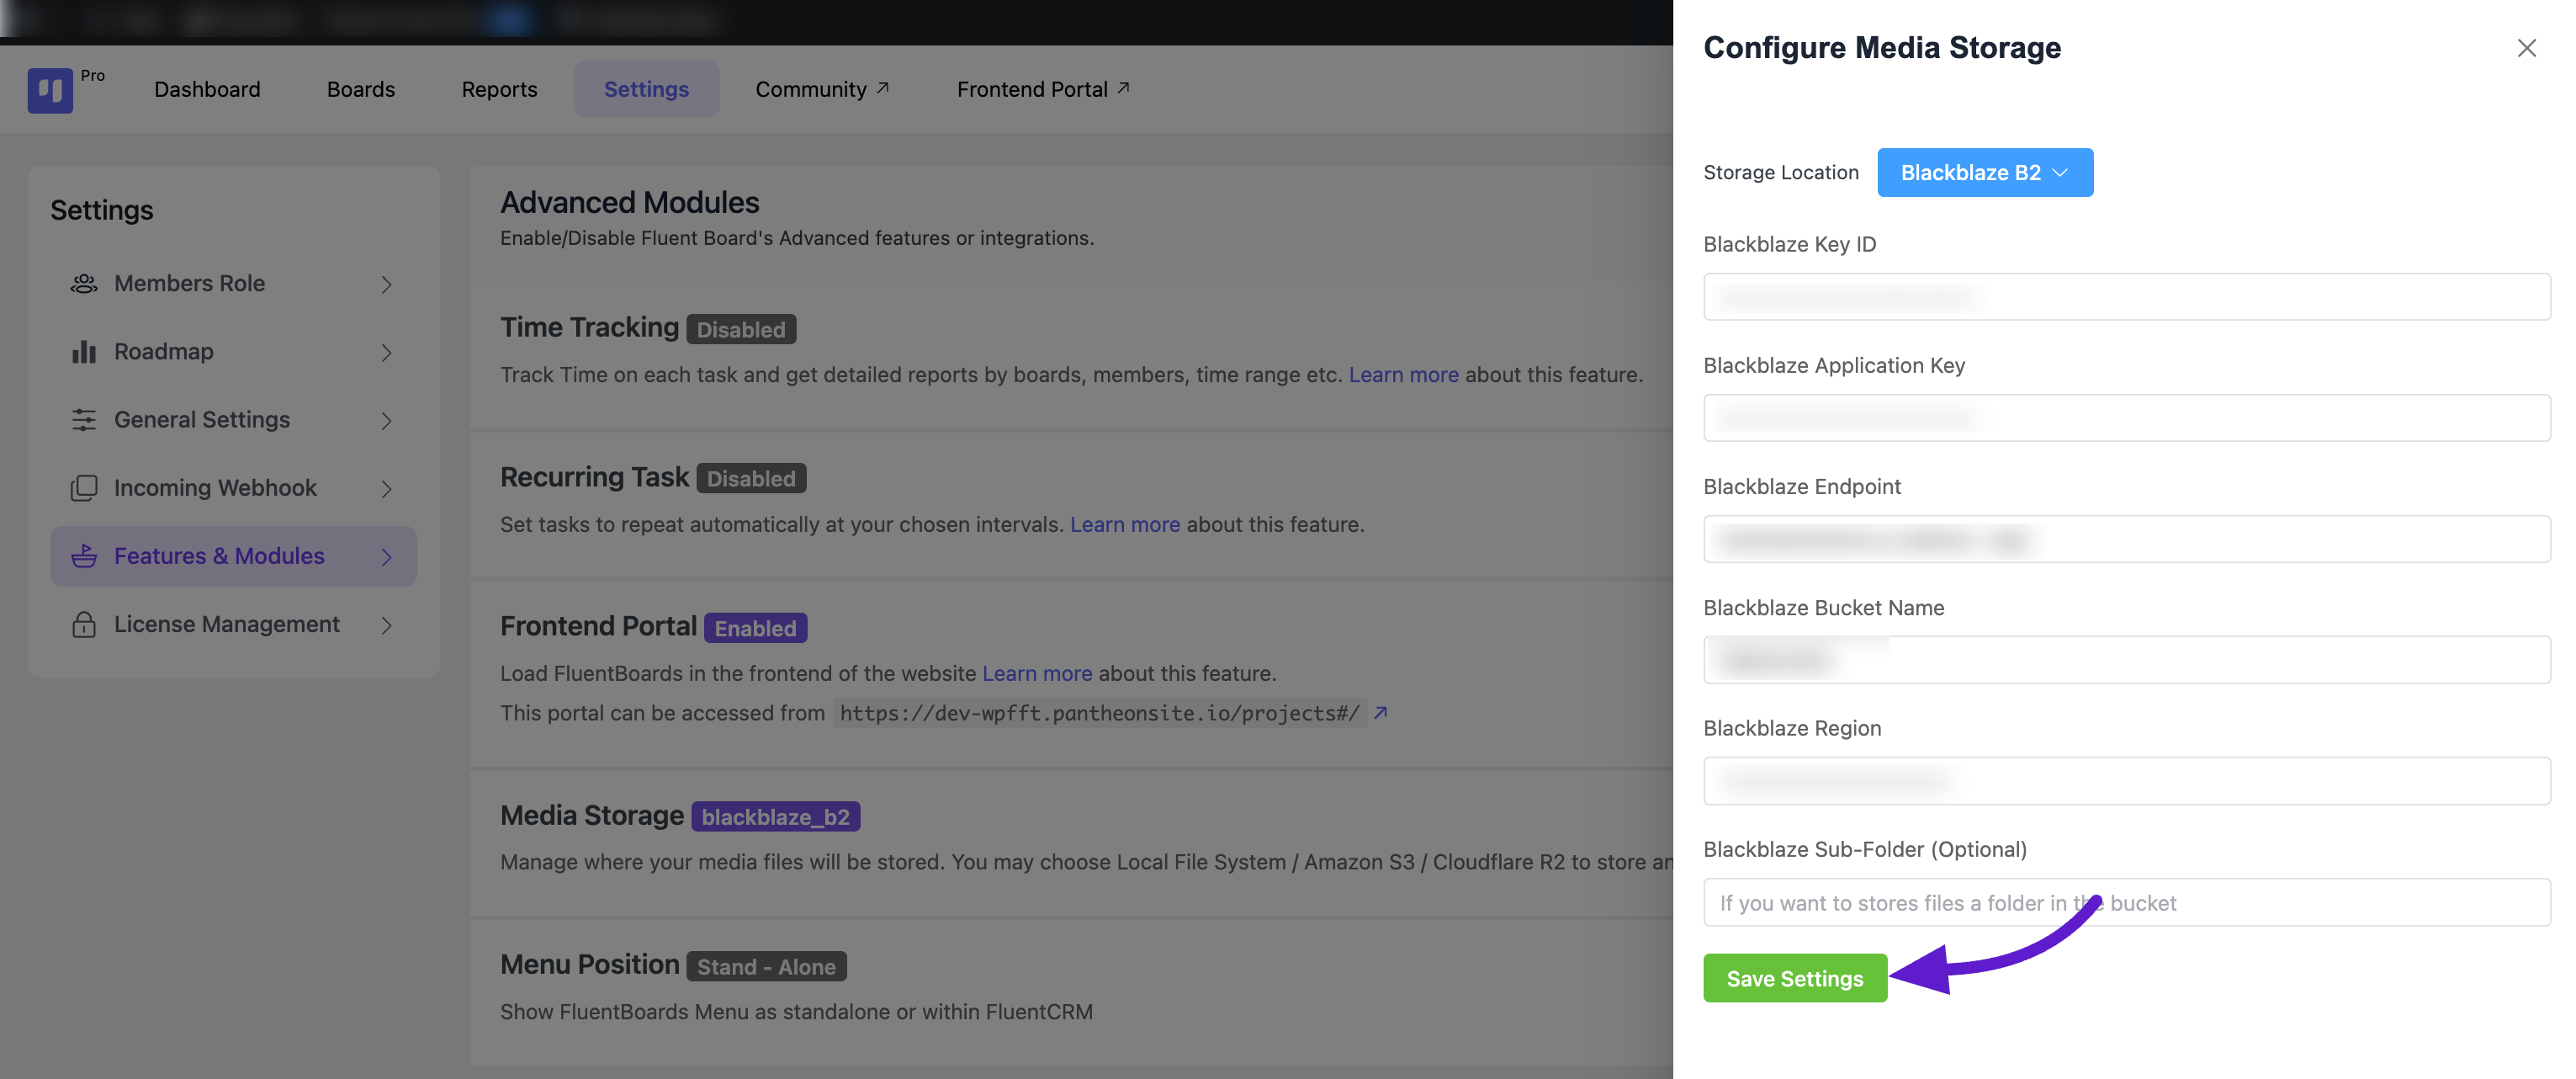
That’s it! DPMS (Powered by FluentBoard) is now integrated with Backblaze cloud storage, and all your attachments will be uploaded to the Backblaze cloud server.